Nissan 240sx S14 Rocket Bunny: The Iconic Widebody Kit
The Nissan 240SX, particularly the S14 chassis, holds a special place in the hearts of car enthusiasts, drifters, and tuners alike. Its lightweight construction, rear-wheel-drive layout, and relatively affordable price point made it a blank canvas ripe for modification. Among the myriad of aftermarket parts available, the Rocket Bunny widebody kit, designed by Kei Miura of TRA Kyoto, stands out as an iconic and highly sought-after aesthetic upgrade. This article delves into the technical details of the S14 Rocket Bunny kit, exploring its components, installation considerations, and impact on the vehicle's performance and aesthetics.
Understanding the Rocket Bunny Philosophy
Before diving into the specifics of the kit, it's important to understand the design philosophy behind Rocket Bunny. Miura-san’s designs are characterized by their aggressive styling, exposed hardware, and a blend of modern and classic aesthetics. This "form follows function" approach often results in a raw, unapologetic look that's both visually striking and aerodynamically functional. Unlike some widebody kits that prioritize smooth, seamless integration, Rocket Bunny embraces a more assertive, bolt-on aesthetic.
Components of the S14 Rocket Bunny Kit
The Rocket Bunny kit for the S14 typically comprises the following key components:
- Front Bumper: The front bumper replacement is usually more aggressive than the OEM bumper, often featuring larger air intakes and a more pronounced splitter. These modifications can improve airflow to the radiator and other cooling components.
- Front Over-Fenders: These are wider fender flares that bolt onto the existing front fenders, creating a significantly wider track. They're designed to accommodate wider wheels and tires, improving grip and handling.
- Side Skirts: Side skirts visually connect the front and rear over-fenders, creating a cohesive widebody appearance. They can also subtly improve airflow along the sides of the car.
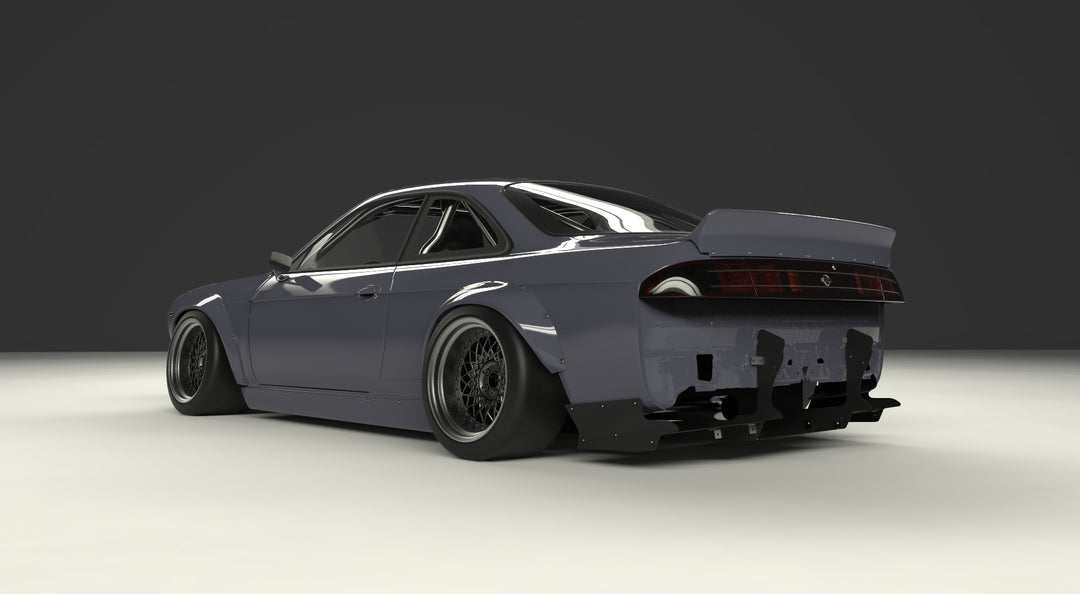
- Rear Over-Fenders: Similar to the front, the rear over-fenders bolt onto the existing rear quarter panels, dramatically widening the rear track. These are crucial for achieving a balanced widebody stance.
- Rear Wing/Spoiler: A signature Rocket Bunny element, the rear wing is often a large, adjustable spoiler designed to generate downforce at higher speeds. The specific design varies, but it usually adds a distinct, aggressive touch.
- Ducktail Spoiler (Optional): Some kits offer a ducktail spoiler, a smaller lip spoiler that adds a subtle yet stylish rear-end enhancement.
- Mounting Hardware: The kit includes all the necessary bolts, nuts, and washers required for installation. The exposed rivet/bolt look is a defining characteristic of the Rocket Bunny style.
The material used for the construction of these kits is typically Fiberglass Reinforced Plastic (FRP). FRP offers a good balance of strength, weight, and affordability. However, it's crucial to understand that FRP requires proper preparation and finishing, including sanding, priming, and painting, to achieve a high-quality appearance and ensure longevity.
Installation Considerations: A Step-by-Step Approach
Installing a Rocket Bunny kit is not a simple bolt-on procedure. It requires significant modifications to the vehicle's bodywork and a high degree of skill and patience. Here’s a breakdown of the key steps:
Preparation
Before starting the installation, ensure you have all the necessary tools and equipment, including:
- Angle Grinder: For cutting and trimming the existing fenders.
- Drill: For drilling holes for mounting the over-fenders.
- Riveter/Bolt Gun: For securely attaching the over-fenders.
- Measuring Tools: Tape measure, level, and square for accurate alignment.
- Sandpaper and Body Filler: For smoothing out imperfections and blending the new body panels.
- Safety Gear: Eye protection, gloves, and a respirator are essential when working with FRP and power tools.
Fender Modification
This is the most critical and irreversible step. The existing fenders must be cut to create clearance for the wider wheels and tires. The amount of material to be removed depends on the specific kit and the desired wheel fitment.
- Marking: Carefully mark the cutting lines on the fenders using a template or by measuring the required clearance.
- Cutting: Use an angle grinder with a cutting wheel to carefully cut along the marked lines. Take your time and avoid cutting too much material at once.
- Trimming: After the initial cut, trim and smooth the edges using a sanding disc or file.
- Rust Prevention: After cutting, immediately treat the exposed metal with a rust inhibitor or primer to prevent corrosion.
Over-Fender Installation
With the fenders modified, you can now install the over-fenders.
- Test Fitting: Before permanently attaching the over-fenders, test fit them to ensure proper alignment and clearance. Make any necessary adjustments.
- Drilling: Drill pilot holes through the over-fenders and into the existing fenders. The number and spacing of the holes will depend on the design of the kit.
- Attachment: Secure the over-fenders using rivets or bolts. Rivets provide a clean, flush finish, while bolts offer more adjustability.
- Sealing: Apply a sealant between the over-fenders and the existing fenders to prevent water and debris from entering.
Bumper and Side Skirt Installation
The installation of the front bumper and side skirts is typically more straightforward, involving bolting them directly to the existing mounting points. However, some trimming or modification may be required for a perfect fit.
Rear Wing Installation
The rear wing usually requires drilling holes in the trunk lid. Ensure proper alignment and reinforcement to prevent damage or vibration.
Finishing
Once all the components are installed, the final step is to prepare the surfaces for painting. This involves:
- Sanding: Sanding the FRP surfaces to create a smooth, even finish.
- Body Filler: Applying body filler to fill any imperfections or gaps.
- Priming: Applying a primer to create a uniform base for the paint.
- Painting: Applying several coats of paint, followed by a clear coat for protection and shine.
Impact on Performance and Handling
While the Rocket Bunny kit is primarily an aesthetic upgrade, it can also have a positive impact on performance and handling, provided it’s installed correctly and paired with appropriate supporting modifications. The wider track created by the over-fenders allows for the use of wider wheels and tires, which increases grip and improves handling. Furthermore, the aerodynamic elements, such as the front splitter and rear wing, can generate downforce, improving stability at higher speeds.
However, it's important to note that simply bolting on a widebody kit without addressing other areas of the car can lead to undesirable handling characteristics. Upgrading the suspension, brakes, and drivetrain is crucial to fully realize the performance potential of the widebody conversion.
Wheel and Tire Fitment
Choosing the right wheels and tires is essential to complement the widebody kit. You'll need to consider:
- Wheel Width and Offset: Calculate the appropriate wheel width and offset to achieve the desired fitment. This may require measuring the available space and considering the suspension geometry.
- Tire Size: Select a tire size that provides adequate grip and clearance. Avoid tires that are too wide or too tall, as they can rub against the fenders or suspension components.
Remember to account for factors like suspension height, camber, and ride height when selecting wheels and tires. It's often helpful to consult with a wheel specialist or use online fitment calculators to ensure a proper fit.
Conclusion
The Nissan 240SX S14 Rocket Bunny kit is more than just a set of body panels; it's a statement. It represents a bold, aggressive aesthetic that has captivated car enthusiasts worldwide. While the installation process is demanding and requires significant skill, the end result is a visually stunning and potentially performance-enhancing modification. By understanding the technical details, planning carefully, and investing in quality components, you can transform your S14 into a true head-turner that stands out from the crowd. Remember to prioritize safety and proper installation techniques to ensure a safe and enjoyable driving experience. Always consult with experienced professionals when tackling complex modifications and consider investing in proper training to develop the necessary skills.