Nissan Altima Ac Compressor Replacement
The Nissan Altima, a staple in the mid-size sedan market, is known for its reliability and comfort. However, like any vehicle, its components are subject to wear and tear. A common issue, especially in warmer climates, is a failing AC compressor. This guide provides an in-depth look at the AC compressor replacement process in a Nissan Altima, delving into the technical aspects and offering insights for the mechanically inclined.
Understanding the Air Conditioning System
Before embarking on the replacement, it's crucial to understand the fundamentals of the Altima's air conditioning system. The system operates on the principle of refrigerant compression and expansion, which absorbs heat from the cabin air and expels it outside.
The key components include:
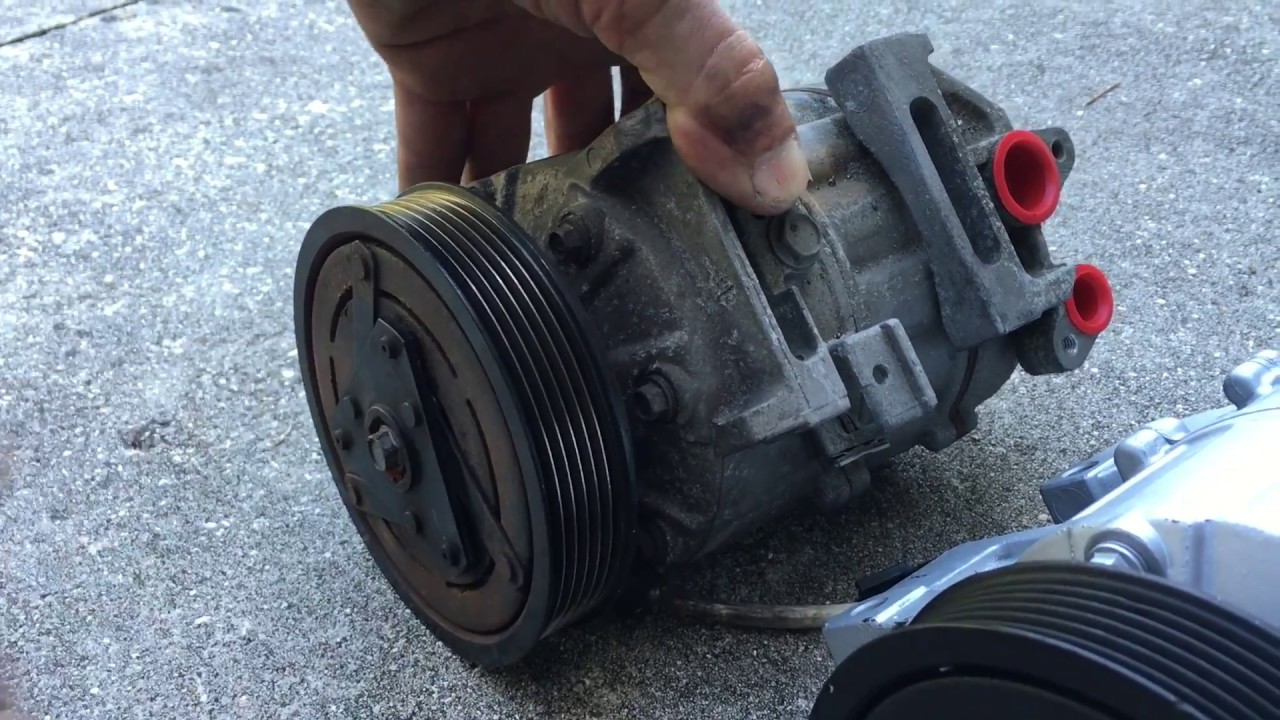
- Compressor: The heart of the system, it compresses the refrigerant, increasing its pressure and temperature.
- Condenser: Located in front of the radiator, it dissipates heat from the high-pressure refrigerant, causing it to condense into a liquid.
- Evaporator: Situated inside the cabin, usually behind the dashboard, it absorbs heat from the cabin air as the refrigerant evaporates, cooling the air.
- Expansion Valve or Orifice Tube: Regulates the flow of refrigerant into the evaporator, creating a pressure drop that facilitates evaporation.
- Receiver Drier or Accumulator: Filters contaminants and removes moisture from the refrigerant.
- Refrigerant Lines: Connect all components, allowing refrigerant circulation.
A malfunctioning compressor can manifest in several ways, including a complete lack of cold air, weak cooling performance, unusual noises from the engine bay, or the clutch on the compressor failing to engage.
Diagnosis: Confirming Compressor Failure
While the symptoms may point to a faulty compressor, proper diagnosis is essential. Consider these checks before replacing the compressor:
- Refrigerant Level: Use an AC manifold gauge set to check the system pressure. Low refrigerant can prevent the compressor from engaging.
- Compressor Clutch Engagement: Visually inspect the compressor clutch when the AC is turned on. If it's not engaging, check the electrical connections, relay, and pressure switches.
- Voltage at Compressor: Use a multimeter to verify that the compressor is receiving the proper voltage.
- Belt Condition: Ensure the serpentine belt is in good condition and properly tensioned. A slipping belt can prevent the compressor from spinning correctly.
- System Blockage: A blockage in the system can overload the compressor and cause it to fail. Checking system pressures can help identify potential blockages.
If all other components check out, and the compressor is still not functioning correctly, it's likely faulty and requires replacement. A telltale sign of internal compressor failure is the presence of metal shavings in the refrigerant lines.
Tools and Materials Required
Replacing an AC compressor requires a specific set of tools and materials. Safety is paramount, so ensure you have the necessary protective gear.
- New AC Compressor: Ensure it's the correct model for your Altima, considering the year and engine type.
- Receiver Drier/Accumulator: Replacing this is highly recommended when replacing the compressor.
- Expansion Valve/Orifice Tube (Optional): Depending on the system design, replacing this may also be advisable.
- PAG Oil: The correct type and amount of PAG oil, specified for your Altima's AC system.
- Refrigerant: R-134a or the correct refrigerant specified for your vehicle.
- AC Manifold Gauge Set: For evacuating and recharging the system.
- Vacuum Pump: To evacuate the system.
- Socket Set: Including metric sockets and extensions.
- Wrenches: Metric wrenches for various fittings.
- Screwdrivers: Phillips head and flathead screwdrivers.
- Torque Wrench: For tightening bolts to the correct specifications.
- Safety Glasses and Gloves: Essential for personal protection.
- Recovery Machine (Recommended): For safely recovering the old refrigerant.
Step-by-Step Replacement Procedure
Warning: This procedure involves working with potentially dangerous refrigerants and mechanical components. If you are not comfortable performing this task, it's best to consult a qualified mechanic.
- Refrigerant Recovery: This is the most crucial step. Using an AC recovery machine, recover all refrigerant from the system. Never release refrigerant into the atmosphere. It is illegal and environmentally damaging. If you don't have access to a recovery machine, take your Altima to a certified AC service shop.
- Disconnect Battery: Disconnect the negative battery terminal to prevent electrical shorts.
- Access the Compressor: Locate the AC compressor. This is typically near the front of the engine, driven by the serpentine belt. You may need to remove other components (like the air intake) to gain access.
- Disconnect Electrical Connections: Disconnect the electrical connector to the compressor clutch.
- Disconnect Refrigerant Lines: Carefully disconnect the refrigerant lines from the compressor. Use appropriate wrenches to prevent damaging the fittings. Be prepared for a small amount of oil to leak out. Cap or plug the open lines to prevent contamination.
- Remove the Compressor: Remove the bolts securing the compressor to the engine bracket. Carefully remove the compressor.
- Drain Old Oil: Drain any remaining oil from the old compressor and measure the amount. This will help determine the correct amount of PAG oil to add to the new compressor.
- Install New Compressor: Add the correct amount of PAG oil to the new compressor, as specified by the manufacturer or based on the amount drained from the old compressor. Install the new compressor onto the engine bracket and tighten the bolts to the specified torque.
- Install New Receiver Drier/Accumulator: Locate and replace the receiver drier/accumulator. This component is crucial for removing moisture and contaminants from the system.
- Install New Expansion Valve/Orifice Tube (If Applicable): If you are replacing the expansion valve or orifice tube, locate and install the new component.
- Connect Refrigerant Lines: Connect the refrigerant lines to the new compressor. Ensure the O-rings are in good condition and lubricated with refrigerant oil. Tighten the fittings to the specified torque.
- Connect Electrical Connections: Connect the electrical connector to the compressor clutch.
- Evacuate the System: Connect the AC manifold gauge set and vacuum pump to the system. Evacuate the system for at least 30-45 minutes to remove any air and moisture. This is crucial for proper AC performance and longevity.
- Leak Test: After evacuating the system, close the valves on the manifold gauge set and observe the vacuum gauge. If the vacuum holds steady for at least 15-20 minutes, the system is likely leak-free. If the vacuum drops, there is a leak that needs to be located and repaired before proceeding.
- Recharge the System: Recharge the system with the correct amount of refrigerant, as specified in the Altima's service manual. Use the AC manifold gauge set to monitor the system pressures during charging.
- Verify Operation: Start the engine and turn on the AC. Verify that the compressor clutch is engaging and that the air conditioning system is cooling properly. Check the vent temperature with a thermometer.
Post-Replacement Considerations
After replacing the AC compressor, it's important to monitor the system for proper operation.
- System Performance: Check the vent temperature and system pressures regularly to ensure the system is functioning optimally.
- Leak Detection: Continue to monitor for any signs of refrigerant leaks.
- Belt Condition: Inspect the serpentine belt for wear and tear, and replace if necessary.
Troubleshooting Common Issues
Even after a successful replacement, you might encounter some issues:
- No Cold Air: Check refrigerant levels, compressor clutch engagement, and system pressures.
- Weak Cooling: Could be caused by low refrigerant, a partially clogged evaporator, or a faulty expansion valve.
- Noisy Compressor: Could indicate improper lubrication, internal damage, or a worn-out clutch.
Conclusion
Replacing the AC compressor in a Nissan Altima is a complex but manageable task for those with the necessary skills, tools, and knowledge. By understanding the principles of the AC system, following the correct procedures, and taking necessary precautions, you can successfully restore the cooling performance of your Altima. Remember, safety should always be your top priority. If you're not comfortable performing this task, seek professional assistance.