Nissan Altima Brake Light Switch Problem
The humble brake light switch, often overlooked, plays a critical role in automotive safety. In the Nissan Altima, as with most modern vehicles, it's more than just a simple on/off device. Understanding its function, common failure modes, and troubleshooting techniques can empower you to diagnose and potentially resolve issues, saving you time and money.
What Does a Brake Light Switch Do?
At its most basic, the brake light switch activates the rear brake lights when the brake pedal is depressed. This warns following drivers that the vehicle is slowing down or stopping. However, its functionality often extends beyond this simple task, integrating with other vehicle systems, especially in newer Altima models.
Here's a breakdown of its typical functions:
- Brake Light Activation: This is the primary function. When the brake pedal is pressed, the switch completes a circuit, sending power to the brake lights.
- Cruise Control Deactivation: In many Altimas, the brake light switch signals the cruise control system to disengage when the brakes are applied. This is a crucial safety feature. If the switch malfunctions, the cruise control might not disengage when you hit the brakes, leading to a dangerous situation.
- Shift Interlock Release (Automatic Transmissions): For Altimas equipped with automatic transmissions, the brake light switch is often linked to the shift interlock mechanism. This prevents the driver from shifting out of "Park" unless the brake pedal is depressed. A faulty switch can prevent the shift interlock from releasing, leaving you stranded.
- Engine Start Interlock: Some Altima models utilize the brake light switch as part of the engine start interlock system. This prevents the engine from starting unless the brake pedal is depressed, acting as a safety measure to prevent accidental acceleration during startup.
- ABS/VDC Integration: The brake light switch signal can also feed into the Anti-lock Braking System (ABS) and Vehicle Dynamic Control (VDC) systems. Although not directly controlling these systems, the brake signal can be used for data analysis and system performance monitoring.
Common Symptoms of a Failing Brake Light Switch in an Altima
Recognizing the symptoms of a failing brake light switch is the first step in diagnosing the problem. Here are some common indicators:
- Brake Lights Not Working: This is the most obvious symptom. If none of the brake lights illuminate when the brake pedal is pressed, the switch is a prime suspect. However, always check the bulbs first to rule out a simpler issue.
- Brake Lights Stay On Continuously: Conversely, if the brake lights remain illuminated even when the brake pedal is not depressed, the switch may be stuck in the "on" position.
- Cruise Control Not Engaging or Disengaging Properly: If the cruise control fails to engage, disengages intermittently, or doesn't disengage when the brake pedal is pressed, a faulty brake light switch could be the cause.
- Difficulty Shifting Out of "Park" (Automatic Transmissions): If you have trouble moving the gear selector out of "Park," even when depressing the brake pedal, the brake light switch is a likely culprit. This is because the shift interlock mechanism is not being released.
- "Check Engine" Light: In some cases, a faulty brake light switch can trigger the "Check Engine" light. The diagnostic trouble code (DTC) will often point to a problem with the brake light switch circuit or related systems. Scanning for DTCs is crucial for accurate diagnosis.
- Starting Problems: If the engine refuses to start unless the brake pedal is depressed with excessive force, or doesn't start at all, the brake light switch could be the issue.
Possible Causes of Brake Light Switch Failure
Several factors can contribute to brake light switch failure. Understanding these causes can help prevent future issues.
- Wear and Tear: Like any mechanical component, the brake light switch is subject to wear and tear over time. Repeated use can cause the internal contacts to degrade, leading to intermittent or complete failure.
- Corrosion: Exposure to moisture and contaminants can cause corrosion on the switch terminals and internal components, hindering electrical conductivity.
- Mechanical Damage: Physical damage to the switch housing or internal mechanisms can also lead to failure. This can occur during other repairs or due to accidental impacts.
- Loose Connections: Loose or corroded electrical connections to the switch can disrupt the circuit, causing the brake lights to malfunction.
- Improper Adjustment: If the brake light switch is not properly adjusted, it may not make consistent contact, leading to intermittent problems. Proper adjustment is vital for reliable operation.
- Electrical Surges: Electrical surges in the vehicle's electrical system can damage the sensitive electronics within the switch, leading to premature failure.
Diagnosing a Brake Light Switch Problem
Diagnosing a brake light switch problem requires a systematic approach. Here's a step-by-step guide:
- Visual Inspection: Begin by visually inspecting the brake light switch, which is typically located near the top of the brake pedal arm. Look for any signs of damage, corrosion, or loose connections.
- Bulb Check: Before assuming the switch is faulty, check the brake light bulbs. A blown bulb can mimic the symptoms of a bad switch. Replace any blown bulbs and retest.
- Electrical Connector Check: Inspect the electrical connector that plugs into the brake light switch. Ensure that it is securely connected and that the terminals are clean and free of corrosion. Use electrical contact cleaner to remove any corrosion.
- Voltage Testing: Use a multimeter to test the voltage at the brake light switch connector. With the ignition on and the brake pedal released, there should be voltage present on at least one of the terminals. When the brake pedal is depressed, voltage should be present on another terminal, indicating that the switch is completing the circuit.
Consult your Altima's wiring diagram for specific pinouts and voltage values.
- Continuity Testing: With the brake light switch disconnected, use a multimeter to test for continuity across the switch terminals. When the brake pedal is released, there should be no continuity. When the brake pedal is depressed, there should be continuity, indicating that the switch is closing the circuit.
- OBD-II Scanner: Use an OBD-II scanner to check for any diagnostic trouble codes (DTCs) related to the brake light switch or brake system. DTCs can provide valuable clues about the nature of the problem. Common codes include P0504 (Brake Switch A/B Correlation), P0571 (Cruise Control/Brake Switch A Circuit Malfunction), and P0703 (Brake Switch Input Circuit Malfunction).
- Adjustment Check: Verify that the brake light switch is properly adjusted. There should be a small amount of free play in the brake pedal before the switch activates. Most Altimas use a threaded switch body that can be adjusted to change the activation point. Refer to the service manual for specific adjustment procedures.
Replacing the Brake Light Switch
Replacing a faulty brake light switch is a relatively straightforward task, but it's essential to follow proper procedures to ensure safety and proper operation. Always disconnect the negative battery cable before working on any electrical components.
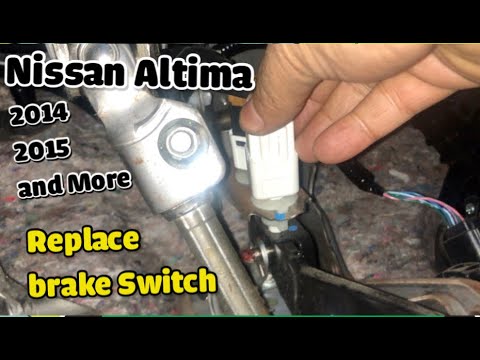
- Locate the Brake Light Switch: As mentioned earlier, the brake light switch is typically located near the top of the brake pedal arm.
- Disconnect the Electrical Connector: Carefully disconnect the electrical connector from the brake light switch.
- Remove the Old Switch: Depending on the Altima model, the brake light switch may be held in place by a threaded retaining clip or a bayonet-style mount. Rotate or unclip the switch to remove it from its mounting position.
- Install the New Switch: Install the new brake light switch in the reverse order of removal. Ensure that it is securely mounted and that the electrical connector is properly connected.
- Adjust the Switch (If Necessary): Adjust the brake light switch according to the manufacturer's specifications. Refer to the service manual for the correct adjustment procedure. Proper adjustment ensures that the brake lights activate correctly and that the cruise control and shift interlock systems function properly.
- Reconnect the Battery: Reconnect the negative battery cable.
- Test the System: Test the brake lights, cruise control, and shift interlock systems to ensure that they are functioning correctly.
- Clear DTCs: Use an OBD-II scanner to clear any diagnostic trouble codes that may have been set during the replacement process.
Prevention
While some failures are inevitable, you can minimize brake light switch issues through preventative measures:
- Regular Inspection: Periodically inspect the brake lights to ensure they are functioning correctly.
- Proper Maintenance: Keep the brake pedal area clean and free of debris.
- Electrical Contact Cleaner: Periodically clean the electrical connectors to the brake light switch with electrical contact cleaner.
- Avoid Excessive Force: Avoid applying excessive force to the brake pedal, as this can damage the switch.
By understanding the function, symptoms, causes, and diagnostic procedures related to the Nissan Altima brake light switch, you can effectively troubleshoot and resolve issues, ensuring safe and reliable operation of your vehicle. Remember to always consult the service manual for your specific Altima model for detailed instructions and specifications.