Nissan Altima Hood Release Cable Broken
Okay, so you're having trouble opening the hood of your Nissan Altima. The handle inside the car feels loose, or nothing happens when you pull it? Chances are, the hood release cable has broken. It's a common issue, unfortunately, especially in older vehicles, but don't worry, it's usually fixable. Let's walk through what's happening and how we can get that hood open.
Understanding the Problem: The Broken Hood Release Cable
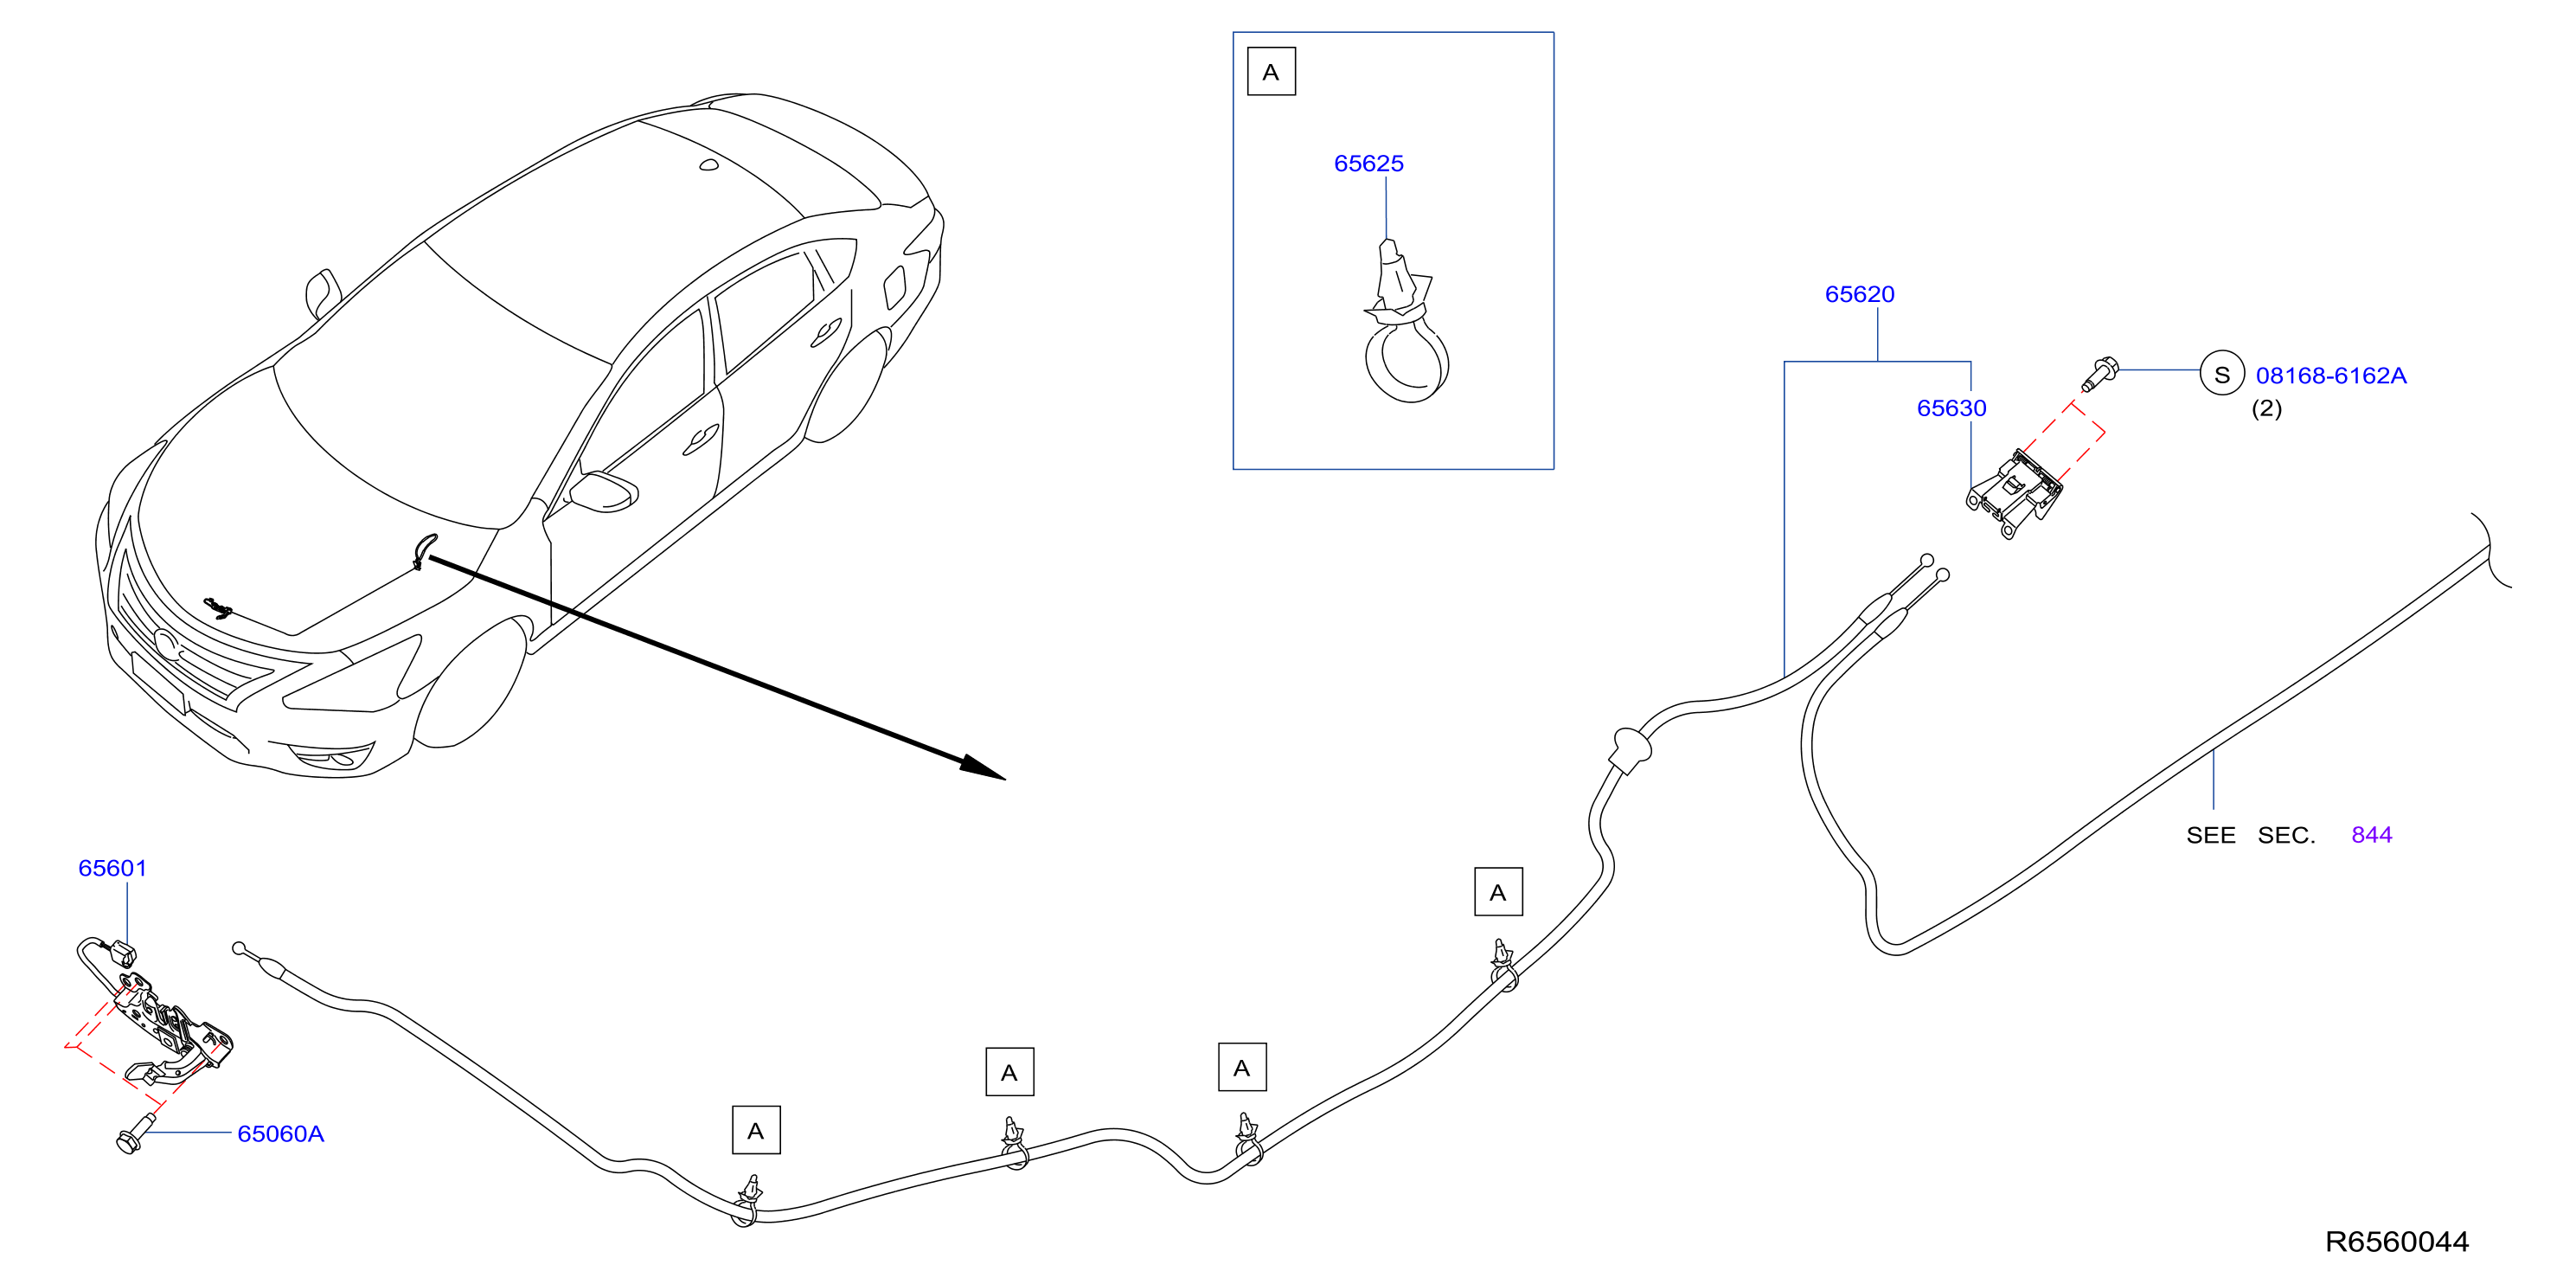
The hood release system in your Altima is pretty simple. When you pull the lever inside the cabin, it pulls on a cable that runs to the hood latch mechanism. This cable physically moves the latch, releasing the hood. Over time, this cable can stretch, fray, or even snap due to corrosion, wear and tear, or even just age. Think of it like a bicycle brake cable – it experiences similar stresses.
When the cable breaks, there's no longer a direct connection between the interior release handle and the hood latch. That's why you're pulling the handle, but nothing's happening at the hood itself.
Common Symptoms of a Broken Hood Release Cable:
- The hood release handle inside the car feels loose or disconnected.
- Pulling the handle produces no click or release sound from the hood area.
- The hood remains firmly latched, even after pulling the release handle repeatedly.
Getting Your Hood Open: Two Possible Approaches
The biggest hurdle is getting the hood open in the first place so you can access the latch and cable. Here are two methods, ranging from the less involved to the requiring a bit more finesse:
Method 1: The "Fishing" Technique (If you're lucky!)
This method relies on the cable being broken close enough to the latch that you can still access it. It's the first thing to try, and might save you some time.
Tools Needed:- Long, thin screwdriver (a flathead works best)
- Pliers or needle-nose pliers
- Flashlight or headlamp
- A helper (optional, but recommended)
- Locate the Hood Latch: Shine your flashlight through the grille. You're looking for the hood latch mechanism, which is usually located centrally, just behind the Nissan emblem.
- Look for the Cable: See if you can spot the broken end of the cable hanging near the latch. It might be covered in grease or grime, so look closely.
- Attempt to Grab the Cable: Use the long screwdriver to try and maneuver the cable end within reach. If you can get it, use the pliers to grip it firmly.
- Pull the Cable: With the pliers firmly gripping the cable, try pulling on it directly. This should mimic the action of the release handle and hopefully pop the hood. Have your helper gently try to lift the hood as you pull.
- If it works, great! Proceed to the next section to replace the cable. If it doesn't work, move on to Method 2.
Important Tip: Be patient! It might take some wiggling and maneuvering to get the cable in the right position to pull. And try not to damage the radiator or anything else behind the grille.
Method 2: Direct Latch Manipulation (Requires more skill)
If the "fishing" technique fails, you'll need to try and manually release the latch. This is trickier and requires a bit more mechanical know-how. If you're not comfortable with this, it's best to take your Altima to a professional mechanic.
Tools Needed:- Long, sturdy screwdriver (a flathead is essential)
- A helper (Highly recommended)
- Jack and Jack stands (For safety if needed)
- Wheel chocks
- Bright Work Light
- Safety First: Ensure the car is parked on a level surface, with the parking brake engaged. If you need to jack up the car slightly for better access, use jack stands to support the vehicle securely. Never work under a vehicle supported only by a jack! And chock the rear wheels!
- Access the Latch: You'll likely need to access the latch from underneath the car. Locate the latch mechanism behind the grille, as described in Method 1. Depending on the Altima's year and model, you might need to remove a plastic splash shield underneath the engine for better access.
- Locate the Latch Lever: Carefully examine the latch mechanism. You're looking for a lever or release arm that you can manually move to release the hood. It will typically pivot or slide.
- Manipulate the Latch: Use the long screwdriver to gently push, pry, or slide the lever. This might require some experimentation and a good understanding of how the latch works. Your helper can gently try to lift the hood as you manipulate the latch.
- Be Patient and Persistent: This can be fiddly, and you might need to try different angles and approaches.
Important Considerations:
- Safety: Be extremely careful when working under the car. Wear safety glasses to protect your eyes from falling debris.
- Avoid Damage: Don't force anything! If you encounter significant resistance, you could damage the latch or surrounding components.
- Professional Help: If you're unsure or unable to release the latch after a reasonable effort, it's time to consult a professional mechanic. They have specialized tools and expertise to handle these situations.
Replacing the Hood Release Cable
Once you've managed to open the hood, the next step is to replace the broken cable. Here's a general overview of the process:
Tools Needed:- New Hood Release Cable (Make sure it's the correct one for your Altima's year and model)
- Socket set
- Wrench set
- Pliers
- Screwdrivers (various sizes)
- Penetrating oil (e.g., WD-40)
- Grease
- Disconnect the Old Cable: Start by disconnecting the broken cable from the hood latch mechanism. You might need to remove some retaining clips or fasteners. Use penetrating oil to loosen any stubborn connections.
- Remove the Old Cable: Trace the cable back from the hood latch, through the engine compartment, and into the interior of the car. It's usually held in place by clips or brackets. Remove these fasteners to free the cable.
- Access the Interior End: Locate where the cable attaches to the release handle inside the car. You might need to remove some trim panels to gain access. Disconnect the old cable from the handle.
- Install the New Cable: Route the new cable along the same path as the old one, securing it with the clips and brackets you removed earlier.
- Connect the Interior End: Connect the new cable to the release handle inside the car. Make sure it's securely attached.
- Connect the Hood Latch End: Connect the new cable to the hood latch mechanism. Apply a small amount of grease to the latch pivot points for smooth operation.
- Test the Release: Close the hood and test the release handle. The hood should open smoothly and easily. If it doesn't, double-check all your connections and adjustments. You might need to adjust the cable tension slightly to ensure proper operation.
Important Tips:
- Take Pictures: Before you start disconnecting anything, take pictures of the cable routing and connections. This will help you remember how to install the new cable correctly.
- Cable Routing: Pay close attention to how the cable is routed. Avoid sharp bends or kinks, which can damage the cable or restrict its movement.
- Lubrication: Apply a small amount of grease to the latch mechanism and cable ends to prevent corrosion and ensure smooth operation.
Estimated Repair Costs
The cost to repair a broken hood release cable on a Nissan Altima can vary depending on several factors, including:
- The cost of the replacement cable: Expect to pay between $30 and $80 for a new hood release cable. Aftermarket cables are often cheaper than OEM (Original Equipment Manufacturer) cables.
- Labor costs (if applicable): If you choose to have a mechanic replace the cable, labor costs can range from $100 to $300, depending on the shop's hourly rate and the complexity of the job.
- The severity of the problem: If the hood latch is damaged or requires additional repairs, the overall cost will be higher.
Therefore, you can expect to pay anywhere from $30 to $380 to repair a broken hood release cable on your Nissan Altima. Doing it yourself will, of course, only cost the price of the cable and some time.
Preventative Maintenance
While a broken hood release cable is often unavoidable, there are a few things you can do to help prevent it from happening:
- Regular Lubrication: Periodically lubricate the hood latch mechanism and cable ends with a light grease or penetrating oil. This will help prevent corrosion and ensure smooth operation.
- Gentle Operation: Avoid pulling the release handle too forcefully. A gentle, steady pull is usually sufficient to release the hood.
- Inspect the Cable: Visually inspect the cable for signs of wear, fraying, or corrosion. If you notice any damage, replace the cable before it breaks completely.
By following these tips, you can help extend the life of your hood release cable and avoid the inconvenience of a broken cable. Good luck getting that hood open!