Nissan Armada Ignition Switch Replacement
So, your Nissan Armada isn't starting, and you suspect the ignition switch? You're not alone. It's a common issue, and thankfully, often fixable. Let's walk through the problem, potential causes, and how to tackle a replacement. Think of me as your virtual service advisor, guiding you through the process.
The Problem: Armada Won't Start (or Acts Strange)
You turn the key, and... nothing. Or maybe you get a click, a whir, but the engine just refuses to fire. Sometimes, the Armada might start, but the accessories (radio, wipers, etc.) don't work properly. Or even worse, they might cut out while you're driving. These are all potential signs of a failing ignition switch.
An ignition switch is more than just where you insert the key. It's an electrical component with multiple contacts that activate different circuits in your vehicle based on the key position: Accessory, On, and Start. A faulty switch can interrupt power to critical systems, preventing the engine from starting or causing other electrical gremlins.
Common Symptoms of a Failing Ignition Switch:
- No Start Condition: The most obvious symptom. The engine won't crank or start when you turn the key.
- Intermittent Starting Issues: Sometimes it starts, sometimes it doesn't. This is often a sign the switch is on its way out.
- Accessory Problems: Radio, wipers, power windows, or other accessories don't work or cut out unexpectedly.
- Engine Stalling: The engine cuts off suddenly while driving. This is a *serious safety concern* and requires immediate attention.
- Key Stuck in Ignition: Difficulty turning the key or removing it from the ignition.
- Dashboard Lights Flickering: Erratic behavior of dashboard lights.
- Clicking Sound When Turning Key: This could also be a sign of a dead battery or faulty starter, but it can also indicate an issue within the ignition switch itself.
Diagnosing the Ignition Switch
Before you jump to replacing the ignition switch, it's essential to rule out other potential causes. Here's a simple troubleshooting process:
- Check the Battery: Make sure your battery is fully charged and in good condition. Use a voltmeter to check the voltage. A healthy battery should read around 12.6 volts. If it's significantly lower, get it charged or replaced. A weak battery can mimic ignition switch problems.
- Check the Starter: If you hear a single click when you turn the key, the starter might be the problem. You can try tapping the starter with a hammer while someone attempts to start the car (be careful!). If it starts after tapping, the starter is likely failing.
- Check the Fuses: Inspect the fuses related to the ignition system and starter. A blown fuse is a simple fix. The fuse box location and fuse diagram will be in your Armada's owner's manual.
- Check the Wiring: Look for any loose, corroded, or damaged wires around the ignition switch and starter.
If you've ruled out these other possibilities, then the ignition switch is the most likely culprit.
Replacing the Ignition Switch: DIY or Professional?
Replacing the ignition switch can be a moderately challenging DIY project, depending on your comfort level and mechanical skills. It typically involves removing steering column covers, disconnecting electrical connectors, and potentially dealing with security features like immobilizers. If you're not comfortable working with electrical systems or have limited experience, it's best to have a professional mechanic handle the replacement.
However, if you're feeling confident, here's a general overview of the replacement process:
Tools and Materials You'll Need:
- New Ignition Switch (Make sure it's the correct one for your Armada's year and model!)
- Screwdrivers (Phillips and Flathead)
- Socket Set
- Pliers
- Steering Wheel Puller (potentially, depending on your model)
- Multimeter (for testing)
- Pen and Paper (to label connectors)
- Safety Glasses
- Gloves
- Possibly a Key Programmer (if your Armada has an immobilizer system)
Steps for Replacing the Ignition Switch (General Guide):
Disclaimer: This is a general guide only. Specific procedures may vary depending on your Armada's year and model. Consult your vehicle's repair manual or a trusted online resource for detailed instructions. Disconnect the negative battery cable before starting any electrical work. Safety First!
- Disconnect the Negative Battery Cable: This is crucial to prevent electrical shorts.
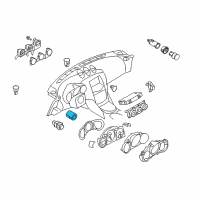
- Remove Steering Column Covers: Typically held in place by screws. Carefully remove them to expose the ignition switch.
- Disconnect Electrical Connectors: Disconnect all electrical connectors attached to the ignition switch. Label each connector before disconnecting it to ensure proper reassembly. A simple piece of masking tape and a pen work well.
- Remove the Ignition Switch: The ignition switch is usually held in place by screws or bolts. Remove these and carefully extract the switch.
- Install the New Ignition Switch: Install the new ignition switch in the reverse order of removal. Ensure all connectors are properly seated and the screws/bolts are tightened securely.
- Reconnect the Negative Battery Cable: Reconnect the negative battery cable.
- Test the New Ignition Switch: Test the new ignition switch by turning the key to different positions and checking that the engine starts and all accessories work correctly.
- Key Programming (If Required): Some Armada models have an immobilizer system that requires you to program the new key to the vehicle. This usually involves a special scan tool and programming procedure. If your Armada has this system, you may need to take it to a dealership or a qualified locksmith for programming.
- Reinstall Steering Column Covers: Reinstall the steering column covers.
Important Note About Immobilizers: Many modern vehicles, including the Nissan Armada, have immobilizer systems. These systems prevent the car from starting without the correct transponder chip in the key. When replacing the ignition switch, the immobilizer system might need to be reprogrammed to recognize the new switch. This often requires specialized equipment and software and is best left to a professional. Trying to bypass or disable the immobilizer can have serious consequences.
Estimated Repair Costs
The cost of replacing an ignition switch on a Nissan Armada can vary depending on several factors:
- DIY vs. Professional Repair: Doing it yourself will save you on labor costs, but you'll need to purchase the parts and potentially invest in tools.
- Part Quality: Aftermarket parts are generally cheaper than OEM (Original Equipment Manufacturer) parts. However, OEM parts often offer better quality and reliability.
- Labor Rates: Labor rates vary depending on your location and the mechanic's experience.
- Key Programming: If your Armada requires key programming, this will add to the overall cost.
Here's a rough estimate of the potential costs:
- DIY (Parts Only): $50 - $200 (depending on the part brand and retailer)
- Professional Repair (Parts and Labor): $250 - $600 (or more, if key programming is required)
It's always a good idea to get quotes from several mechanics before committing to a repair. Be sure to ask about the type of parts they use (OEM or aftermarket) and whether the quote includes key programming (if applicable).
Preventative Maintenance
While ignition switch failure can sometimes be unavoidable, there are a few things you can do to prolong its lifespan:
- Avoid Overloading Your Key Ring: A heavy key ring can put excessive strain on the ignition switch. Use a separate key ring for non-essential keys.
- Don't Force the Key: If the key doesn't turn easily, don't force it. Try wiggling the steering wheel or lightly lubricating the key with a graphite lubricant.
- Regular Vehicle Maintenance: Keeping your Armada properly maintained can help prevent other electrical issues that might put extra strain on the ignition switch.
Conclusion
A failing ignition switch can be a frustrating problem, but with a little knowledge and the right approach, you can diagnose the issue and decide on the best course of action. Remember to prioritize safety and consult a professional if you're unsure about any part of the process. Good luck getting your Armada back on the road!
If you do decide to go the DIY route, be patient, take your time, and double-check your work. And always disconnect that negative battery cable!