Nissan Frontier Backup Camera Install
The modern pickup truck is a marvel of engineering, balancing utility with increasingly sophisticated technology. One such technology is the backup camera, a seemingly simple device that significantly enhances safety and convenience. While many newer vehicles come equipped with backup cameras from the factory, older models, like earlier iterations of the Nissan Frontier, often require aftermarket installation. This guide provides an in-depth look at the process of installing a backup camera system in a Nissan Frontier, shedding light on the underlying electronics and the practical considerations involved.
Understanding the System Components
Before diving into the installation, it's crucial to understand the individual components of a typical backup camera system. These generally include:
- Camera: This is the eye of the system, capturing the rear view. Cameras vary in resolution, viewing angle, and low-light performance. Many are designed to be waterproof and durable to withstand the elements. Some integrate guide lines that can be manually set to calibrate to the truck's width.
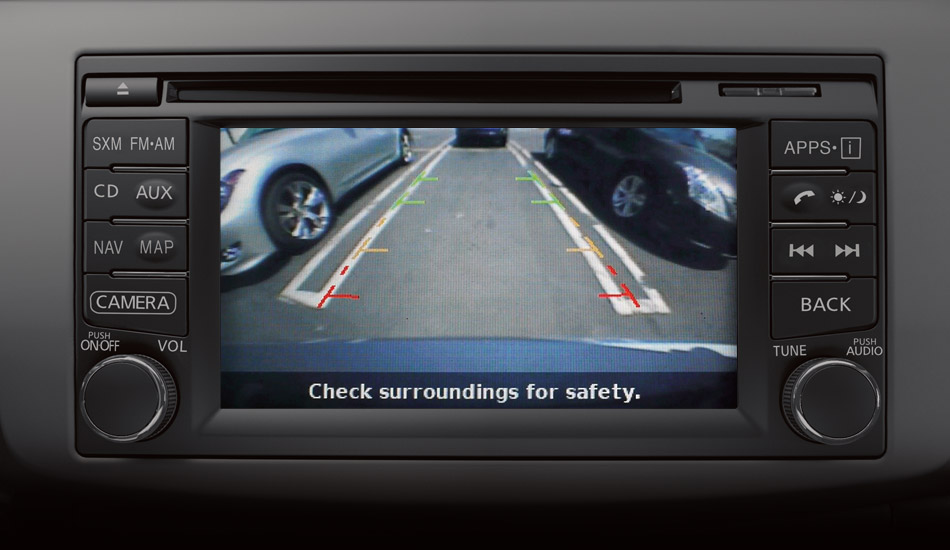
- Monitor/Display: This is where the camera's feed is displayed. It can be a dedicated screen, an integrated screen in the rearview mirror, or, most commonly, an aftermarket or factory radio with a screen.
- Wiring Harness: This bundle of wires provides the electrical connection between the camera, the monitor, and the vehicle's power system. Quality harnesses are properly shielded to prevent interference and are often color-coded for easy identification.
- Power Source: The camera needs power to operate. Typically, this is drawn from the vehicle's reverse light circuit, activating the camera only when the truck is in reverse. The monitor may draw power from an accessory power circuit.
- Connectors: These facilitate secure and reliable connections between the various components. Common connectors include RCA connectors for video signals and butt connectors or solder connections for power and ground.
Planning the Installation
Careful planning is essential for a successful installation. Before you even pick up a tool, consider the following:
Camera Location
The camera's location will affect its field of view and the ease of installation. Common locations include:
- License Plate Frame: This is a popular and relatively easy option, as it provides a central and unobstructed view.
- Above the Bumper: This location offers a higher vantage point and may provide a better view of objects behind the truck.
- Inside the Tailgate Handle: Some cameras are specifically designed to replace the tailgate handle, providing a stealthy and integrated look.
Consider the camera's viewing angle and mounting options when making your selection. You want to ensure it provides sufficient coverage of the area behind the truck.
Monitor Location
The monitor's location should be convenient and easily visible while driving. Common options include:
- Dashboard-Mounted Screen: Requires a dedicated screen that is stuck to the dashboard.
- Rearview Mirror Replacement: Replaces the entire rearview mirror with one that includes a built-in LCD screen. This is a more integrated-looking solution.
- Head Unit Integration: If your Frontier has an aftermarket head unit with a screen, it may have a video input for a backup camera. This is often the cleanest and most integrated solution. This typically needs to be a modern head unit with the correct input.
Consider how you will run the wiring from the camera to the monitor. You'll need to route the wires discreetly and safely, avoiding any moving parts or sharp edges.
Power and Ground
The camera and monitor will need power and ground connections. The camera is usually powered by the reverse light circuit, while the monitor may be powered by the accessory power circuit or a dedicated fuse. Always use a multimeter to verify the correct voltage and polarity before making any connections. A poor ground can cause interference or malfunction.
The Installation Process: A Step-by-Step Guide
The following steps provide a general overview of the installation process. Specific details may vary depending on the camera and monitor you choose.
- Disconnect the Negative Battery Terminal: This is a crucial safety precaution to prevent electrical shocks and damage to your vehicle's electrical system.
- Install the Camera: Mount the camera in your chosen location. If using a license plate frame camera, simply replace your existing license plate frame. If mounting above the bumper, you may need to drill holes. Follow the manufacturer's instructions carefully.
- Route the Camera Wiring: Route the camera's wiring harness from the camera location to the interior of the vehicle. This may involve drilling a hole through the tailgate or bed. Use a rubber grommet to protect the wiring from sharp edges.
- Connect the Camera Power: Locate the reverse light wiring in the taillight assembly. Use a wire stripper to expose the wires, and connect the camera's power wire to the reverse light wire. Use a butt connector or solder connection to ensure a secure and reliable connection. Connect the camera's ground wire to a suitable ground point on the vehicle's frame.
- Route the Video Cable: Route the video cable from the camera to the location of the monitor. This may involve removing interior trim panels to conceal the wiring. Be sure to secure the wiring to prevent it from interfering with moving parts or chafing against sharp edges.
- Install the Monitor: Mount the monitor in your chosen location. If using a rearview mirror replacement monitor, simply remove the existing rearview mirror and install the new one. If using a dashboard-mounted screen, use the included mounting hardware to attach it to the dashboard.
- Connect the Monitor Power: Connect the monitor's power wire to the accessory power circuit or a dedicated fuse. Connect the monitor's ground wire to a suitable ground point.
- Connect the Video Cable to the Monitor: Plug the video cable from the camera into the video input on the monitor.
- Test the System: Reconnect the negative battery terminal. Put the truck in reverse and verify that the camera is displaying an image on the monitor. Adjust the camera's angle as needed.
- Secure the Wiring: Use zip ties or electrical tape to secure the wiring and prevent it from dangling or interfering with moving parts.
- Reinstall Trim Panels: Reinstall any interior trim panels that were removed during the installation process.
Troubleshooting Common Issues
Even with careful planning and execution, you may encounter some issues during the installation process. Here are some common problems and their solutions:
- No Image: Check the power and ground connections to both the camera and the monitor. Verify that the camera is receiving power when the truck is in reverse. Check the video cable connection between the camera and the monitor.
- Fuzzy or Distorted Image: Check the video cable for damage. Ensure that the camera is properly grounded. Try using a higher-quality video cable.
- Interference: Run the camera's power and video cables separately from other electrical wires to minimize interference. Use shielded wiring.
- Camera Not Activating in Reverse: Verify you are using the correct wire. Check the reverse light bulb and fuse.
Safety Considerations
Installing a backup camera system involves working with your vehicle's electrical system. Always disconnect the negative battery terminal before starting any work. Use caution when drilling holes and avoid damaging any existing wiring or components. If you are not comfortable working with your vehicle's electrical system, it is best to seek professional assistance.
Backup cameras are not a substitute for careful driving. Always check your surroundings before backing up, and use your mirrors and senses to ensure that the area is clear. A backup camera is a valuable tool for enhancing safety, but it should not be relied upon as the sole means of avoiding accidents.
Conclusion
Installing a backup camera system in a Nissan Frontier can be a rewarding project for the DIY enthusiast. By understanding the system components, planning the installation carefully, and following the steps outlined in this guide, you can significantly improve the safety and convenience of your truck. Remember to prioritize safety and take your time to ensure a clean and reliable installation. With a little patience and attention to detail, you can enjoy the benefits of a backup camera system for years to come. The key is patience and precision.