Nissan Frontier Head Gasket Replacement
The head gasket, a seemingly simple component nestled between the cylinder head and engine block, performs a critical role in the health and performance of your Nissan Frontier. It seals the combustion chambers, preventing the escape of high-pressure gases and coolant, while also maintaining the integrity of the oil passages. When it fails, the consequences can range from a minor loss of power to catastrophic engine damage. This article provides an in-depth look at the head gasket replacement process on a Nissan Frontier, offering insight into the why's and how's behind each step.
Understanding the Role and Failure of the Head Gasket
Before diving into the replacement procedure, it's crucial to understand the head gasket's function and how it fails. Think of it as a high-pressure seal subjected to immense thermal cycling. Every time the engine starts and runs, the gasket experiences extreme heat and pressure. Over time, this constant stress can lead to several failure modes:
- Combustion Gas Leakage: The gasket can develop cracks or weaken, allowing combustion gases to escape into the cooling system or the atmosphere. This often manifests as bubbles in the coolant reservoir, overheating, and a loss of power.
- Coolant Leakage: Coolant can leak into the cylinders, resulting in white smoke from the exhaust, a sweet smell, and potential cylinder misfires. This can also contaminate the engine oil, leading to lubrication issues.
- Oil Leakage: Oil can leak externally, creating unsightly messes, or internally into the coolant, causing a milky appearance in the radiator.
- Bridging: This occurs when the gasket fails between cylinders, allowing combustion pressure to cross-contaminate, significantly impacting performance and potentially causing engine knocking.
Common causes of head gasket failure include overheating, detonation (engine knock), improper installation, and age/material degradation. Recognizing the symptoms early is crucial for minimizing damage.
Tools and Materials Required
Head gasket replacement is a complex task requiring a specific set of tools and materials. Before starting, ensure you have everything on hand:
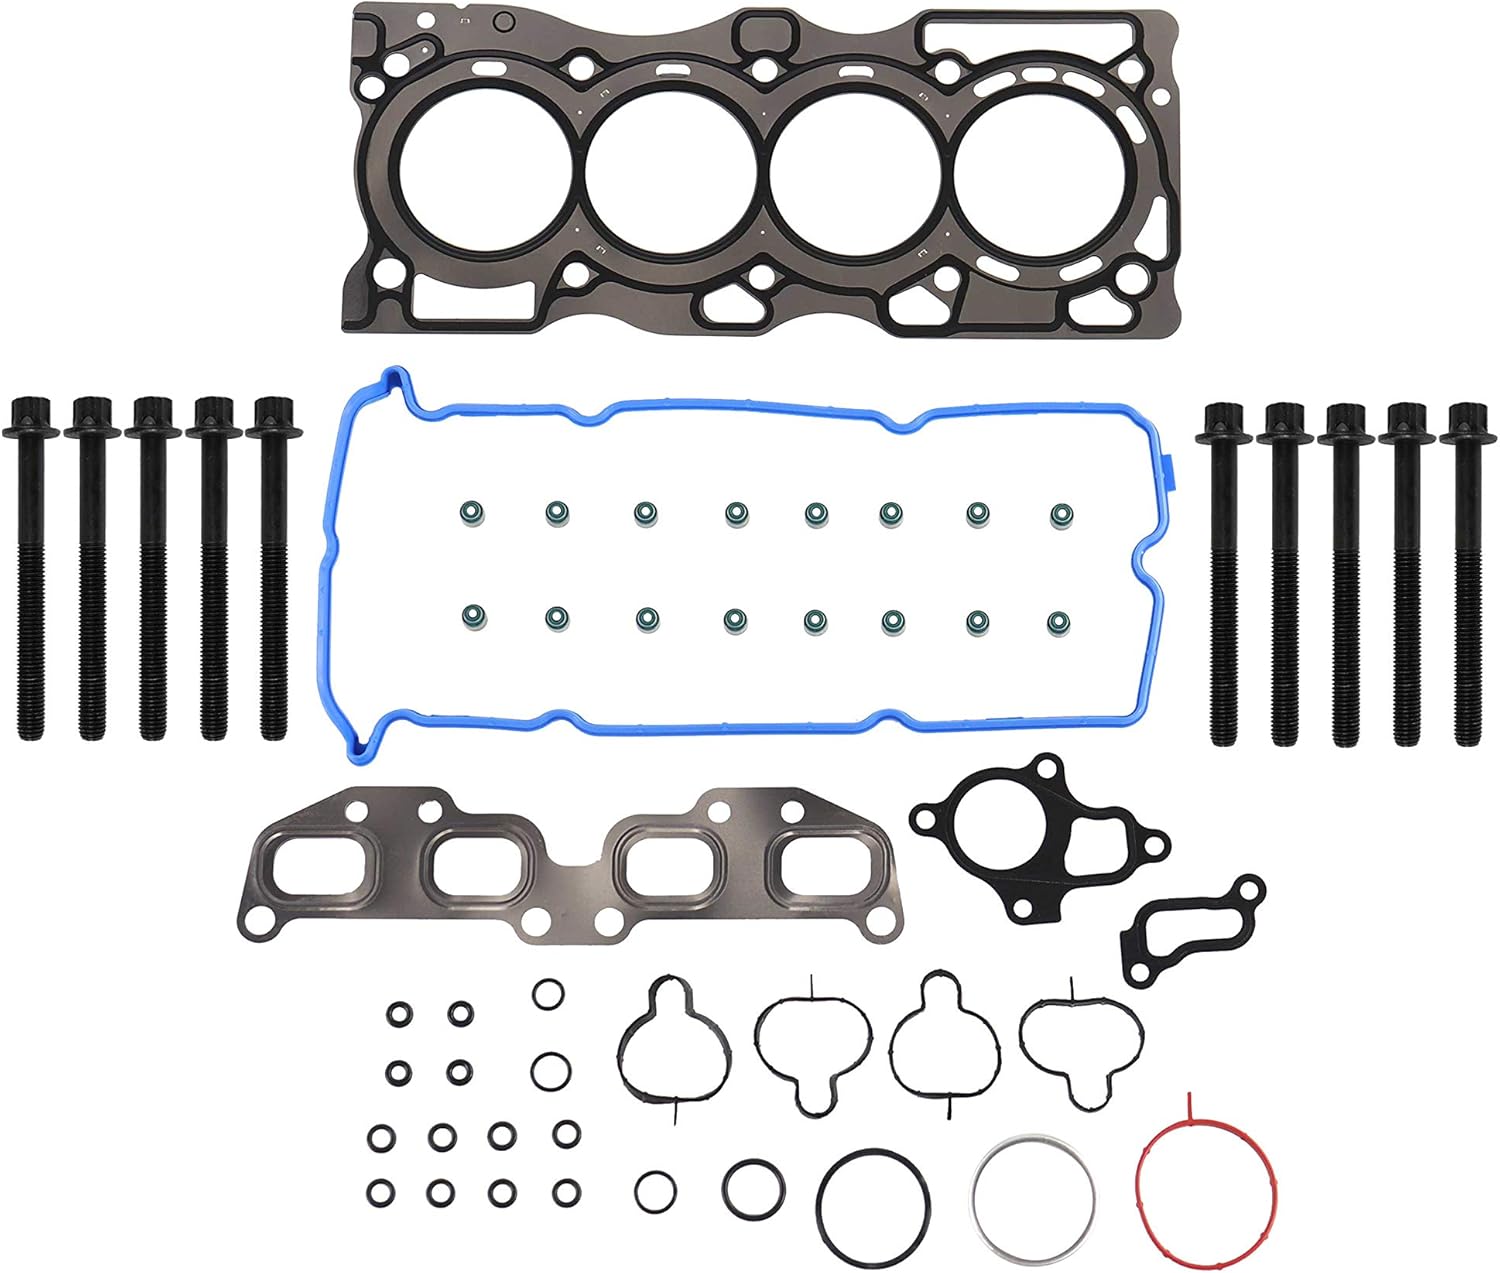
- New Head Gasket: Crucially, use a gasket designed specifically for your engine model and year.
- Head Bolts: Always replace head bolts when replacing the head gasket. These are usually torque-to-yield bolts and should not be reused.
- Coolant: Use the correct type of coolant specified for your Nissan Frontier.
- Engine Oil and Filter: It's good practice to change the oil and filter after this type of repair.
- Intake and Exhaust Manifold Gaskets: Replace these gaskets when reinstalling the manifolds.
- Valve Cover Gasket: Replacing this gasket prevents future leaks.
- Torque Wrench: A *calibrated* torque wrench is essential for properly tightening the head bolts to the manufacturer's specifications.
- Socket Set: Including deep sockets and extensions.
- Wrenches: A variety of wrenches will be needed.
- Pry Bar: For gently separating components.
- Scrapers: For cleaning gasket surfaces.
- Cleaning Solvent: For degreasing and cleaning parts.
- Rags: Plenty of clean rags.
- Marking Pen/Tape: For labeling parts and hoses.
- Repair Manual: A repair manual specific to your Nissan Frontier model is invaluable.
- Safety Glasses and Gloves: Protect yourself!
Step-by-Step Head Gasket Replacement Procedure
Important Safety Note: Disconnect the negative battery terminal before beginning any work on the engine. Allow the engine to cool completely before proceeding. This process requires meticulous attention to detail. Take your time and double-check your work.
1. Preparation and Disassembly
This stage involves removing components obstructing access to the cylinder head.
- Drain Coolant and Oil: Drain both the coolant and engine oil. Dispose of fluids properly.
- Remove Air Intake: Disconnect and remove the air intake system, including the air filter housing and intake tube.
- Disconnect Wiring Harness: Carefully disconnect all wiring harnesses connected to the cylinder head. Label each connector to ensure proper reassembly.
- Remove Fuel Injector Rail: Depressurize the fuel system (consult your repair manual for the proper procedure) and carefully remove the fuel injector rail with the injectors still attached. Store the injectors in a clean, safe place.
- Remove Throttle Body: Disconnect any vacuum lines and electrical connectors attached to the throttle body and remove it.
- Remove Intake Manifold: Disconnect any remaining vacuum lines and remove the intake manifold. Replace the intake manifold gasket.
- Remove Exhaust Manifold: Disconnect the exhaust manifold from the cylinder head. Be prepared for potentially rusted bolts. Replace the exhaust manifold gasket.
- Disconnect Hoses: Disconnect all hoses connected to the cylinder head, labeling them for easy reassembly.
- Remove Valve Cover: Remove the valve cover. Replace the valve cover gasket.
- Remove Timing Chain/Belt: This is a *critical* step. Follow the procedures in your repair manual carefully to prevent damage to the engine. Typically, this involves aligning timing marks on the crankshaft and camshaft(s) before removing the timing chain or belt tensioner. Secure the timing chain/belt to prevent it from falling into the engine.
2. Cylinder Head Removal
With all obstructions removed, you can now proceed to remove the cylinder head.
- Loosen Head Bolts: Loosen the head bolts in the reverse order of the tightening sequence specified in your repair manual. This prevents warping of the cylinder head. Loosen the bolts in stages, gradually reducing the tension.
- Remove Head Bolts: Once all bolts are loosened, remove them completely. Discard the old head bolts.
- Separate the Cylinder Head: Carefully separate the cylinder head from the engine block. A pry bar may be needed, but avoid excessive force that could damage the head or block.
3. Surface Preparation and Cleaning
Proper surface preparation is essential for a successful head gasket replacement.
- Clean Cylinder Head and Engine Block Surfaces: Use a scraper to remove all traces of the old head gasket from both the cylinder head and the engine block. Be meticulous, ensuring a perfectly clean and smooth surface. Follow up with a cleaning solvent to remove any remaining debris.
- Inspect Cylinder Head and Engine Block: Check the cylinder head and engine block for any signs of warping or damage. If necessary, have the cylinder head professionally resurfaced to ensure a flat sealing surface. Consider having the engine block checked for flatness as well.
- Clean Pistons: While the head is off, clean the tops of the pistons using a suitable solvent and scraper. Be careful not to drop debris into the cylinders.
4. Head Gasket and Cylinder Head Installation
This is where precision is paramount.
- Install New Head Gasket: Carefully position the new head gasket onto the engine block, aligning it with the dowel pins or other locating features. Ensure the gasket is oriented correctly (check for "UP" markings or other indicators).
- Install Cylinder Head: Carefully lower the cylinder head onto the engine block, aligning it with the head gasket and dowel pins.
- Install New Head Bolts: Install new head bolts, lightly lubricated with engine oil as specified by the manufacturer.
- Torque Head Bolts: Tighten the head bolts in the sequence and to the torque specifications outlined in your repair manual. Many modern engines use torque-to-yield (TTY) bolts, which require a specific torque value followed by an additional angle of rotation. This is *crucial* for proper sealing. A *high-quality* torque wrench is essential here.
5. Reassembly
Reverse the disassembly process, paying close attention to detail.
- Reinstall Timing Chain/Belt: Reinstall the timing chain or belt, ensuring the timing marks are properly aligned. Consult your repair manual for specific instructions. Incorrect timing can cause severe engine damage.
- Reinstall Valve Cover: Install the valve cover with a new gasket.
- Reinstall Intake and Exhaust Manifolds: Reinstall the intake and exhaust manifolds with new gaskets. Torque the manifold bolts to the manufacturer's specifications.
- Reinstall Throttle Body: Reinstall the throttle body.
- Reinstall Fuel Injector Rail: Reinstall the fuel injector rail, ensuring the injectors are properly seated.
- Reconnect Wiring Harness: Reconnect all wiring harnesses, referring to your labels to ensure proper connections.
- Reconnect Hoses: Reconnect all hoses.
- Reinstall Air Intake: Reinstall the air intake system.
6. Final Steps and Testing
- Refill Coolant and Oil: Refill the cooling system with the correct type of coolant and the engine with the correct type of oil.
- Bleed the Cooling System: Bleed the cooling system to remove any air pockets. Consult your repair manual for the proper bleeding procedure.
- Start the Engine: Start the engine and let it idle for several minutes. Check for any leaks.
- Monitor Temperature: Monitor the engine temperature gauge to ensure the engine is not overheating.
- Check for Leaks: Carefully inspect all connections and gaskets for leaks.
- Test Drive: Take the vehicle for a test drive, monitoring performance and temperature.
Conclusion
Head gasket replacement is a demanding but manageable task for the experienced DIY mechanic. However, if you are unsure of your abilities, it is best to seek the assistance of a qualified professional. A properly executed head gasket replacement will restore your Nissan Frontier's performance and reliability for years to come. Remember to always consult your vehicle's specific repair manual for detailed instructions and torque specifications.