Nissan Frontier U Joint Replacement
So, your Nissan Frontier's got a vibration, a clunk when shifting, or maybe even a squeak that gets worse with speed? Chances are, your U-joints are telling you they've had enough. Replacing U-joints is a pretty straightforward job for a DIYer with some experience, and it can save you a bundle compared to taking it to a shop. This guide will walk you through the process step-by-step, covering everything from diagnosis to reassembly.
Understanding U-Joints: The Backbone of Your Drivetrain
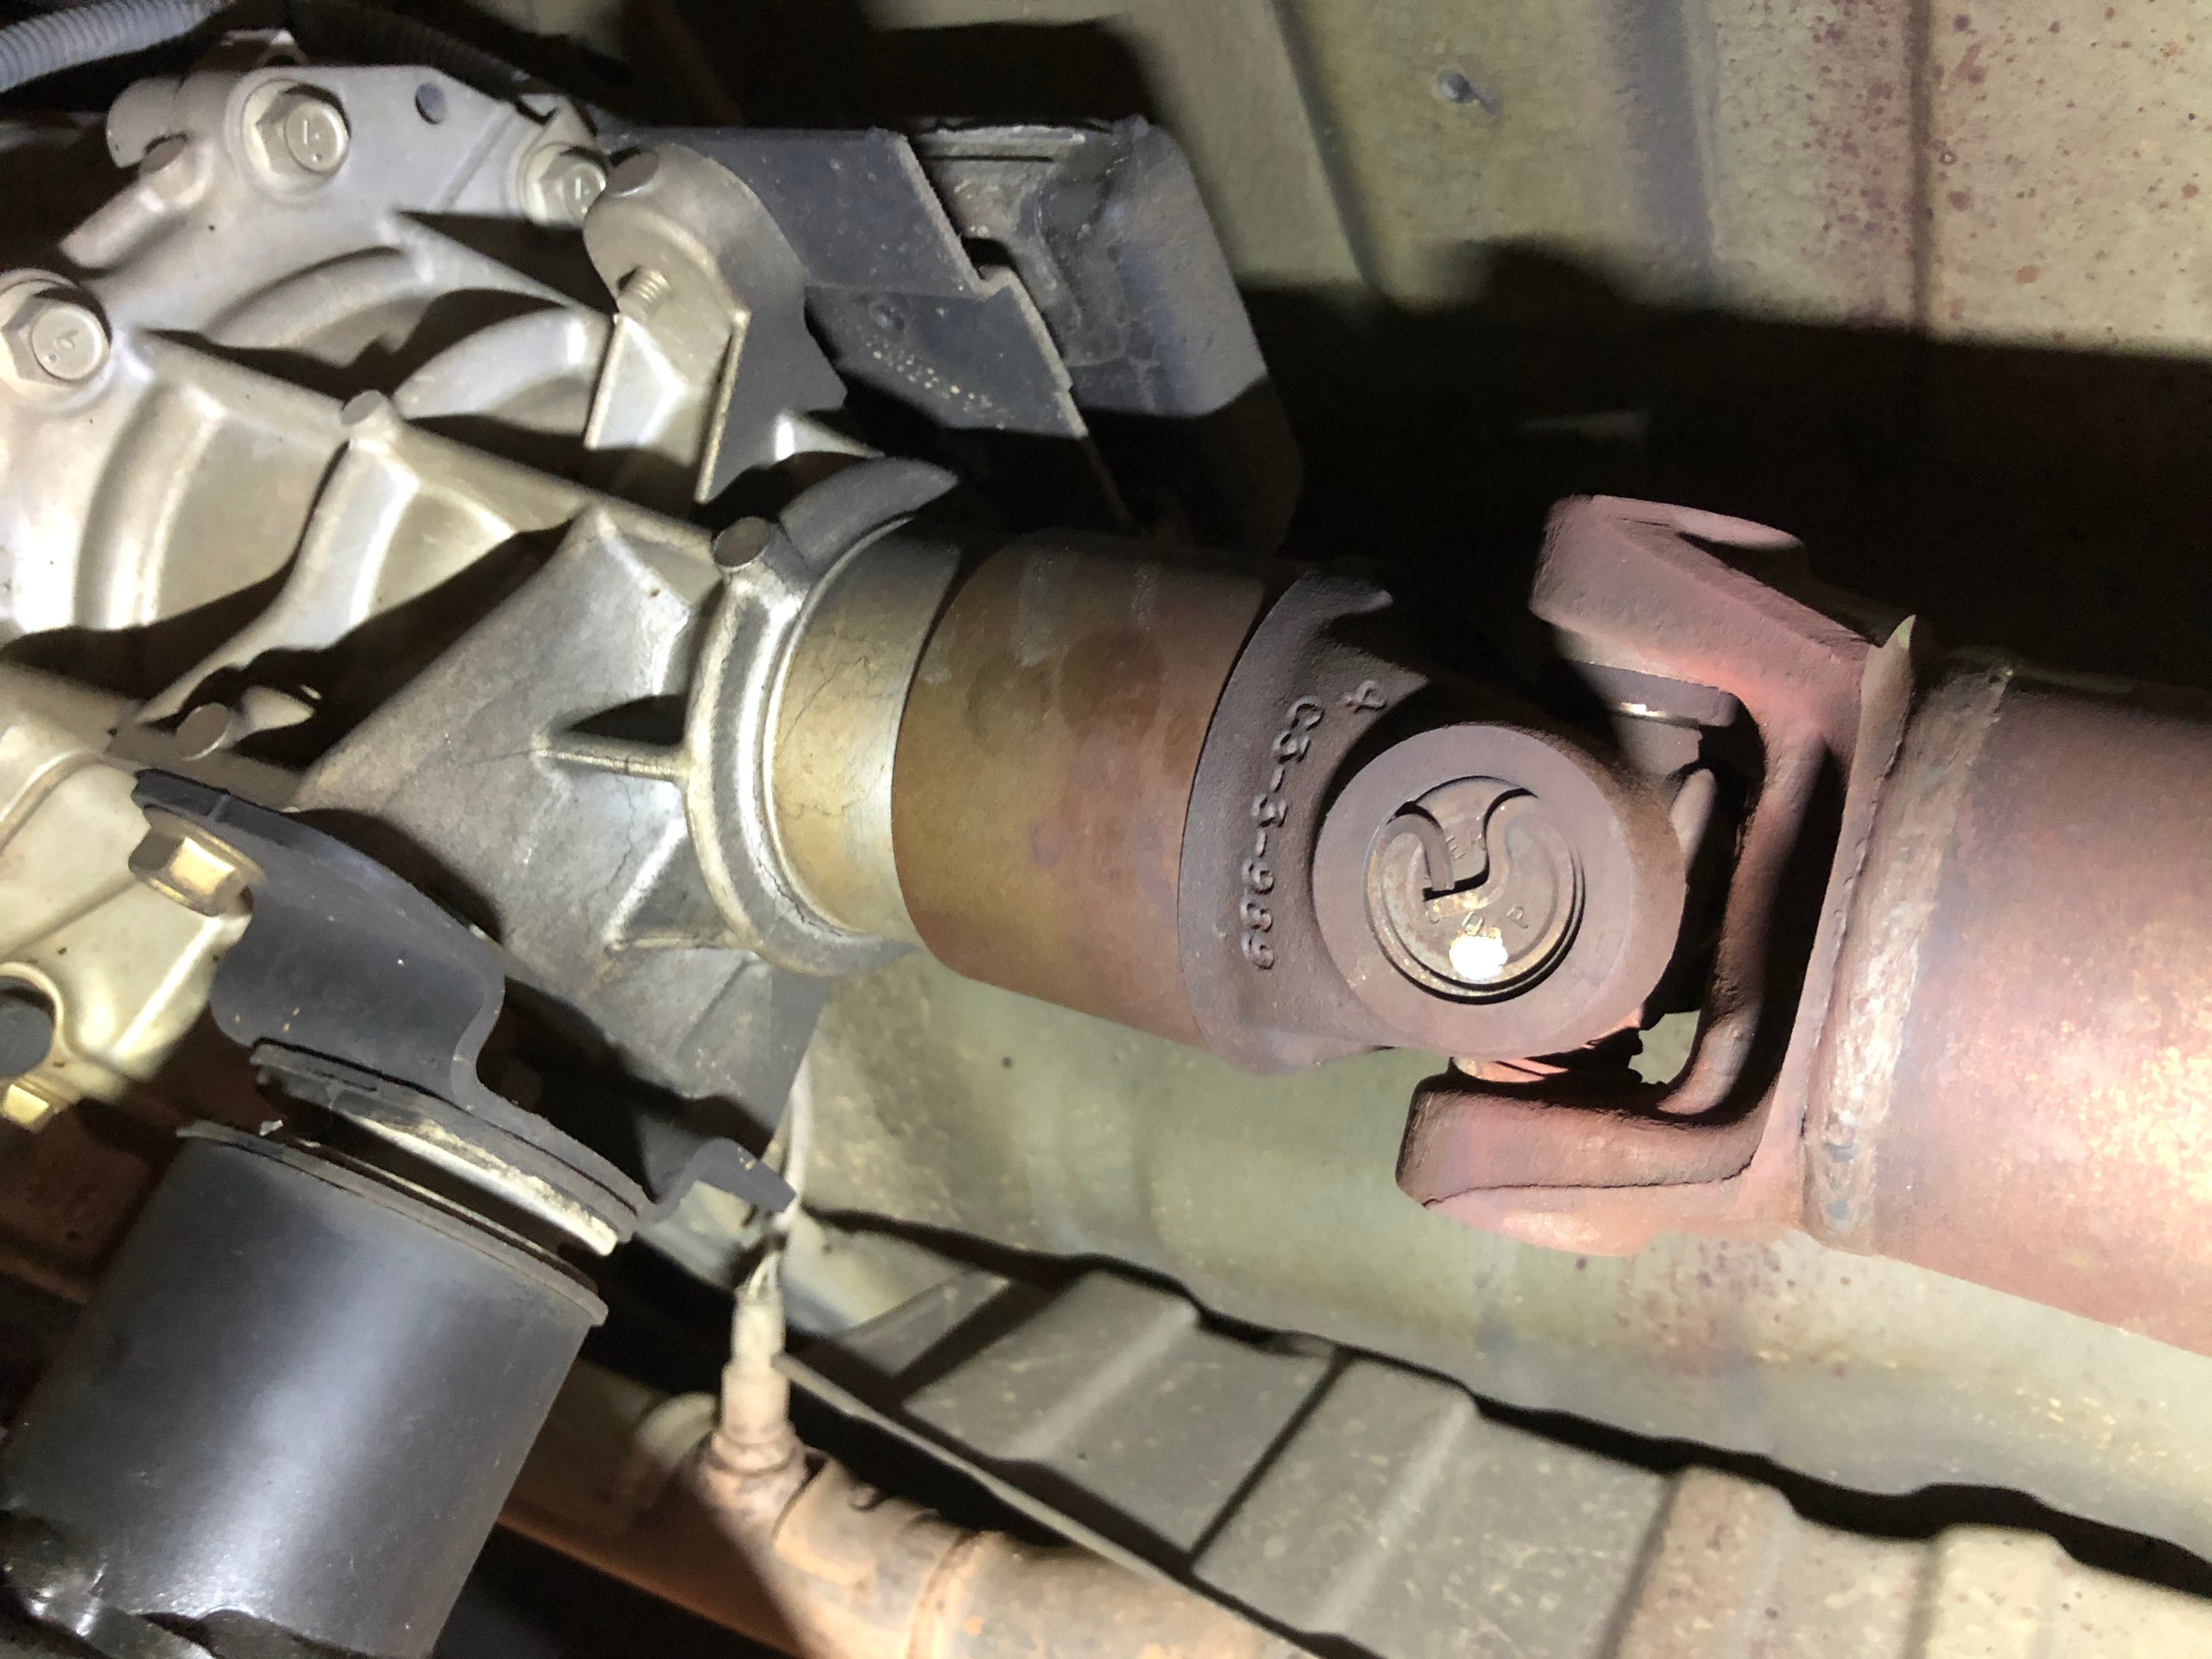
Before we dive in, let's quickly cover what U-joints (or universal joints) actually do. In your Frontier, U-joints are critical components that connect the transmission to the rear differential (or front differential in 4x4 models) via the driveshaft(s). They allow the driveshaft to transmit rotational power through angles, compensating for suspension movement and changes in the relative positions of the transmission and differential. Essentially, they're the flexible connectors that make your whole drivetrain work.
A typical U-joint consists of a cross-shaped "spider" (also known as a trunnion) with needle bearings at each of its four ends. These bearings ride inside cups that are pressed into the yokes on the driveshaft and differential (or transfer case). Over time, these bearings can wear out, dry out, or even break, leading to play, vibration, and eventually, failure.
Signs of a Failing U-Joint
Here's what to look for:
- Vibration: Often felt in the floorboard or seat, especially at higher speeds. The vibration may change with acceleration or deceleration.
- Clunking: A noticeable clunk when shifting between gears, particularly from park to drive or reverse. This can also occur when accelerating or decelerating abruptly.
- Squeaking: A high-pitched squeak that increases with vehicle speed. This is a sign of dry or worn bearings.
- Visible Play: You can sometimes feel play in the U-joint by grabbing the driveshaft and trying to rotate it back and forth. Excessive play is a clear indicator of a problem.
- Grease Leakage: If you see grease leaking from the U-joint seals, it's a sign that the seals are failing and the bearings are likely losing lubrication.
Tools and Materials You'll Need
Gathering the right tools and parts beforehand will make the job much smoother.
- New U-Joints: Get the correct part number for your Frontier's year, make, and model. 4x4 models have more U-joints than 2WD! Don't cheap out here. Buy quality U-joints from a reputable brand like Spicer or Moog. Some come pre-greased and sealed (non-greasable), while others have a grease fitting (greasable). Choose the type that suits your preference and driving conditions.
- Socket Set: Including sockets that fit the driveshaft bolts and any other fasteners you might encounter.
- Wrenches: A set of wrenches, including open-end and box-end, for removing bolts and nuts.
- Hammer: A ball-peen hammer is essential for driving out the old U-joint cups.
- U-Joint Press: This is the most important tool. You can rent one from most auto parts stores. Trying to hammer U-joints in and out without a press is a recipe for disaster. Don't even think about it.
- Sockets (as press anvils): You'll need several sockets of various sizes to act as support anvils for the U-joint press. The size needed depends on the U-joint and the press you're using.
- Punch or Drift: For tapping out the U-joint cups if they're particularly stubborn.
- Grease Gun (if using greasable U-joints): To lubricate the new U-joints after installation. Use a high-quality chassis grease.
- Penetrating Oil: Spray it on any rusted or stuck bolts before attempting to remove them.
- Safety Glasses: Protect your eyes!
- Gloves: To keep your hands clean and protected.
- Wheel Chocks: For safety, chock the wheels before you start.
- Jack and Jack Stands: To safely lift and support the vehicle.
- Torque Wrench: To tighten the fasteners to the correct specifications.
- Marker or Paint Pen: To mark the orientation of the driveshaft before removal (crucial for avoiding vibrations).
Step-by-Step U-Joint Replacement
Alright, let's get to work!
- Safety First: Chock the rear wheels (if working on the rear driveshaft) and engage the parking brake. Loosen the lug nuts on the wheels if you need to remove them for better access. Jack up the vehicle and securely support it with jack stands. Never work under a vehicle supported only by a jack.
- Mark the Driveshaft: Before removing the driveshaft, use a marker or paint pen to mark the orientation of the driveshaft relative to the differential flange and the transmission output flange. This ensures you reinstall it in the same way it came out. This is absolutely critical to prevent driveline vibrations after the repair. Misalignment can cause significant issues. A simple line spanning both surfaces is usually sufficient.
- Remove the Driveshaft: Locate the bolts that connect the driveshaft to the differential flange. Spray them with penetrating oil and let it soak for a few minutes. Remove the bolts. You might need to rotate the driveshaft to access all the bolts. Support the driveshaft as you remove the last bolt to prevent it from falling. If you're working on the rear driveshaft, carefully slide it out of the transmission. Be prepared for a small amount of transmission fluid to leak out. Place a rag or plug in the tail shaft of the transmission to minimize fluid loss. If you're working on the front driveshaft, it typically slides out of the transfer case.
- Secure the Driveshaft: Once the driveshaft is removed, secure it in a vise or on a workbench. Make sure it's stable and won't move around while you're working on it.
- Remove the Old U-Joint: This is where the U-joint press comes in.
- Position the driveshaft yoke in the U-joint press, with a socket on the opposite side to receive the U-joint cup as it's pressed out.
- Carefully press one of the U-joint cups out of the yoke. If it's stuck, try tapping around the yoke with a hammer and punch to loosen it.
- Once one cup is out, reposition the U-joint in the press to press out the opposite cup.
- With both cups removed from one side, you can usually maneuver the U-joint spider to remove the cups from the other side. Repeat the pressing process.
- If the cups are extremely stubborn, you might need to use a torch to heat the yoke slightly. Be very careful not to overheat the yoke, as this can damage it. A quick pass with a propane torch is usually sufficient.
- Clean the Yokes: Thoroughly clean the yokes on the driveshaft and differential (or transfer case) with a wire brush to remove any rust, dirt, or debris. This will ensure a proper fit for the new U-joints.
- Install the New U-Joint:
- Carefully position the new U-joint spider in the yoke.
- Start pressing in one of the U-joint cups. Make sure the needle bearings stay in place inside the cup. If any bearings fall out, carefully reinstall them.
- Press the cup in until it's flush with the outside of the yoke.
- Install the opposite cup, pressing it in until it's also flush with the outside of the yoke.
- Repeat the process for the other side of the U-joint.
- Important: Make sure the U-joint moves freely in the yoke. If it's binding, tap the yoke lightly with a hammer to seat the cups properly. You might need to slightly relieve pressure from the press and then reapply it.
- Grease the U-Joint (if applicable): If you're using greasable U-joints, use a grease gun to lubricate them. Pump grease into the fitting until you see fresh grease coming out of all four seals.
- Reinstall the Driveshaft: Align the marks you made earlier and carefully slide the driveshaft back into place. Install the bolts that connect the driveshaft to the differential flange and torque them to the manufacturer's specifications.
- Lower the Vehicle: Remove the jack stands and lower the vehicle.
- Test Drive: Take the vehicle for a test drive and check for any vibrations or noises. If you still experience vibrations, double-check the driveshaft alignment and make sure the U-joints are properly installed and lubricated.
Important Considerations and Troubleshooting
- Driveshaft Phasing: This is beyond the scope of a simple U-joint replacement, but it's worth mentioning. Driveshafts are designed with specific phasing to minimize vibrations. If you have a multi-piece driveshaft, ensure the sections are reassembled in the correct orientation.
- Driveshaft Balancing: If you're still experiencing vibrations after replacing the U-joints, your driveshaft might be out of balance. This is more common with older vehicles. You'll need to take the driveshaft to a specialist to have it balanced.
- Stuck Cups: As mentioned earlier, stubborn U-joint cups can be a real pain. Penetrating oil and heat are your friends. A good quality U-joint press is invaluable.
- Needle Bearings: Be extremely careful not to lose any of the needle bearings inside the U-joint cups. If a bearing falls out, make sure to reinstall it correctly.
- Torque Specs: Always torque the driveshaft bolts to the manufacturer's specifications. Overtightening can damage the bolts or the flanges.
Replacing U-joints on your Nissan Frontier is a manageable DIY project with the right tools and a bit of patience. By following these steps and taking your time, you can save money and keep your Frontier running smoothly. Good luck, and happy wrenching!