Nissan Murano Alternator Replacement Cost
Replacing the alternator in a Nissan Murano, or any modern vehicle for that matter, is a task that can range from a relatively straightforward DIY project to a job best left to experienced mechanics. Understanding the factors that influence the overall cost involved, and the intricacies of the replacement procedure itself, is crucial for making an informed decision about how to proceed. This technical guide breaks down the various aspects of Nissan Murano alternator replacement, offering insights into parts costs, labor rates, and the nuances of the replacement process.
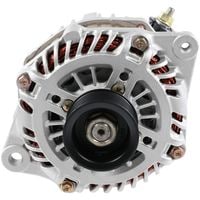
Understanding the Alternator's Role
Before diving into the cost analysis, it's essential to understand the alternator's fundamental function. The alternator is a vital component of your Murano's electrical system. Its primary responsibility is to convert mechanical energy from the engine's rotation into electrical energy. This electricity powers all of the vehicle's electrical systems while the engine is running, including the headlights, radio, air conditioning, and, crucially, it also recharges the battery. Without a properly functioning alternator, the battery will eventually be depleted, leading to a stalled engine and a non-operational vehicle. Recognizing the symptoms of a failing alternator early can save you from potential breakdowns and more costly repairs down the line.
Common symptoms of a failing alternator include:
- Dim or flickering headlights.
- Warning lights on the dashboard (e.g., battery light, "ALT" light).
- Slow or struggling engine starting.
- Unusual noises coming from the engine (e.g., whining or growling).
- Electrical problems such as power windows operating slowly or the radio cutting out.
Factors Influencing Alternator Replacement Cost
The total cost of replacing a Nissan Murano alternator is influenced by several key factors:
1. Type of Alternator
The most significant cost factor is the alternator itself. You have several options:
- New OEM (Original Equipment Manufacturer) Alternator: This is the most expensive option but offers the highest level of reliability and compatibility. OEM alternators are manufactured to Nissan's exact specifications and are designed to perfectly fit and function within the Murano's electrical system.
- New Aftermarket Alternator: Aftermarket alternators are produced by third-party manufacturers and are generally more affordable than OEM parts. The quality of aftermarket alternators can vary significantly, so it's crucial to choose a reputable brand known for producing reliable components.
- Remanufactured Alternator: Remanufactured alternators are used alternators that have been disassembled, cleaned, repaired, and tested. They offer a cost-effective alternative to new alternators, and reputable remanufacturers often provide warranties. However, the longevity of a remanufactured alternator can be less predictable than that of a new unit.
- Used Alternator: Purchasing a used alternator from a salvage yard is the cheapest option, but also the riskiest. There's no guarantee of its functionality or lifespan, and it may fail soon after installation. This is generally not recommended unless you're on a very tight budget and understand the risks involved.
The cost of a new OEM alternator for a Nissan Murano can range from $400 to $800 or even more, depending on the model year and specific trim level. Aftermarket alternators typically range from $150 to $400, while remanufactured units can be found for $100 to $300. Used alternators may be available for as little as $50, but as stated before, this option is not advised for long-term reliability.
2. Labor Costs
Labor costs are another significant component of the overall replacement cost. The complexity of the alternator replacement process, as well as the hourly labor rate charged by the mechanic or repair shop, will influence the final bill. The amount of time required to replace an alternator on a Nissan Murano can vary depending on the engine, model year, and the mechanic's experience, but it typically takes between 1.5 and 3 hours. Dealerships generally have higher labor rates than independent repair shops.
Labor rates can vary widely depending on your location and the type of repair shop. Dealership labor rates can range from $120 to $200 per hour, while independent shops may charge $80 to $150 per hour. Therefore, expect to pay between $120 and $600 in labor costs, depending on where you have the work done.
3. Location
The location of the alternator within the engine compartment can impact the labor time. Some Murano models may have alternators that are easily accessible, while others may require the removal of other components, such as belts, hoses, or even intake manifolds, to gain access to the alternator. The more complex the removal process, the more labor time will be required, thus increasing the overall cost.
4. Diagnostic Fees
If you're unsure whether the alternator is the actual problem, you might need to pay a diagnostic fee to have a mechanic diagnose the issue. This fee can range from $50 to $150, but it's crucial to accurately identify the root cause of the problem before replacing any parts unnecessarily. Some repair shops will waive the diagnostic fee if you proceed with the repair at their facility.
5. Additional Parts
In some cases, additional parts may need to be replaced along with the alternator. For example, the serpentine belt, which drives the alternator, should be inspected for wear and tear. If it's cracked, frayed, or shows signs of damage, it should be replaced to ensure optimal alternator performance. Similarly, the battery terminals and cables should be inspected for corrosion and cleaned or replaced as needed. The cost of these additional parts can add to the overall expense of the replacement.
DIY vs. Professional Installation
One of the major decisions to be made is whether to replace the alternator yourself or to have a professional mechanic do the job.
DIY Replacement
Replacing an alternator yourself can save you a significant amount of money on labor costs. However, it requires some mechanical knowledge, the right tools, and a willingness to get your hands dirty. Before attempting a DIY replacement, consider the following:
- Skill Level: Are you comfortable working on cars? Have you performed similar repairs before?
- Tools: Do you have the necessary tools, such as wrenches, sockets, screwdrivers, a voltmeter, and a torque wrench?
- Time: Do you have the time and patience to complete the job properly?
- Safety: Do you understand the safety precautions involved, such as disconnecting the battery before starting work?
If you're confident in your abilities and have the necessary resources, a DIY alternator replacement can be a rewarding experience. However, if you're unsure or uncomfortable with any aspect of the process, it's best to leave it to a professional.
Professional Installation
Having a professional mechanic replace your alternator offers several advantages. Experienced mechanics have the knowledge, skills, and tools to diagnose the problem accurately, replace the alternator efficiently, and ensure that all connections are properly secured. They also typically offer a warranty on their work, providing peace of mind. However, professional installation will be more expensive than a DIY replacement. Obtaining quotes from multiple repair shops can ensure you get a fair price. When obtaining quotes, be sure to ask for a breakdown of the parts and labor costs to understand exactly what you're paying for.
Step-by-Step Overview of Alternator Replacement (Simplified)
While this isn't a comprehensive DIY guide, understanding the general steps involved can give you a better sense of the process:
- Disconnect the Battery: Always disconnect the negative battery terminal before working on any electrical components. This prevents electrical shocks and potential damage to the vehicle's electrical system.
- Locate the Alternator: Identify the location of the alternator in the engine compartment. Consult your vehicle's repair manual for guidance.
- Remove the Serpentine Belt: Use a wrench or belt tensioner tool to release the tension on the serpentine belt and remove it from the alternator pulley.
- Disconnect Electrical Connections: Disconnect the electrical connectors attached to the alternator. Be sure to note their locations so you can reconnect them correctly later.
- Remove the Alternator Mounting Bolts: Remove the bolts that secure the alternator to the engine block.
- Remove the Alternator: Carefully remove the old alternator from the vehicle.
- Install the New Alternator: Position the new alternator in place and secure it with the mounting bolts.
- Reconnect Electrical Connections: Reconnect the electrical connectors to the alternator.
- Reinstall the Serpentine Belt: Route the serpentine belt around the alternator pulley and other engine components, ensuring that it's properly seated in the grooves.
- Connect the Battery: Reconnect the negative battery terminal.
- Test the System: Start the engine and use a voltmeter to verify that the alternator is charging the battery properly.
Important Note: This is a simplified overview. Refer to a specific repair manual for your Murano model for detailed instructions and torque specifications.
Cost Saving Tips
Here are some tips to help you save money on Nissan Murano alternator replacement:
- Get Multiple Quotes: Obtain quotes from several repair shops to compare prices.
- Consider a Remanufactured Alternator: A remanufactured alternator can be a cost-effective alternative to a new OEM unit.
- Check Online Retailers: Compare prices from online retailers to local auto parts stores.
- Negotiate: Don't be afraid to negotiate with the repair shop on the price of parts and labor.
- DIY (If Capable): If you're comfortable working on cars, consider replacing the alternator yourself to save on labor costs.
Conclusion
The cost of replacing a Nissan Murano alternator can vary widely depending on several factors, including the type of alternator, labor costs, and the complexity of the installation process. By understanding these factors and exploring your options, you can make an informed decision and potentially save money on the repair. Whether you choose to tackle the job yourself or leave it to a professional, it's crucial to ensure that the alternator is replaced correctly to maintain the reliability and functionality of your Murano's electrical system. Always prioritize safety and refer to your vehicle's repair manual for specific instructions and torque specifications.