Nissan Sentra Battery Terminal Replacement
Replacing the battery terminals on your Nissan Sentra is a common maintenance task that can significantly improve the electrical performance and reliability of your vehicle. Corroded or damaged terminals can lead to a variety of problems, including starting issues, dimming lights, and even electrical system failures. This guide provides a step-by-step walkthrough for replacing your Sentra's battery terminals, geared towards the experienced DIYer.
Understanding Battery Terminals and Their Importance
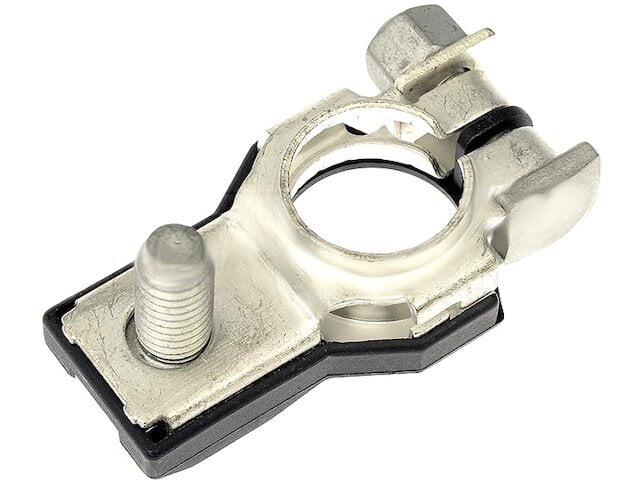
Battery terminals are the connection points between your car's battery and the electrical system. They are typically made of lead or a lead alloy, chosen for their conductivity. The positive terminal is usually marked with a "+" symbol and is slightly larger in diameter than the negative terminal, marked with a "-" symbol. This difference in size prevents accidental reverse polarity connections, which can severely damage your vehicle's electronics.
Over time, battery terminals are prone to corrosion. This is primarily caused by the release of hydrogen gas from the battery during charging and discharging, which reacts with the metal of the terminals and the environment. This corrosion acts as an insulator, increasing resistance and hindering the flow of electricity. High resistance leads to voltage drop, reducing the efficiency of your car's electrical components.
Why replace your battery terminals? Aside from preventing starting issues, clean and well-connected terminals ensure that your alternator can properly charge the battery, extending its lifespan.
Tools and Materials Needed
Before starting, gather the necessary tools and materials:
- New battery terminals (ensure they are compatible with your Nissan Sentra)
- Wrench set (typically 10mm, 12mm, and 13mm depending on the terminal clamps)
- Socket set (same sizes as the wrench set)
- Battery terminal cleaner and protector spray
- Wire brush or terminal cleaning tool
- Gloves and safety glasses
- Shop rags
- Dielectric grease (helps prevent corrosion after installation)
- Wire stripper/crimper
- Replacement wire (if the existing wire is damaged)
- Cable lug crimper (if replacing wires)
- Heat shrink tubing and heat gun (optional, for weatherproofing wire connections)
- Memory saver (optional, to retain radio presets and other electronic settings)
Step-by-Step Replacement Procedure
Safety First! Before you begin, disconnect the negative battery cable. This prevents any accidental short circuits. Wear safety glasses and gloves to protect your eyes and skin from battery acid.
Step 1: Disconnecting the Battery Cables
Locate the battery in your Nissan Sentra. It's typically under the hood, but some models might have it located in the trunk. Identify the negative (-) and positive (+) terminals. Using the appropriate wrench (usually 10mm or 13mm), loosen the nut or bolt on the negative terminal clamp. Once loose, carefully wiggle the clamp off the terminal. Tuck the cable away from the battery to prevent accidental contact.
Repeat the process for the positive terminal. Remember to be extra cautious to avoid touching any metal parts of the car with your wrench while it's connected to the positive terminal, as this will create a short circuit.
Using a Memory Saver: A memory saver plugs into the OBDII port and provides power to the car's computer while the battery is disconnected, preserving settings like radio presets and seat positions. If you don't have one, be prepared to reset these settings.
Step 2: Inspecting and Cleaning the Existing Terminals and Cables
Examine the old battery terminals and the surrounding cables for signs of corrosion, damage, or fraying. If the corrosion is light, you can try cleaning it with a battery terminal cleaner and a wire brush. Spray the cleaner onto the terminals and scrub away the corrosion until the metal is clean and shiny.
If the corrosion is extensive or if the cables are damaged, it's best to replace the entire terminal and potentially the cable as well. Replacing the cable involves cutting the old terminal off, stripping the wire, and crimping on a new terminal lug. Use a cable lug crimper to ensure a secure and reliable connection. Consider using heat shrink tubing over the connection for added weatherproofing.
Step 3: Installing the New Battery Terminals
Before installing the new terminals, clean the battery posts themselves with a terminal cleaning tool or a wire brush. This ensures a good connection between the terminal and the post.
Slide the new terminals onto the battery posts. Ensure that the positive terminal goes on the positive post and the negative terminal goes on the negative post. Tighten the clamps securely using the appropriate wrench. Don't overtighten, as this can damage the battery posts or the terminals. Aim for a snug fit that prevents movement but doesn't put excessive stress on the components.
Proper Torque: While a specific torque value isn't usually specified for battery terminals, a good rule of thumb is to tighten them until they are snug and don't move with moderate force. Overtightening can damage the posts.
Step 4: Reconnecting the Battery Cables
Reconnect the positive cable to the positive terminal and tighten the clamp. Then, reconnect the negative cable to the negative terminal and tighten the clamp. Ensure that both connections are secure.
Step 5: Applying Protective Coating
After reconnecting the cables, apply a battery terminal protector spray or dielectric grease to the terminals. This will help prevent future corrosion and ensure a long-lasting connection. Dielectric grease is a non-conductive, waterproof grease that helps seal out moisture and air, preventing corrosion.
Step 6: Final Checks and Testing
Double-check all connections to ensure they are tight and secure. Start the engine and verify that the car starts without any issues. Check the headlights, interior lights, and other electrical components to ensure they are working properly. If you used a memory saver, verify that your radio presets and other electronic settings are still intact.
Troubleshooting Common Issues
- Loose Terminals: If the car is still having trouble starting after replacing the terminals, check for loose connections. Even a slightly loose terminal can cause problems.
- Incorrect Terminal Size: Ensure that the new terminals are the correct size for your battery posts. If they are too small, they won't make a good connection. If they are too large, they will be difficult to tighten and may not hold securely.
- Damaged Cables: If the cables are severely corroded or damaged, they may need to be replaced entirely. Consider taking your car to a professional mechanic if you are unsure about replacing the cables yourself.
- Reverse Polarity: Connecting the battery cables in reverse polarity can cause serious damage to your car's electrical system. Be extremely careful to ensure that the positive cable is connected to the positive terminal and the negative cable is connected to the negative terminal.
Maintenance Tips
To prevent future corrosion and ensure the long-term reliability of your battery terminals, consider the following maintenance tips:
- Regular Inspections: Check your battery terminals for corrosion every few months.
- Clean Regularly: Clean the terminals with a battery terminal cleaner and a wire brush as needed.
- Apply Protective Coating: Apply a battery terminal protector spray or dielectric grease after cleaning the terminals.
- Check Cable Condition: Inspect the cables for signs of damage or fraying.
By following these steps and tips, you can successfully replace your Nissan Sentra's battery terminals and ensure the reliable operation of your vehicle's electrical system.