Nissan Sentra Shift Knob Replacement
The humble shift knob, often overlooked, is a critical interface between driver and machine. It’s the point of contact, the lever of control that translates intention into action on the road. Whether you're seeking a cosmetic upgrade, replacing a worn-out original, or simply curious about the mechanics, understanding the process of shift knob replacement on a Nissan Sentra is a valuable skill. This guide provides an in-depth look at the procedure, covering various types of shift knobs and potential challenges, suitable for both the curious and the mechanically inclined.
Understanding Sentra Shift Knob Configurations
Before diving into the replacement process, it's crucial to understand the two primary types of shift knobs found in Nissan Sentras: manual transmission (MT) and automatic transmission (AT). The design and attachment methods differ significantly between the two.
Manual Transmission (MT) Shift Knobs
MT shift knobs are typically threaded onto the shifter shaft. This means the knob is screwed on, utilizing internal threads that match those on the shaft. The thread size and pitch are important considerations when choosing a replacement. Common sizes include M10x1.25 or M12x1.25, but it's always best to confirm the correct size for your specific model year Sentra. Aftermarket options abound, ranging from simple plastic knobs to weighted metal designs that can alter the feel of shifting. The installation process, as you'll see, is relatively straightforward.
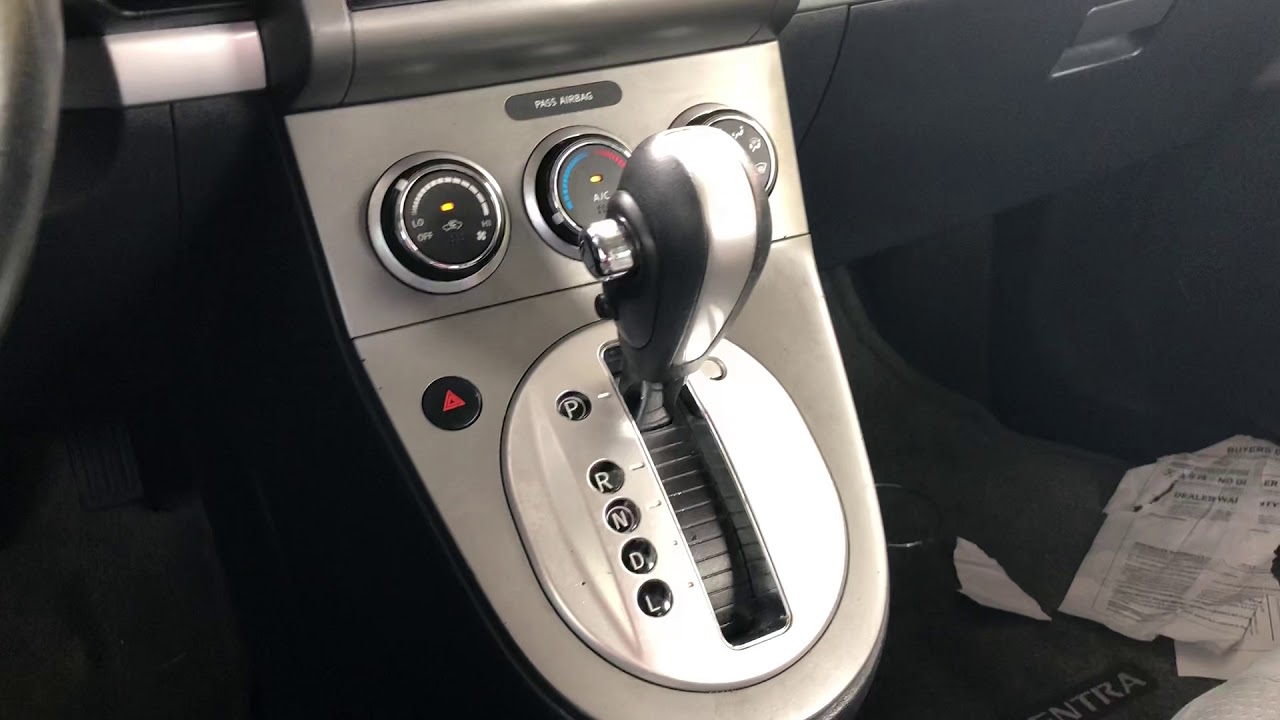
Automatic Transmission (AT) Shift Knobs
AT shift knobs are more complex. They are not simply screwed on. Instead, they are typically held in place by a combination of mechanical fasteners, such as clips, pins, or detent mechanisms, and an overdrive (OD) button, if equipped. The OD button is often integrated into the shift knob, requiring a specific wiring connection. Removing and replacing an AT shift knob can be trickier due to the need to disengage these fasteners and potentially disconnect electrical connectors. Furthermore, some AT shift knobs are part of a larger assembly that includes the shift boot and surrounding trim.
Tools and Materials Required
Regardless of the transmission type, having the right tools on hand will make the process smoother and prevent damage to your Sentra. Here's a list of essential items:
- New Shift Knob: Ensure it's compatible with your transmission type (MT or AT) and thread size (for MT).
- Small Flathead Screwdriver: Useful for prying clips and removing trim pieces.
- Phillips Head Screwdriver: May be needed for removing screws securing trim or fasteners.
- Socket Set: Potentially necessary for removing retaining nuts or bolts (less common).
- Pliers (Needle-Nose): Helpful for manipulating clips and connectors in tight spaces.
- Trim Removal Tools (Plastic): These specialized tools are designed to remove interior trim panels without scratching or damaging them. Highly recommended, but not strictly essential.
- Shop Rags: For cleaning and protecting surfaces.
- Pen and Paper (or Camera): To document the disassembly process, especially for AT shift knobs with multiple connections.
- Electrical Contact Cleaner (Optional): For cleaning electrical connections on AT shift knobs with OD buttons.
Step-by-Step Guide: Manual Transmission (MT) Shift Knob Replacement
The MT shift knob replacement is usually a quick and easy process. Here's how to do it:
- Preparation: Park the vehicle on a level surface, engage the parking brake, and turn off the engine.
- Loosening the Existing Knob: Grip the shift knob firmly and rotate it counterclockwise (lefty-loosey). It may be tight, especially if it hasn't been removed in a while. You may need to use a bit of force. If it's particularly stubborn, consider wearing gloves for better grip.
- Removal: Continue rotating the knob until it comes completely free from the shifter shaft.
- Installation: Align the new shift knob with the shifter shaft threads and rotate it clockwise (righty-tighty) until it's snug. Do not overtighten! Overtightening can damage the threads on the shaft or the knob.
- Alignment (Optional): Some shift knobs may have a logo or design that you want to align in a specific direction. Before fully tightening, adjust the knob to your desired orientation.
- Testing: Once the knob is securely attached, test the shift linkage through all gears to ensure it doesn't interfere with the gear selection process.
Step-by-Step Guide: Automatic Transmission (AT) Shift Knob Replacement
Replacing an AT shift knob requires more care and attention to detail. Here's a general guide. Note that specific steps may vary slightly depending on the Sentra model year and trim level:
- Preparation: Park the vehicle on a level surface, engage the parking brake, and turn off the engine. It's also advisable to disconnect the negative battery terminal to prevent accidental electrical issues.
- Accessing the Shift Knob Assembly: This often involves removing a console trim panel surrounding the shifter. Use trim removal tools or a flathead screwdriver (carefully!) to pry the trim pieces loose. Start from the edges and work your way around.
- Locating Fasteners: Once the trim is removed, you'll likely find screws, clips, or pins securing the shift knob to the shifter shaft. These may be hidden from view, so carefully inspect the area.
- Disconnecting Electrical Connectors (If Applicable): If your Sentra has an OD button on the shift knob, there will be an electrical connector attached to it. Gently disconnect the connector, taking note of its orientation. Do not pull on the wires!
- Releasing the Shift Knob: Once all fasteners and connectors are removed, the shift knob should be free to detach from the shifter shaft. Some knobs may require a specific angle or motion to release.
- Installing the New Shift Knob: Align the new shift knob with the shifter shaft and reattach any fasteners, clips, or pins that were removed. Ensure everything is securely in place.
- Reconnecting Electrical Connectors (If Applicable): If you disconnected any electrical connectors, reconnect them now, making sure they are properly seated.
- Reassembling the Console Trim: Reinstall the console trim panels, ensuring they snap securely into place.
- Testing: Start the vehicle and test the shifter through all positions (P, R, N, D, etc.). If your vehicle has an OD button, test its functionality as well.
- Final Check: Double-check that all connections are secure and that the shift knob operates smoothly.
Common Challenges and Troubleshooting
Even with careful planning, you might encounter some challenges during the shift knob replacement process:
- Stubborn Shift Knob (MT): If the shift knob is stuck, try using a wrench or pliers (with padding to protect the knob) to provide extra leverage. You can also try applying penetrating oil to the threads and letting it sit for a few minutes before attempting to remove the knob.
- Broken Clips (AT): Plastic clips are prone to breaking, especially in older vehicles. If a clip breaks, you may need to purchase a replacement clip from a Nissan dealer or an auto parts store.
- Damaged Threads (MT): If the threads on the shifter shaft are damaged, the new shift knob may not tighten properly. You may need to re-tap the threads or replace the shifter shaft entirely.
- Electrical Issues (AT): If the OD button doesn't work after replacing the shift knob, double-check the electrical connections. Ensure that the connector is properly seated and that there are no damaged wires. Consider using electrical contact cleaner to clean the contacts.
- Difficulty Removing Trim Panels: If you're having trouble removing trim panels, consult a repair manual or online resources for your specific Sentra model. Applying too much force can damage the trim.
Aftermarket Considerations
The aftermarket offers a wide range of shift knobs for Nissan Sentras, catering to various tastes and preferences. When selecting an aftermarket shift knob, consider the following:
- Compatibility: Ensure that the shift knob is compatible with your transmission type (MT or AT) and thread size (for MT).
- Material: Shift knobs are available in a variety of materials, including plastic, metal, wood, and leather. Each material offers a different feel and aesthetic.
- Weight: Weighted shift knobs can improve the feel of shifting by reducing notchiness and providing a more solid engagement.
- Ergonomics: Choose a shift knob that is comfortable to grip and that fits well in your hand.
- Quality: Opt for a shift knob from a reputable brand to ensure quality and durability.
Conclusion
Replacing a shift knob on a Nissan Sentra is a relatively straightforward task, especially for manual transmissions. Automatic transmissions require more finesse, but with patience and the right tools, it's a manageable DIY project. Whether you're aiming for aesthetic improvement, performance enhancement, or simply a functional replacement, understanding the process empowers you to personalize your driving experience and gain a deeper appreciation for the mechanics of your vehicle. Remember to prioritize safety, take your time, and consult reliable resources if you encounter any challenges. With a little effort, you can achieve a satisfying and personalized upgrade to your Sentra's interior.