Nissan Titan Side Mirror Glass Replacement
The Nissan Titan, a formidable contender in the full-size pickup truck market, is known for its robust engineering and utilitarian design. A seemingly minor component, the side mirror, plays a critical role in driver safety and situational awareness. While often overlooked, a cracked or damaged side mirror glass necessitates prompt replacement. This guide delves into the technical aspects of replacing the side mirror glass on a Nissan Titan, providing an in-depth understanding of the process and the underlying mechanics.
Understanding the Titan's Side Mirror Assembly
Before embarking on the replacement, it's crucial to grasp the architecture of the side mirror assembly. The Titan's side mirror typically consists of several key components:
- Mirror Housing: The outer shell that protects the internal components and provides aerodynamic shaping.
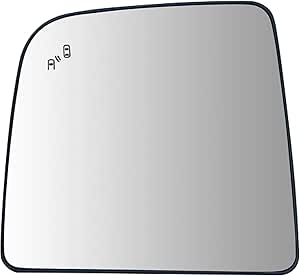
- Mirror Glass: The reflective surface providing the driver with a view of the vehicle's surroundings.
- Heating Element (if equipped): A resistive heating grid bonded to the back of the mirror glass, used to defrost or demist the surface.
- Motor Assembly (if equipped): Small electric motors responsible for adjusting the mirror's angle horizontally and vertically.
- Retaining Clips/Mounting Plate: Mechanisms that secure the mirror glass to the motor assembly or directly to the mirror housing.
- Turn Signal Indicator (if equipped): An LED or incandescent light integrated into the mirror housing for signaling turns.
The complexity of the assembly varies depending on the Titan's trim level and optional features. Higher trims often include heated mirrors, power adjustment, and integrated turn signals, adding to the intricacy of the replacement process.
Tools and Materials Required
Successfully replacing the side mirror glass requires a specific set of tools and materials. Gathering these beforehand will streamline the process and minimize potential complications.
- New Side Mirror Glass: Ensure the replacement glass is compatible with your Titan's year, trim, and mirror features (heated, non-heated). Check the part number carefully.
- Plastic Trim Removal Tools: These tools are designed to gently pry apart plastic components without causing damage. A set with various shapes and sizes is recommended.
- Flathead Screwdriver (small): May be needed for releasing retaining clips or disconnecting electrical connectors. Avoid using excessive force.
- Pliers (optional): Needle-nose pliers can be helpful for manipulating small connectors or clips in tight spaces.
- Heat Gun or Hair Dryer (optional): Applying gentle heat can soften adhesives and make removing the old mirror glass easier. Use with caution to avoid overheating or damaging plastic components.
- Gloves: Protect your hands from sharp edges and debris.
- Clean Microfiber Cloth: For cleaning the mirror housing and new mirror glass.
- Safety Glasses: Essential for protecting your eyes from shattered glass or debris.
Step-by-Step Replacement Procedure
The following steps outline the typical procedure for replacing side mirror glass on a Nissan Titan. Always exercise caution and consult your vehicle's service manual for specific instructions and safety precautions.
- Preparation: Park the Titan on a level surface and engage the parking brake. Lower the window on the side where you're replacing the mirror glass to provide better access.
- Removing the Old Mirror Glass:
This is often the most delicate step. Depending on the Titan's model year and mirror design, the mirror glass may be held in place by clips, adhesive, or a combination of both.
Method 1 (Clip-Based): Gently insert a plastic trim removal tool between the mirror glass and the mirror housing. Apply gentle pressure and pry outwards, working your way around the perimeter of the mirror. Listen for the sound of clips releasing. Avoid forcing the mirror, as this can break the clips or damage the motor assembly.
Method 2 (Adhesive-Based): If the mirror glass is primarily held by adhesive, use a heat gun or hair dryer to gently warm the glass and surrounding area. This will soften the adhesive and make it easier to remove. Carefully pry the mirror glass away from the housing, using a plastic trim removal tool. Take your time and apply even pressure to avoid cracking the glass.
Important: If the mirror is heated, carefully disconnect the electrical connectors for the heating element before completely removing the glass. Note the orientation of the connectors for reassembly.
- Cleaning the Mirror Housing: Once the old mirror glass is removed, thoroughly clean the mirror housing and mounting surface. Remove any remaining adhesive residue using a suitable adhesive remover (follow the manufacturer's instructions). Ensure the surface is clean and dry before installing the new mirror glass.
- Installing the New Mirror Glass:
Connect the electrical connectors for the heating element (if equipped). Ensure they are securely connected.
Align the new mirror glass with the mounting points on the mirror housing or motor assembly. Apply gentle pressure to snap the mirror glass into place. If the mirror uses clips, listen for the sound of the clips engaging. If adhesive is required, apply a thin layer of automotive-grade adhesive to the back of the mirror glass before attaching it to the housing.
Ensure the mirror glass is securely attached and properly aligned.
- Testing the Mirror Functionality: If the mirror is power-adjustable, test the adjustment functions to ensure the motors are working correctly. If the mirror is heated, test the heating element to ensure it is functioning.
- Final Inspection: Clean the new mirror glass with a clean microfiber cloth to remove any fingerprints or smudges. Inspect the mirror assembly to ensure it is securely attached and properly aligned.
Troubleshooting and Common Issues
While the replacement process is relatively straightforward, some common issues may arise.
- Broken Clips: If the retaining clips are broken during removal, you may need to replace the entire mirror housing or find replacement clips.
- Damaged Heating Element: If the heating element is damaged, the mirror will not defrost or demist properly. Replacing the mirror glass with a new unit that includes a heating element is the solution.
- Motor Malfunction: If the power adjustment motors are not working, the issue may be with the motor assembly itself, the wiring, or the control switch. Diagnosing the root cause requires further investigation.
- Incorrect Mirror Glass: Ensure you have the correct replacement mirror glass for your Titan's year, trim, and features. An incorrect mirror glass may not fit properly or may not have the necessary features (e.g., heating element connectors).
Advanced Considerations: Integrated Turn Signals and Blind Spot Monitoring
Some Nissan Titan models are equipped with integrated turn signals in the side mirrors. Replacing the mirror glass on these models requires extra care, as the turn signal LEDs are often integrated into the mirror housing. You may need to carefully disconnect the wiring harness for the turn signal before removing the old mirror glass.
Similarly, Titans equipped with blind spot monitoring (BSM) systems may have sensors integrated into the side mirrors. Removing the mirror glass on these models requires extreme caution to avoid damaging the BSM sensors. Disconnect the BSM sensor wiring harness (if applicable) before removing the old mirror glass.
It is highly recommended to consult a qualified technician if you are unsure about any aspect of the replacement process, especially on vehicles equipped with advanced features like integrated turn signals or blind spot monitoring.
Conclusion
Replacing the side mirror glass on a Nissan Titan is a manageable task for the mechanically inclined. By understanding the mirror assembly's components, using the correct tools, and following a methodical procedure, you can safely and effectively restore your Titan's visibility and safety. Remember to exercise caution, consult your vehicle's service manual, and seek professional assistance if needed. With patience and attention to detail, you can complete this repair and appreciate the improved functionality and aesthetics of your vehicle.