
Nissan Versa Fuel Filter
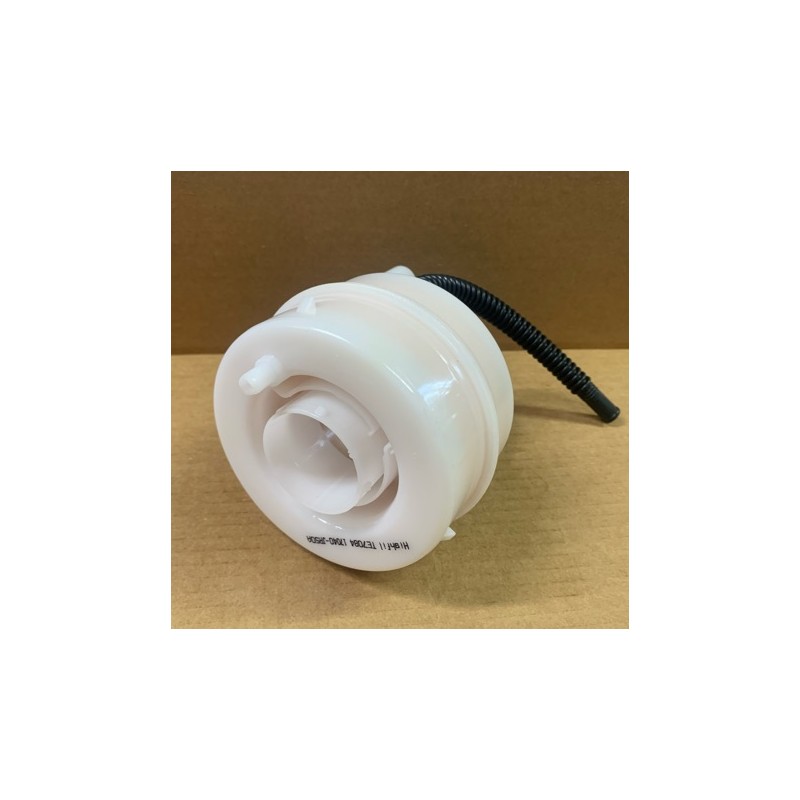
The Nissan Versa, known for its affordability and fuel efficiency, relies on a well-functioning fuel system to deliver consistent performance. A critical component of this system is the fuel filter. This article will provide an in-depth look at the Versa's fuel filter, covering its location, function, replacement procedure, and potential issues. While fuel filter design can vary based on model year, this guide will provide a general overview applicable to most Versa generations.
Understanding the Fuel Filter's Role
The fuel filter's primary purpose is to remove contaminants from the fuel before it reaches the engine's delicate components, especially the fuel injectors. Fuel, even from reputable sources, can contain dirt, rust, debris from the fuel tank, and other particulates. These contaminants can clog fuel injectors, reduce fuel flow, and ultimately lead to poor engine performance, misfires, and even engine damage. Think of it as a gatekeeper, protecting the heart of your Versa's power plant.
Without a functioning fuel filter, the following issues can arise:
- Reduced Fuel Economy: Clogged injectors spray fuel unevenly, leading to inefficient combustion.
- Rough Idling: Inconsistent fuel delivery can cause the engine to stumble and idle roughly.
- Hesitation During Acceleration: The engine may hesitate or feel sluggish when accelerating due to insufficient fuel flow.
- Misfires: A severely clogged injector may not deliver enough fuel to a cylinder, resulting in a misfire.
- Engine Damage: In extreme cases, contaminants can damage fuel injectors and other fuel system components, requiring costly repairs.
Therefore, regularly replacing the fuel filter is crucial for maintaining optimal engine performance and preventing potential problems. Neglecting this maintenance item can lead to significant downstream consequences.
Locating the Fuel Filter
The location of the fuel filter in a Nissan Versa can vary slightly depending on the year and model, but it is most often found within the fuel tank, integrated with the fuel pump assembly. This design is increasingly common in modern vehicles. This location presents both advantages and disadvantages. The primary advantage is a more compact and efficient fuel system design. The disadvantage is that replacing the filter typically requires removing the fuel pump assembly from the fuel tank, which can be a more involved process than replacing an inline filter.
Important Note: Some older Versa models *may* have an inline fuel filter located externally, typically along the fuel line running underneath the vehicle, often near the fuel tank. Refer to your vehicle's repair manual or consult a trusted mechanic to confirm the precise location for your specific model year.
Identifying the Fuel Pump Assembly
If your Versa has the fuel filter integrated with the fuel pump, you'll need to access the fuel pump assembly. This is usually accomplished by:
- Accessing the Fuel Pump Access Panel: Most Versas have an access panel located under the rear seat. Lifting the rear seat cushion will typically reveal a metal or plastic cover.
- Removing the Access Panel: Carefully remove the access panel, usually held in place by screws or clips.
- Locating the Fuel Pump Assembly: Under the access panel, you'll find the fuel pump assembly, which is a round or rectangular unit with electrical connectors and fuel lines attached.
Replacing the Fuel Filter (Integrated with Fuel Pump)
Safety First! Working with fuel requires extreme caution. Always disconnect the negative battery terminal before starting any fuel system work to prevent accidental sparks. Work in a well-ventilated area and avoid open flames or smoking. Have a fire extinguisher readily available. Consider wearing safety glasses and gloves to protect your eyes and skin.
Replacing the fuel filter when it's integrated with the fuel pump requires the following general steps. *Remember that specific procedures may vary, so consult your vehicle's repair manual for detailed instructions.*
- Depressurize the Fuel System: This is a crucial step to prevent fuel from spraying out when you disconnect the fuel lines. There are several methods to do this, including disconnecting the fuel pump relay and starting the engine until it stalls, or using a fuel pressure gauge and relief valve (if available).
- Disconnect Electrical Connectors and Fuel Lines: Carefully disconnect the electrical connectors and fuel lines attached to the fuel pump assembly. Be prepared for some fuel spillage, and have rags ready to absorb it. Use appropriate fuel line disconnect tools if required.
- Remove the Fuel Pump Assembly: The fuel pump assembly is typically held in place by a retaining ring. Use a specialized fuel pump retaining ring tool (or a suitable substitute if you are careful) to loosen and remove the retaining ring. Carefully lift the fuel pump assembly out of the fuel tank.
- Replace the Fuel Filter: Once the fuel pump assembly is removed, you can access the fuel filter. The filter is usually attached to the fuel pump with clips or screws. Carefully remove the old filter and install the new one, ensuring it is properly seated and secured. Pay attention to the orientation of the filter; it must be installed correctly for proper fuel flow.
- Reinstall the Fuel Pump Assembly: Carefully lower the fuel pump assembly back into the fuel tank, aligning it properly. Reinstall the retaining ring, ensuring it is securely tightened.
- Reconnect Fuel Lines and Electrical Connectors: Reconnect the fuel lines and electrical connectors to the fuel pump assembly. Ensure they are properly seated and secured.
- Reinstall the Access Panel: Reinstall the fuel pump access panel and secure it with screws or clips.
- Reconnect the Battery: Reconnect the negative battery terminal.
- Prime the Fuel System: Turn the ignition key to the "ON" position (without starting the engine) for a few seconds. Repeat this several times to allow the fuel pump to prime the fuel system.
- Start the Engine: Start the engine and check for any fuel leaks. If you detect any leaks, immediately stop the engine and address the issue.
When to Replace the Fuel Filter
Nissan typically recommends replacing the fuel filter every 30,000 to 50,000 miles. However, this is just a general guideline. Factors such as driving conditions, fuel quality, and the age of the vehicle can influence the filter's lifespan. If you experience any of the symptoms mentioned earlier (reduced fuel economy, rough idling, hesitation during acceleration, misfires), it may be time to replace the fuel filter, even if you haven't reached the recommended mileage interval.
Pro Tip: It's often a good idea to replace the fuel filter when you replace the fuel pump, as they are often accessed together and the filter is relatively inexpensive.
Troubleshooting Fuel Filter Issues
If you suspect a problem with your fuel filter, consider these troubleshooting steps:
- Check for Fuel Leaks: Inspect the fuel lines and connections around the fuel filter for any signs of leaks.
- Check Fuel Pressure: Use a fuel pressure gauge to check the fuel pressure at the fuel rail. Low fuel pressure can indicate a clogged fuel filter or a failing fuel pump.
- Inspect the Fuel Filter: If possible, inspect the old fuel filter for signs of excessive contamination. A heavily contaminated filter is a clear indication that it needs to be replaced.
Conclusion
The fuel filter is a vital component of the Nissan Versa's fuel system, ensuring clean fuel reaches the engine. While its location inside the fuel tank on many models adds complexity to the replacement process, understanding its function, replacement procedure, and potential issues can help you maintain your Versa's performance and prevent costly repairs. Remember to always prioritize safety when working with fuel, and consult your vehicle's repair manual for specific instructions. By staying proactive with fuel filter maintenance, you can keep your Versa running smoothly for years to come.
Disclaimer: This article provides general information and should not be considered a substitute for professional mechanical advice. Always consult your vehicle's repair manual and follow safety precautions when performing any maintenance or repair work.