Nissan Xterra Front Brake Replacement
Replacing the front brakes on a Nissan Xterra is a routine maintenance task that, while involving mechanical work, is well within the capabilities of a competent DIY enthusiast. This guide delves into the process, providing not just step-by-step instructions but also an understanding of the underlying principles and potential pitfalls. This isn't just about swapping parts; it's about understanding the mechanics of braking.
Understanding the Xterra's Front Brake System
Before diving in, let's briefly examine the components we'll be dealing with. The Xterra utilizes a disc brake system on the front wheels. Key components include:
- Rotor (Brake Disc): A metal disc attached to the wheel hub. It rotates with the wheel and provides a surface for the brake pads to grip.
- Caliper: A clamp-like assembly that houses the brake pads and pistons. It's responsible for pressing the pads against the rotor.
- Brake Pads: Friction material bonded to a metal backing plate. These are the components that wear down over time as they contact the rotor.
- Pistons: Hydraulic pistons within the caliper that push the brake pads.
- Brake Lines: Flexible hoses that carry brake fluid from the master cylinder to the calipers.
- Brake Fluid: A hydraulic fluid that transmits pressure from the brake pedal to the calipers.
- Dust Shield (Splash Guard): A metal shield behind the rotor that protects the brake components from debris.
The fundamental principle is simple: pressing the brake pedal forces brake fluid into the calipers, causing the pistons to extend and press the brake pads against the rotor. The friction between the pads and rotor slows the wheel's rotation, thereby slowing the vehicle. Understanding this interaction is crucial for proper maintenance.
Tools and Materials Required
Having the right tools makes the job significantly easier and safer. Here's a comprehensive list:
- New Brake Pads: Ensure you purchase pads compatible with your Xterra's year and trim. Consider the type of driving you do (e.g., towing, off-roading) when selecting pads. Different pad compounds offer varying levels of performance and longevity.
- New Rotors (Recommended): Unless your existing rotors are relatively new and within acceptable thickness specifications (check your vehicle's service manual), it's generally recommended to replace them along with the pads.
- Brake Cleaner: For cleaning the rotor and caliper.
- Caliper Piston Compression Tool: This tool is essential for retracting the caliper pistons without damaging them. Using a C-clamp can sometimes work, but a dedicated tool is much safer and more effective.
- Socket Set: Including sockets for the caliper bolts, wheel lug nuts, and potentially the caliper bracket bolts. Metric sockets are required for the Xterra.
- Wrench Set: For various nuts and bolts.
- Torque Wrench: Absolutely crucial for properly tightening the caliper bolts, wheel lug nuts, and any other fasteners. Using the correct torque prevents damage and ensures safety.
- Jack and Jack Stands: Never work under a vehicle supported only by a jack. Jack stands are essential for safety.
- Wheel Chocks: Place wheel chocks behind the rear wheels to prevent the vehicle from rolling.
- Gloves: To protect your hands.
- Safety Glasses: To protect your eyes from brake dust and debris.
- Brake Fluid: For topping off the brake fluid reservoir after the brake job. Use the correct type of brake fluid specified in your owner's manual (typically DOT 3 or DOT 4).
- Penetrating Oil: To help loosen rusted or stubborn bolts.
- Wire Brush: For cleaning the caliper bracket.
- Rags: For cleaning up spills and wiping down parts.
- Brake Pad Spreader (Optional but Recommended): For compressing the caliper pistons if you don't have a specialized piston compression tool.
- Shop Manual (Recommended): A service manual for your specific Xterra year provides detailed instructions, torque specifications, and diagrams.
Step-by-Step Brake Replacement Procedure
Safety First: Before starting, ensure the vehicle is parked on a level surface, the parking brake is engaged, and the wheels are chocked.
- Loosen Lug Nuts: Before lifting the vehicle, use a lug wrench to loosen the lug nuts on the wheel you'll be working on. Don't remove them completely; just break them free.
- Raise the Vehicle: Use a jack to lift the vehicle and securely support it with jack stands placed under the frame rails. Never work under a vehicle supported only by a jack.
- Remove the Wheel: Remove the lug nuts completely and carefully remove the wheel.
- Inspect the Brake Components: Before disassembling anything, take a good look at the existing brake components. Note the position of the brake pads, the condition of the rotor, and any signs of leaks or damage.
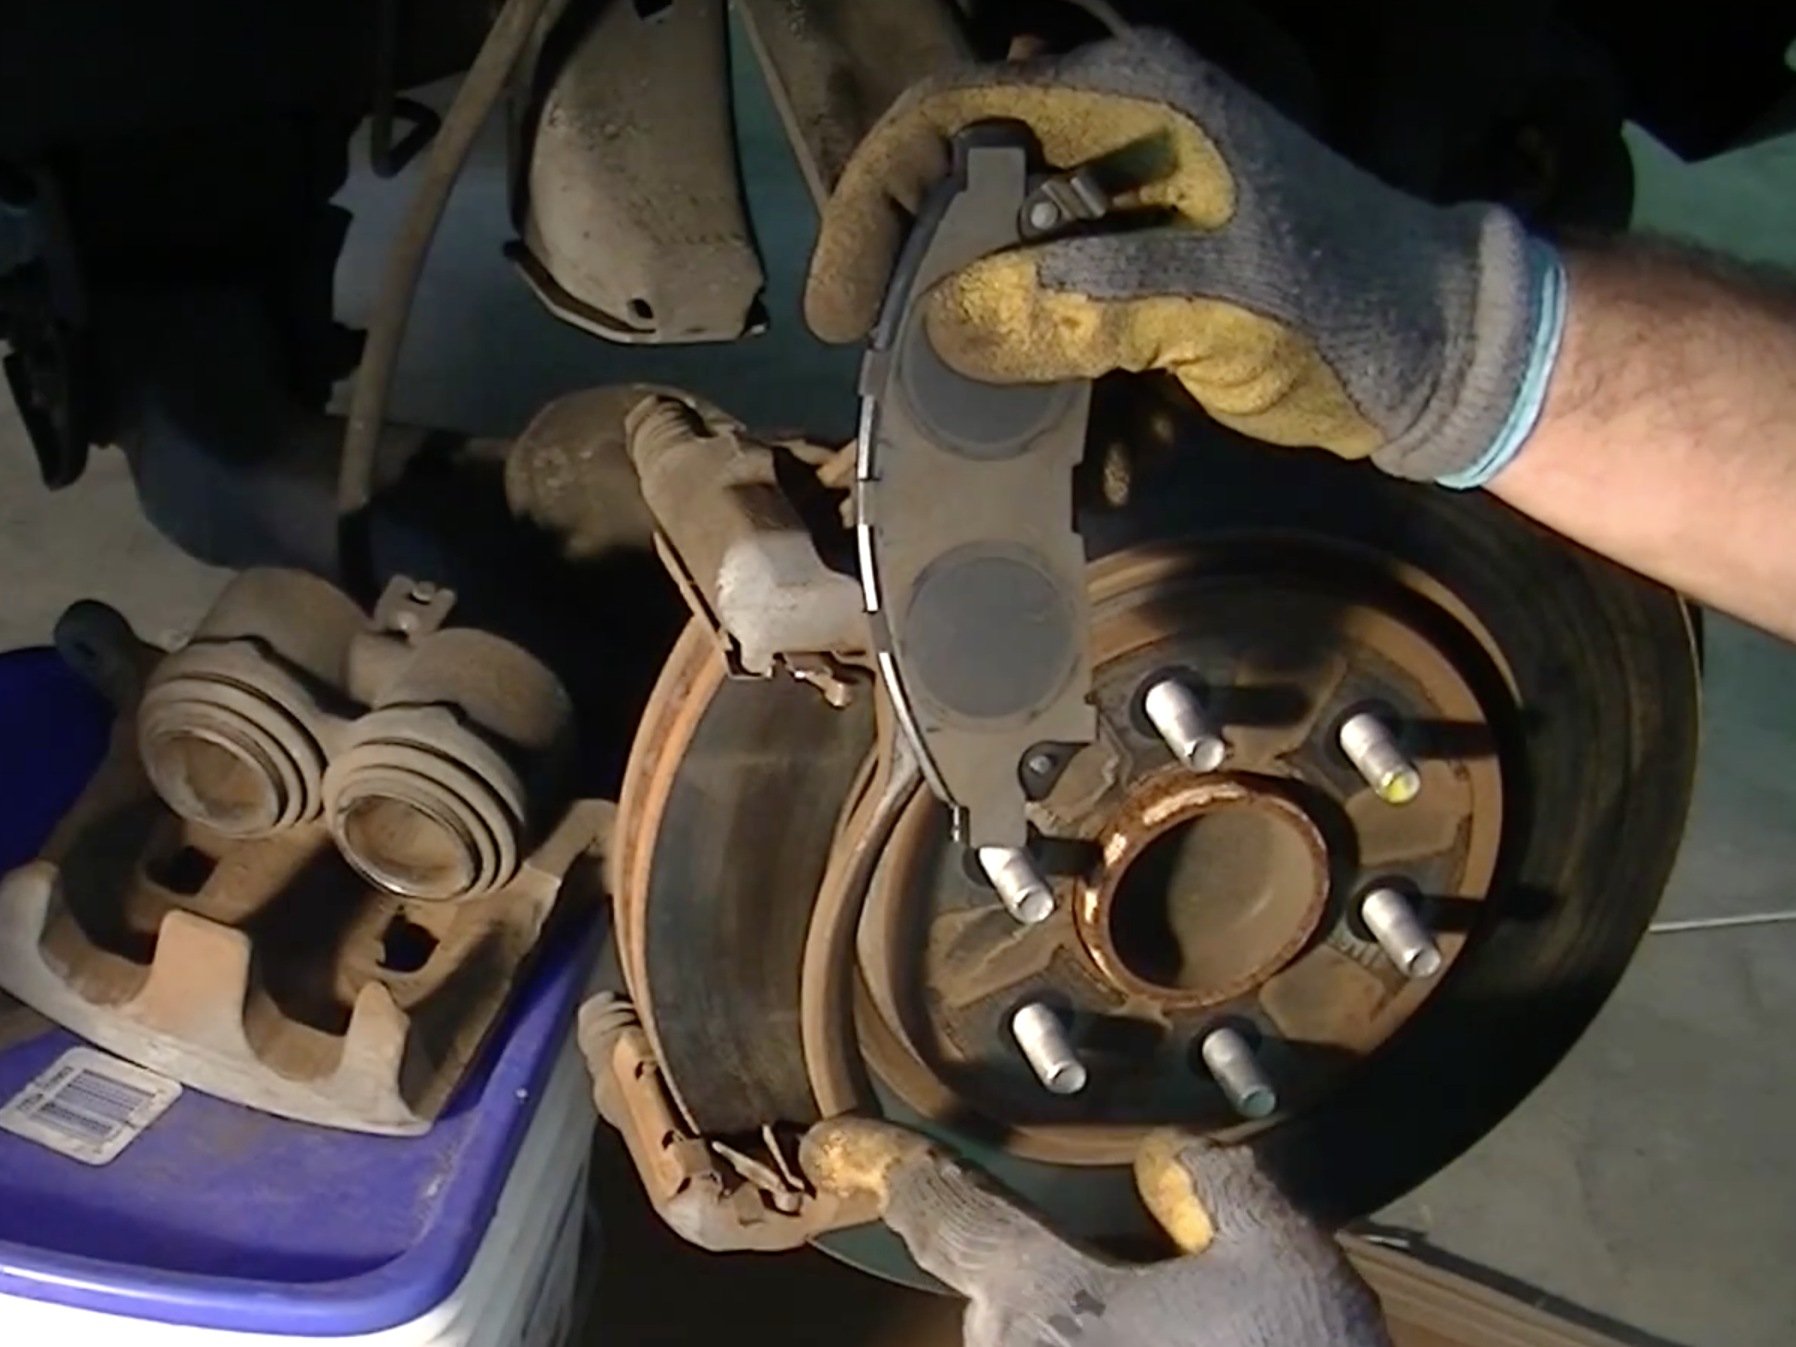
- Remove the Caliper: Locate the caliper bolts (typically two bolts on the back of the caliper). Use a socket wrench to remove these bolts. You may need to use penetrating oil if they are rusted. Once the bolts are removed, carefully slide the caliper off the rotor. Be careful not to damage the brake line. If the caliper is difficult to remove, you may need to gently pry it off with a screwdriver. Important: Do not let the caliper hang by the brake line. Support it with a bungee cord or wire.
- Remove the Old Brake Pads: Slide the old brake pads out of the caliper bracket. Note their orientation for proper installation of the new pads.
- Compress the Caliper Piston(s): Use a caliper piston compression tool to carefully retract the piston(s) back into the caliper bore. This is necessary to create enough space for the new, thicker brake pads. Place the old brake pad against the piston to ensure even pressure.
- Remove the Caliper Bracket (Optional): If you're replacing the rotors, you'll need to remove the caliper bracket. Locate the bracket bolts (typically two larger bolts on the back of the knuckle). These bolts can be very tight, so you may need to use a breaker bar for leverage. Once the bolts are removed, carefully remove the caliper bracket.
- Remove the Rotor: If the rotor is rusted to the hub, you can try tapping it with a hammer (use a rubber mallet or a block of wood to protect the rotor surface). You can also use penetrating oil to help loosen it. Some rotors have threaded holes that you can use to push the rotor off the hub by screwing in bolts.
- Clean and Inspect: Clean the caliper bracket with a wire brush to remove any rust or debris. Inspect the brake lines for any cracks or leaks. If you find any damage, replace the brake lines. Also, clean the hub surface where the rotor mounts to remove any rust or debris.
- Install the New Rotor: Carefully install the new rotor onto the hub. Make sure it sits flush against the hub surface.
- Install the Caliper Bracket (if removed): Install the caliper bracket and tighten the bracket bolts to the torque specification listed in your service manual.
- Install the New Brake Pads: Install the new brake pads into the caliper bracket. Make sure they are properly seated and oriented correctly (match the orientation of the old pads).
- Reinstall the Caliper: Carefully slide the caliper back onto the rotor and caliper bracket. Align the caliper bolts and tighten them to the torque specification listed in your service manual.
- Repeat on the Other Side: Repeat the entire process on the other front wheel.
- Bleed the Brakes (Recommended): Although not strictly necessary if you only compressed the pistons and didn't open the brake lines, bleeding the brakes after a brake job is highly recommended. This removes any air that may have entered the system and ensures optimal brake performance. Consult a separate guide on how to bleed brakes properly.
- Reinstall the Wheels: Reinstall the wheels and tighten the lug nuts by hand.
- Lower the Vehicle: Carefully lower the vehicle to the ground and remove the jack stands.
- Torque the Lug Nuts: Use a torque wrench to tighten the lug nuts to the torque specification listed in your owner's manual. Tighten them in a star pattern.
- Pump the Brakes: Before driving, pump the brake pedal several times to seat the brake pads against the rotors.
- Test Drive: Perform a slow-speed test drive to ensure the brakes are functioning properly. Listen for any unusual noises and feel for any vibrations.
Important Considerations and Troubleshooting
- Rotor Runout: After installing new rotors, it's a good idea to check for rotor runout using a dial indicator. Excessive runout can cause brake pulsations.
- Brake Fluid Leaks: Carefully inspect all brake lines and connections for leaks after the brake job.
- Uneven Pad Wear: If you notice uneven pad wear, it could indicate a problem with the caliper or caliper bracket.
- Sticking Caliper: A sticking caliper can cause the brake pad to drag against the rotor, leading to excessive heat and wear.
- ABS Light: If the ABS light comes on after the brake job, it could indicate a problem with the ABS system.
- Torque Specifications: Always use the correct torque specifications for all fasteners. Overtightening can damage the components, while undertightening can lead to loosening and failure.
Replacing your Nissan Xterra's front brakes is a manageable DIY project that can save you money and provide a deeper understanding of your vehicle's mechanics. By following these steps carefully and paying attention to detail, you can ensure a safe and effective brake job.