Parts List And Procedure For A Type-x 'kouki' Front End Conversion On An S13
So, you're thinking about giving your S13 a fresh new face with a Type-X 'Kouki' front end conversion? Excellent choice! It's a popular and arguably one of the best looking modifications you can make to an S13, instantly modernizing its appearance. This conversion involves swapping out your existing front end components for those from a later model S13 Silvia, specifically the 'Kouki' or late model, which was factory equipped with the Type-X aero package. This article will walk you through the parts you'll need and the basic procedure involved.
Understanding the Conversion
Before we dive into the parts list, it's important to understand what's involved. This isn't just bolting on a new bumper. It's a comprehensive swap that requires careful planning and attention to detail. While technically bolt-on, some minor modifications may be needed depending on your car and the origin of your parts.
Parts List: The Essential Ingredients
Here's a breakdown of the parts you'll need for a complete Type-X front end conversion. This assumes you're starting with a completely stock S13 and aiming for a complete Type-X look. Note: Prices are *estimates* and can vary wildly depending on condition, source (new, used, aftermarket), and location. Factor in shipping costs, especially if importing parts.
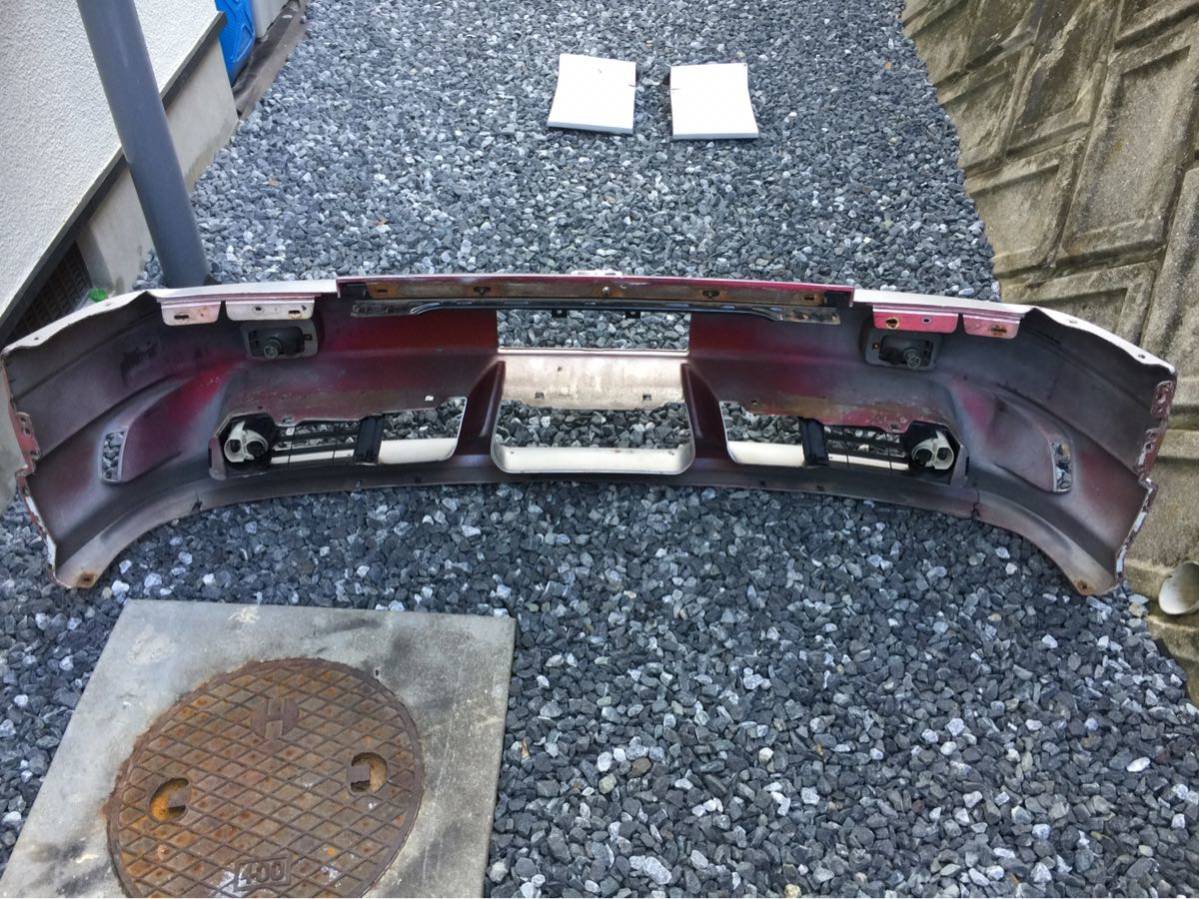
- Type-X Front Bumper: This is the main piece. Expect to pay anywhere from $500-$1500+ for a used OEM bumper, or $200-$600+ for an aftermarket replica. Look for good condition with minimal damage.
- Type-X Front Lip: Attaches to the bottom of the bumper. Typically included with the bumper, but sometimes sold separately. Price range: $100-$400, depending on OEM vs. aftermarket.
- Type-X Side Skirts: These complete the side profile to match the front bumper. Expect to pay $300-$800 for a set, again depending on OEM vs. aftermarket and condition.
- Type-X Rear Spats (Valances): These attach to the rear bumper to match the side skirts and front bumper. Usually around $200-$600 a set.
- Headlights: 'Kouki' headlights are different from the earlier model. A pair will set you back $300-$800 depending on condition. Check for broken tabs and clouding.
- Corner Lights (Turn Signals): These fit into the corners of the headlights. $50-$150 for a pair.
- Bumper Brackets/Supports: These attach the bumper to the chassis. Sometimes included with the bumper, but it's wise to confirm. Price around $50-$100 if purchased separately.
- Turn Signal Stalk (with Fog Light Switch): If you want to utilize fog lights (if your bumper has them), you'll need a new turn signal stalk with the fog light switch. This can be found for $50-$150.
- Fog Lights (Optional): If your Type-X bumper has fog light openings, you'll need the fog lights themselves. Prices vary considerably; aftermarket options are readily available. $100-$300 for a pair. You will also need the wiring for the fog lights.
- Grille (Optional): You may want a Type-X grille to complete the look. Price: $50-$150.
- Hardware: Don't underestimate the importance of having the correct bolts, nuts, and clips. Some original hardware might be brittle or missing. A hardware kit specifically for this conversion is a good idea. $20-$50.
- Paint: Unless you find parts already in your car's color, you'll need to factor in the cost of paint and potentially bodywork. This is a significant cost, potentially $500-$1500+, depending on the quality of the paint job.
Tip: Consider buying a complete kit if possible. This can often save you money and ensure that all the parts are compatible.
Tools Required
Before you begin, make sure you have the following tools on hand:
- Socket set (metric)
- Wrench set (metric)
- Screwdrivers (Phillips and flathead)
- Pliers
- Jack and jack stands
- Wheel chocks
- Drill (for minor modifications if needed)
- Trim removal tools
- Masking tape
- Sandpaper (various grits)
- Primer
- Paint (if painting parts yourself)
- Clear coat (if painting parts yourself)
- Safety glasses
- Gloves
Procedure: Step-by-Step Guide
This is a general overview of the installation process. Always refer to a service manual or online resources for detailed instructions specific to your vehicle.
Step 1: Preparation
Safety first! Disconnect the negative battery terminal. Park your car on a level surface, engage the parking brake, and use wheel chocks. Raise the front of the car and secure it with jack stands.
Step 2: Removing the Old Front End
Carefully remove the existing front bumper, headlights, corner lights, and any other components you're replacing. Take photos as you disassemble everything – this will be helpful when reassembling. Pay attention to how everything is attached and label any wires you disconnect. Don't force anything – if it's stuck, check for hidden fasteners.
Step 3: Preparing the New Parts
Inspect all your new parts for damage. If you're painting them, now's the time to prep them. Sand down any imperfections, apply primer, and then paint them in your desired color, followed by clear coat. Allow the paint to fully cure before proceeding. This is a critical step for a professional-looking finish.
Step 4: Installing the New Bumper Brackets
Install the new bumper brackets/supports onto the chassis. These are essential for properly mounting the new bumper. Make sure they are securely fastened.
Step 5: Installing the Headlights and Corner Lights
Install the 'Kouki' headlights and corner lights. Connect the wiring harnesses. You may need to adapt the wiring slightly depending on the origin of your headlights. Test the lights to ensure they are working correctly before proceeding.
Step 6: Installing the New Bumper
Carefully align the new bumper with the brackets and attach it using the appropriate hardware. Make sure the bumper is properly aligned and securely fastened. If you're installing fog lights, now's the time to do so. Connect the wiring for the fog lights. You may need to run new wiring from the battery and install a relay.
Step 7: Installing the Side Skirts and Rear Spats
Install the side skirts and rear spats. These usually attach with screws, clips, and sometimes double-sided tape. Ensure they are properly aligned and securely fastened.
Step 8: Final Touches
Double-check all connections and hardware. Reconnect the negative battery terminal. Lower the car and remove the jack stands. Test all the lights to ensure they are working correctly. Clean up your workspace.
Potential Issues and Solutions
Here are some common issues you might encounter during the conversion and how to address them:
- Fitment Issues: Aftermarket parts may not fit perfectly. You may need to trim or modify them to achieve a proper fit. This is common with replica bumpers and side skirts. Patience and careful adjustment are key.
- Wiring Issues: The wiring harnesses for the headlights and corner lights may not be directly compatible. You may need to adapt the wiring or use adapters. Consult a wiring diagram for your car and the 'Kouki' model.
- Missing Hardware: It's common to find that some hardware is missing. Purchase a hardware kit or source the necessary bolts, nuts, and clips from a local hardware store.
- Damage During Shipping: Inspect your parts carefully upon arrival. If they are damaged, file a claim with the shipping company immediately.
Approximate Cost Breakdown
Here's a rough estimate of the total cost of the conversion:
- Parts: $1500-$4000+ (depending on OEM vs. aftermarket and condition)
- Paint: $500-$1500+
- Hardware: $50-$100
- Tools: (Assuming you already have most tools) $0-$100
- Labor (if hiring a professional): $500-$1500+
Total: $2550-$7200+
Important: This is just an estimate. The actual cost may vary significantly depending on your specific circumstances.
Conclusion
A Type-X front end conversion is a rewarding project that can dramatically improve the look of your S13. While it requires careful planning and attention to detail, the results are well worth the effort. By following these steps and addressing any potential issues, you can successfully transform your S13 into a head-turning machine. Good luck with your project!