Procedure For Applying A Flocked Finish To A 240sx Dashboard
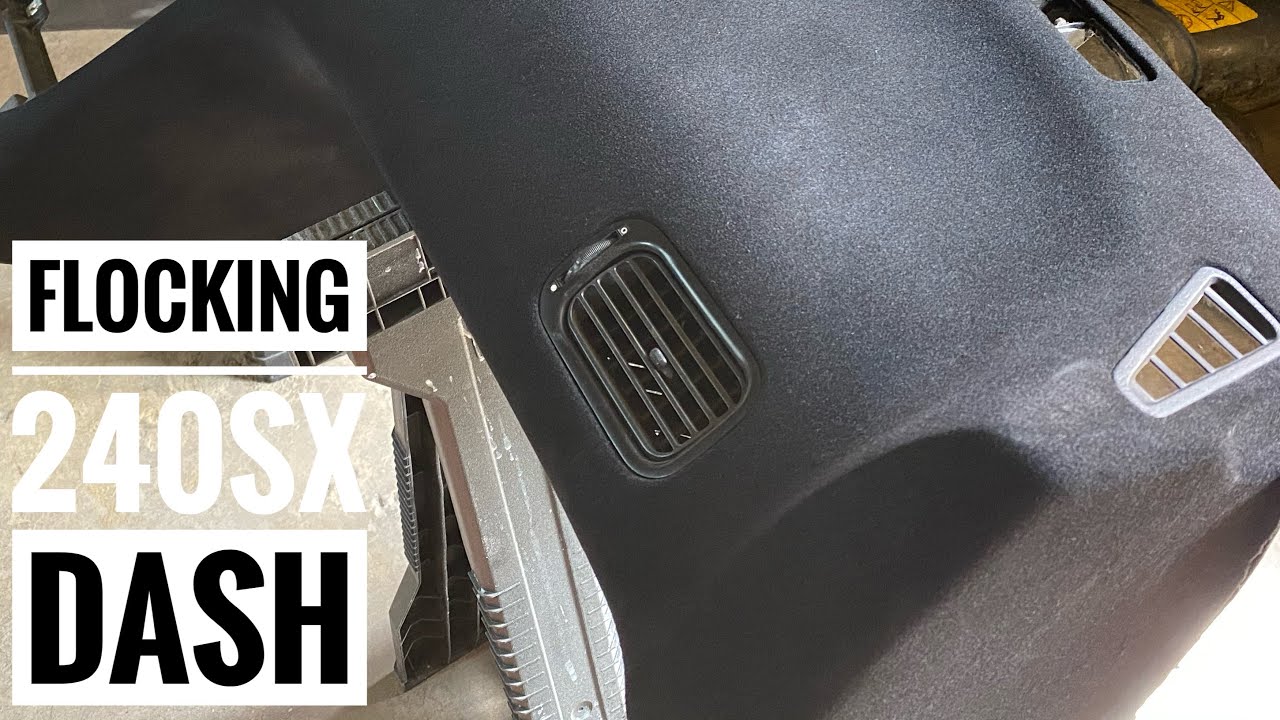
So, you're thinking about flocking the dashboard of your 240SX? That's a great idea! Flocking not only gives your interior a unique, custom look, but it can also reduce glare and heat buildup. A flocked dashboard also adds a soft, tactile feel that many owners find quite appealing. While it's not exactly a "bolt-on" modification, it's definitely achievable with some patience and the right tools. This guide will walk you through the process, highlighting potential pitfalls and offering solutions to ensure a professional-looking finish. We'll cover everything from preparation to application, so you can tackle this project with confidence.
Understanding the Challenge: Why Flocking Isn't Just Spraying Fuzzy Stuff
Before diving in, it's important to understand that flocking isn't as simple as just spraying some adhesive and throwing on some fibers. The key to a durable and visually appealing flocked finish lies in meticulous preparation and proper application technique. Shortcuts will almost always result in a subpar finish that's prone to peeling, uneven texture, and generally looking unprofessional. Common issues include:
- Peeling: Caused by inadequate surface preparation or using the wrong adhesive.
- Uneven Texture: Resulting from inconsistent adhesive application or improper flocking technique.
- Dust and Contamination: Leading to a bumpy or speckled finish.
- Fading: Using low-quality flocking fibers that are not UV resistant.
Fortunately, these issues can be easily avoided by following the steps outlined below.
The Solution: A Step-by-Step Guide to Flocking Your 240SX Dashboard
Here's a detailed procedure for applying a flocked finish to your 240SX dashboard. Remember to take your time and pay attention to detail.
Step 1: Dashboard Removal - The Crucial First Step
This is arguably the most important part. You must remove the dashboard from the car. Trying to flock it in place is a recipe for disaster. Refer to your 240SX service manual or a reputable online guide for detailed instructions on dashboard removal. Disconnecting the battery before beginning any electrical work is paramount for safety. Take pictures as you disassemble – it'll save you headaches during reinstallation! Pay special attention to grounding straps and wiring harness routing.
Step 2: Thorough Cleaning - The Foundation for Success
Once the dashboard is removed, clean it thoroughly with a strong degreaser. Old Armor-All, grease, and grime will prevent the adhesive from bonding properly. Use a plastic-safe cleaner like Simple Green or a dedicated automotive interior cleaner. Scrub all surfaces with a brush, paying close attention to textured areas and crevices. Rinse thoroughly with water and allow it to dry completely. You can use compressed air to speed up the drying process.
Step 3: Surface Preparation - Creating a Bonding Surface
Sanding is key. Start with a coarser grit sandpaper (180-220) to scuff up the existing surface and remove any imperfections. Follow this with a finer grit (320-400) to smooth out the scratches. This process creates a "key" for the adhesive to grip onto. For areas with particularly smooth plastic, you might consider using a plastic adhesion promoter before applying the adhesive. This is especially important for areas that are prone to flexing or high wear. Clean the dashboard again after sanding to remove all dust particles. A tack cloth works wonders for this.
Step 4: Masking - Protecting Areas You Don't Want Flocked
Carefully mask off any areas you don't want flocked, such as vents, gauge openings, and speaker grilles. Use high-quality masking tape and ensure it's firmly adhered to the surface. Overlap the tape slightly to prevent adhesive from seeping underneath. Consider using a razor blade to precisely cut the tape around intricate shapes. This step is crucial for a clean, professional look. Double-check your masking job before proceeding to the next step.
Step 5: Adhesive Application - Even and Consistent Coverage is Key
Use a high-quality, specialized flocking adhesive. Many kits come with their own adhesive, which is usually the best option. Apply the adhesive in a thin, even coat using a spray gun. Avoid applying too much adhesive in one area, as this can lead to clumping and an uneven flocked finish. Work in a well-ventilated area and wear a respirator to protect yourself from the fumes. Always follow the manufacturer's instructions regarding drying time and application thickness. Multiple thin coats are better than one thick coat. Consider testing the adhesive on a scrap piece of plastic before applying it to the dashboard.
Step 6: Flocking - The Moment of Truth
This is where the magic happens. Use a flocking applicator (usually included in flocking kits) to apply the flocking fibers to the adhesive-coated surface. Hold the applicator at the recommended distance and move it in a smooth, even motion. Ensure that the entire surface is covered with flocking fibers. Some kits use electrostatic applicators, which charge the fibers to help them stand up straight and create a denser, more uniform finish. This technique is highly recommended. After applying the flocking, gently tap the dashboard to remove any loose fibers.
Step 7: Drying and Curing - Patience is a Virtue
Allow the adhesive to dry completely according to the manufacturer's instructions. This can take anywhere from several hours to a full day. Avoid touching the flocked surface during this time. Some adhesives require heat curing to achieve maximum bond strength. If this is the case, follow the manufacturer's instructions carefully. Rushing the drying process can lead to a weak bond and a subpar finish.
Step 8: Cleaning and Excess Fiber Removal - The Final Touches
Once the adhesive is completely dry, use a soft brush or vacuum cleaner to remove any loose fibers. Be gentle, as you don't want to damage the flocked finish. A lint roller can also be helpful for removing stubborn fibers. Inspect the flocked surface for any imperfections and touch up any areas that need attention. A small paintbrush can be used to apply adhesive and flocking fibers to small areas.
Step 9: Reassembly - Putting It All Back Together
Carefully remove the masking tape and inspect the edges for any adhesive residue. Clean any residue with a mild solvent. Reinstall the dashboard into your 240SX, following the reverse of the disassembly procedure. Ensure that all wiring harnesses are properly connected and routed. Double-check all connections before reconnecting the battery.
Tools and Materials Needed
- Dashboard removal tools (sockets, wrenches, screwdrivers, trim removal tools)
- Degreaser and cleaning supplies
- Sandpaper (180-220 grit and 320-400 grit)
- Masking tape and razor blade
- Flocking kit (including adhesive, flocking fibers, and applicator)
- Spray gun (if required by the adhesive)
- Respirator
- Tack cloth
- Soft brush or vacuum cleaner
- Lint roller (optional)
- Plastic adhesion promoter (optional)
Estimated Cost
The cost of flocking your 240SX dashboard can vary depending on the quality of the materials and tools you use. A basic flocking kit can cost anywhere from $50 to $150. Additional materials, such as sandpaper, masking tape, and cleaning supplies, can add another $20 to $50. If you need to purchase a spray gun, that can add another $50 to $200. Overall, you can expect to spend between $120 and $400 to flock your dashboard. The price can drastically increase if you decide to hire a professional, where labor costs will significantly impact the overall expenses.
Troubleshooting Tips
- Peeling: Re-sand the affected area and apply a fresh coat of adhesive and flocking fibers. Ensure that the surface is properly cleaned and prepared before applying the adhesive.
- Uneven Texture: Re-apply the adhesive in a more even coat and use a flocking applicator to distribute the flocking fibers evenly.
- Dust and Contamination: Clean the dashboard thoroughly before applying the adhesive and work in a dust-free environment.
- Fading: Use high-quality, UV-resistant flocking fibers.
- Adhesive Runs: Apply the adhesive in thin, even coats and avoid over-saturating the surface.
Conclusion
Flocking your 240SX dashboard is a rewarding project that can dramatically improve the look and feel of your interior. By following these steps and paying attention to detail, you can achieve a professional-looking finish that will last for years to come. While it requires patience and some effort, the results are well worth it. Just remember: Preparation is key, take your time, and don't be afraid to experiment. Good luck, and happy flocking!