Rear Bumper Protectort99b1-6sa0a$ 175.00
Alright, let's talk about the Rear Bumper Protector, specifically model number T99B1-6SA0A, retailing around $175.00. You're considering adding one, good on you. Protecting that rear bumper is a smart move, especially if you frequently load and unload cargo, or just want to ward off those pesky parking dings. This article will break down what to expect, the installation process, and some potential pitfalls to watch out for.
Understanding the T99B1-6SA0A Rear Bumper Protector
First off, let's clarify what this particular protector is designed to do. It's primarily a cosmetic and minor impact protection device. Don't expect it to prevent significant damage in a rear-end collision. Its main function is to prevent scratches, scuffs, and minor dents that can occur during routine loading/unloading or from the occasional parking mishap.
Typically, the T99B1-6SA0A is made from a durable material, often ABS plastic (Acrylonitrile Butadiene Styrene) or a similar polymer blend. ABS is chosen for its impact resistance, ability to withstand temperature variations, and relatively low cost. Some versions might incorporate polyurethane for added flexibility and resistance to UV degradation. UV degradation is the breaking down of the plastic from sun exposure.
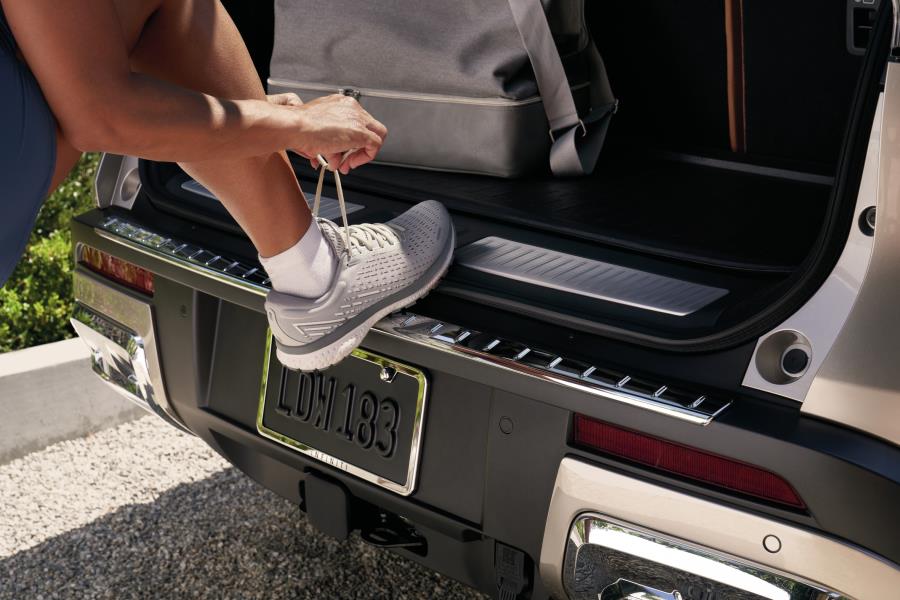
The protector itself will likely have a textured surface. This serves a dual purpose: it provides a degree of slip resistance when you're leaning against the bumper, and it helps to camouflage minor scratches that inevitably occur over time. Some protectors may even incorporate a brushed metal or chrome accent for a more premium look.
Key Features to Consider
- Material Composition: Understanding the material used helps gauge its durability and resistance to wear and tear. Look for protectors specifically designed for your vehicle's environment. For example, if you live in an area with harsh winters, a protector resistant to cold temperatures and salt is crucial.
- Coverage Area: How much of the bumper does it actually protect? Some protectors only cover the top surface, while others extend further down the rear face, offering more comprehensive coverage. This model generally covers the upper bumper surface, the area most susceptible to damage during loading and unloading.
- Mounting Method: This is critical for a secure and lasting installation. The T99B1-6SA0A probably utilizes a combination of automotive-grade adhesive tape (likely 3M VHB – Very High Bond) and potentially mechanical fasteners like screws or clips.
- Fit and Finish: A protector that doesn't fit precisely will look out of place and potentially cause damage to the underlying paint. Ensure the protector is specifically designed for your vehicle's make and model year. Check online reviews and forums for feedback on fitment quality.
Installation: A Step-by-Step Guide for the DIYer
Installing the T99B1-6SA0A is usually a straightforward process, but attention to detail is crucial for a professional-looking result. Here's a general guide. Always refer to the manufacturer's instructions, as there may be specific nuances for your vehicle.
- Preparation is Key: This is the most important step. Thoroughly clean the area where the protector will be applied. Use a wax and grease remover to eliminate any contaminants that could prevent the adhesive from bonding properly. Follow this with a wipe down using isopropyl alcohol. The surface needs to be spotless.
- Test Fit: Before peeling off any adhesive backing, position the protector on the bumper to ensure proper alignment. Pay close attention to the edges and corners. Mark the outline of the protector with painter's tape. This will serve as a visual guide during the actual installation.
- Adhesive Application: If the protector comes with pre-applied adhesive tape, carefully peel back a small portion of the backing. Position the protector within the painter's tape outline, ensuring accurate alignment. Press firmly on the exposed adhesive, then slowly peel back the remaining backing while applying consistent pressure along the entire protector surface.
- Mechanical Fasteners (If Applicable): If the protector requires screws or clips, carefully drill pilot holes in the bumper according to the manufacturer's instructions. Use appropriate sized drill bits. Be extremely cautious not to damage any underlying wiring or components. Secure the protector with the provided fasteners.
- Pressure and Cure Time: After installation, apply firm, even pressure to the entire protector surface. Use a rubber roller or a soft cloth to ensure maximum contact between the adhesive and the bumper. Allow the adhesive to cure for the recommended time (typically 24-72 hours) before exposing it to moisture or stress. Curing time is dependent on temperature and humidity.
Potential Challenges and Troubleshooting
Even with careful preparation, you might encounter some challenges during installation. Here are a few common issues and how to address them:
- Adhesive Not Sticking: This is usually due to improper surface preparation. Re-clean the surface with wax and grease remover and isopropyl alcohol. You might also need to use an adhesion promoter, a chemical that enhances the bonding of the adhesive to the surface. Ensure the ambient temperature is within the recommended range for the adhesive to function properly.
- Misalignment: If you notice misalignment after partially applying the protector, you may be able to carefully peel it back and reposition it. However, this can weaken the adhesive. If the misalignment is significant, it's better to start over with a new set of adhesive strips.
- Bubbles: Air bubbles trapped under the protector can be unsightly. Use a soft cloth or rubber roller to gently work the bubbles towards the edges. In some cases, small bubbles will disappear on their own over time.
- Damage During Drilling: If you're installing a protector with mechanical fasteners, be extremely careful when drilling pilot holes. Use a center punch to create a starting point for the drill bit and avoid excessive pressure. If you're unsure about drilling, it's best to consult a professional.
Alternative Bumper Protection Options
The T99B1-6SA0A is just one option for protecting your rear bumper. Consider these alternatives:
- Paint Protection Film (PPF): PPF is a clear, self-healing film that's applied directly to the paint surface. It offers excellent protection against scratches, chips, and UV damage. However, it's generally more expensive than a bumper protector.
- Bumper Guards: These are typically larger, more robust protectors made from rubber or plastic. They offer superior impact protection but can be less aesthetically pleasing.
- DIY Solutions: Some car owners opt for DIY solutions like applying multiple layers of heavy-duty tape or fabricating their own protectors from rubber or plastic sheeting. While these options can be cost-effective, they often lack the fit and finish of a professionally designed protector.
Is the T99B1-6SA0A Worth It?
Ultimately, whether the T99B1-6SA0A is worth the $175.00 price tag depends on your individual needs and priorities. If you're primarily concerned with preventing minor scratches and scuffs during loading and unloading, and you value a clean, integrated look, then it's a worthwhile investment. However, if you require more robust impact protection, or you're on a tight budget, you might want to consider alternative options.
Before making a decision, research the specific model, read online reviews, and compare prices from different vendors. Also, consider your own skill level and comfort with the installation process. If you're not confident in your ability to install the protector correctly, it's best to have it done by a professional.
Pro Tip: Regardless of the bumper protector you choose, regular cleaning and maintenance will help to prolong its lifespan and keep it looking its best. Use a mild soap and water solution to remove dirt and debris, and avoid using abrasive cleaners that could damage the surface.