Removal And Deletion Of The Clutch Damper Loop For Improved Pedal Feel
Alright, let's talk about a modification that can significantly improve the feel of your clutch pedal: removing or deleting the clutch damper loop, also sometimes referred to as a clutch delay valve (CDV). Many modern cars, in an attempt to make them easier for novice drivers to operate smoothly and reduce driveline shock, incorporate this system. However, for enthusiasts who crave a more direct and responsive connection to their car, getting rid of it can be a game-changer.
What is the Clutch Damper Loop (CDV)?
The clutch damper loop, or CDV, is essentially a restriction placed within the hydraulic line that actuates the clutch slave cylinder. It's a small valve, often resembling a one-way check valve with a calibrated orifice, designed to slow down the engagement of the clutch. Think of it as a small bottleneck in the hydraulic system.
The intended purpose is twofold:
- Reduce driveline shock: By slowing down clutch engagement, especially during aggressive shifts, the CDV theoretically minimizes the harshness transmitted through the drivetrain, potentially prolonging the life of components like the transmission, differential, and driveshaft.
- Improve driveability for less experienced drivers: A slower clutch engagement makes it more forgiving for drivers who may not be proficient at matching engine speed to wheel speed during shifts. This helps prevent stalling and jerky transitions.
However, the drawbacks often outweigh these perceived benefits for experienced drivers. The CDV introduces a noticeable delay and nonlinearity in clutch engagement, making it harder to execute smooth, precise shifts. This is especially noticeable during performance driving or track days, where quick and consistent clutch control is crucial.
Why Remove or Delete It?
The primary reason for removing the CDV is to improve pedal feel and clutch responsiveness. Specifically, deleting the CDV can result in the following improvements:
- More linear pedal feel: Without the CDV, the clutch pedal engagement becomes more directly proportional to the force applied to the pedal. This makes it easier to predict and control the clutch.
- Faster clutch engagement: The delay introduced by the CDV is eliminated, allowing for quicker and more responsive shifts. This is particularly beneficial for performance driving.
- Improved heel-toe downshifting: Matching engine speed during downshifts becomes easier due to the more immediate clutch response. This results in smoother and more controlled downshifts.
- Reduced clutch slip: Although the CDV intends to reduce driveline shock, some argue that it can actually contribute to clutch slip, especially during aggressive driving. Removing it allows for a more positive and immediate engagement.
How to Remove or Delete the CDV
There are generally two methods for addressing the CDV: removal and deletion. Removal involves physically taking the CDV out of the hydraulic line and replacing it with a straight-through fitting. Deletion, on the other hand, typically involves modifying the existing CDV to disable its restricting function.
Method 1: CDV Removal
This is generally the preferred method as it completely eliminates the restriction. Here's a step-by-step guide:
- Safety First: Disconnect the negative terminal of your car's battery. This is a crucial safety step to prevent any electrical shorts during the process.
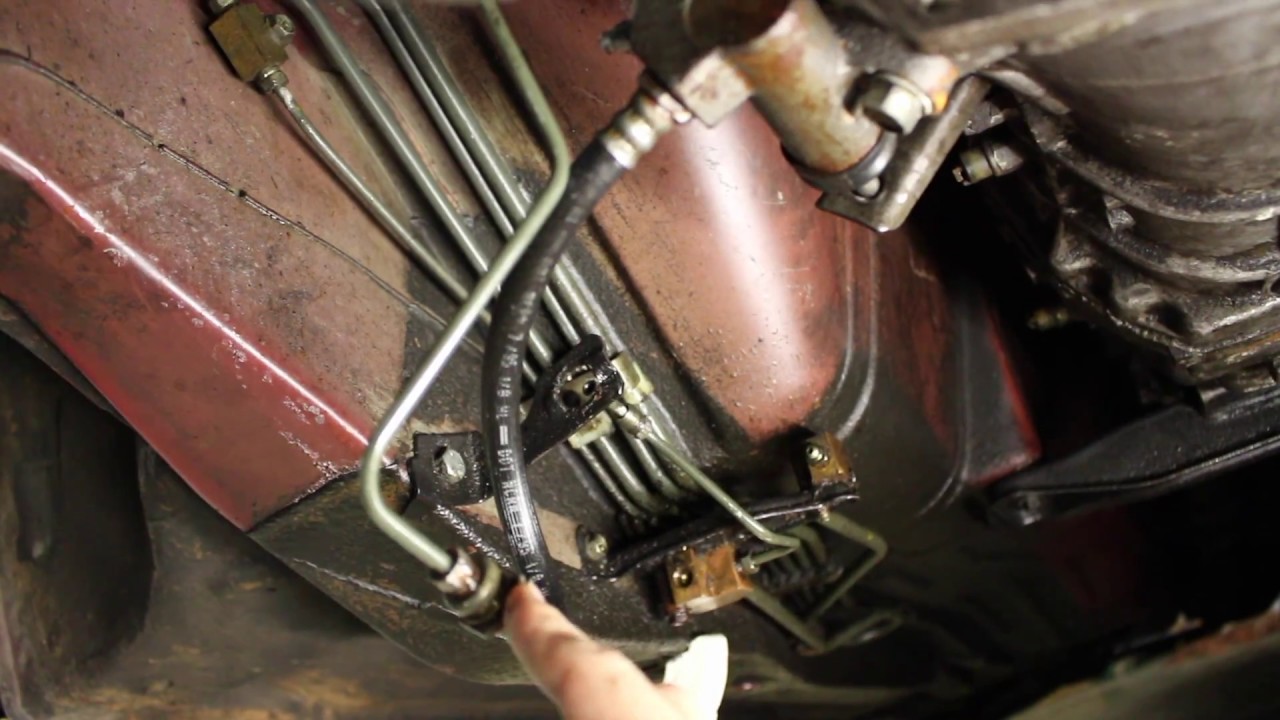
- Locate the CDV: The CDV is typically located on the hydraulic line running from the clutch master cylinder to the clutch slave cylinder, near the transmission. It often resembles a small, cylindrical valve. Consult your car's service manual or online resources to pinpoint its exact location.
- Gather your tools: You'll need wrenches to disconnect the hydraulic lines, a container to catch brake fluid, rags to clean up spills, and potentially a flare nut wrench to avoid damaging the brake lines. You'll also need a replacement fitting to connect the hydraulic lines after removing the CDV. Make sure this fitting is compatible with your car's hydraulic line threads and is rated for brake fluid.
- Bleed the Clutch System: Before disconnecting the lines, it's a good idea to bleed the clutch system. This will minimize the amount of fluid that spills when you disconnect the lines.
- Disconnect the Hydraulic Lines: Carefully disconnect the hydraulic lines from the CDV. Be prepared for brake fluid to spill out. Use rags to catch the fluid and prevent it from contaminating other components.
- Remove the CDV: Once the lines are disconnected, remove the CDV.
- Install the Replacement Fitting: Connect the hydraulic lines using the replacement fitting. Ensure the fitting is properly tightened to prevent leaks.
- Bleed the Clutch System Again: After reconnecting the lines, thoroughly bleed the clutch system to remove any air bubbles that may have entered during the process. This is critical for proper clutch operation. The bleeding process is essential! If you do not bleed correctly, the clutch will not function properly.
- Test the Clutch: Once you've bled the system, test the clutch pedal feel and engagement. The pedal should feel more linear and responsive.
Method 2: CDV Deletion (Modification)
This method involves modifying the existing CDV to disable its restricting function. It typically involves drilling out the orifice in the valve to increase its diameter, effectively eliminating the restriction. However, this method is generally not recommended for several reasons:
- Irreversible modification: Once the CDV is modified, it cannot be easily restored to its original condition.
- Risk of damage: Improper drilling can damage the CDV and potentially cause leaks or other problems.
- Inconsistent results: The amount of material removed during drilling can be difficult to control, leading to inconsistent results.
If you still choose to proceed with this method, be extremely careful and follow these steps:
- Remove the CDV: Follow steps 1-6 from the removal procedure to remove the CDV from the car.
- Disassemble the CDV: Carefully disassemble the CDV to access the restricting orifice.
- Drill out the Orifice: Using a small drill bit, carefully drill out the orifice to increase its diameter. Be very careful not to damage the valve body.
- Reassemble the CDV: Reassemble the CDV.
- Reinstall the CDV: Follow steps 7-9 from the removal procedure to reinstall the CDV and bleed the clutch system.
Important Considerations and Potential Issues
- Brake Fluid Compatibility: Ensure that the replacement fitting and any new brake fluid you use are compatible with your car's braking system. DOT 3 and DOT 4 brake fluids are common, but consult your owner's manual to confirm the correct type.
- Proper Bleeding is Crucial: As mentioned earlier, thoroughly bleeding the clutch system after removing or deleting the CDV is essential. Air in the system can cause a spongy pedal feel and poor clutch engagement. If bleeding is not done well, clutch will not work properly.
- Leak Check: After completing the installation, carefully inspect all connections for leaks. If you find any leaks, tighten the fittings or replace them as necessary.
- Increased Driveline Shock (Potential): While the CDV is intended to reduce driveline shock, some argue that it can actually contribute to clutch slip. Removing it *may* slightly increase the potential for driveline shock during aggressive shifts, but this is generally not a significant concern for experienced drivers.
- Warranty Implications: Modifying your car's hydraulic system may void your warranty, so be aware of the potential consequences before proceeding.
Conclusion
Removing or deleting the clutch damper loop can be a worthwhile modification for experienced drivers seeking improved pedal feel and clutch responsiveness. While the procedure is relatively straightforward, it's important to follow the steps carefully and take necessary precautions to avoid damaging your car. Remember to prioritize safety, use the correct tools, and thoroughly bleed the clutch system after completing the modification. If you're not comfortable performing this modification yourself, it's best to consult with a qualified mechanic.