Replacement And Installation Of Molded Carpet Kits For The Nissan 240sx
Replacement and Installation of Molded Carpet Kits for the Nissan 240SX
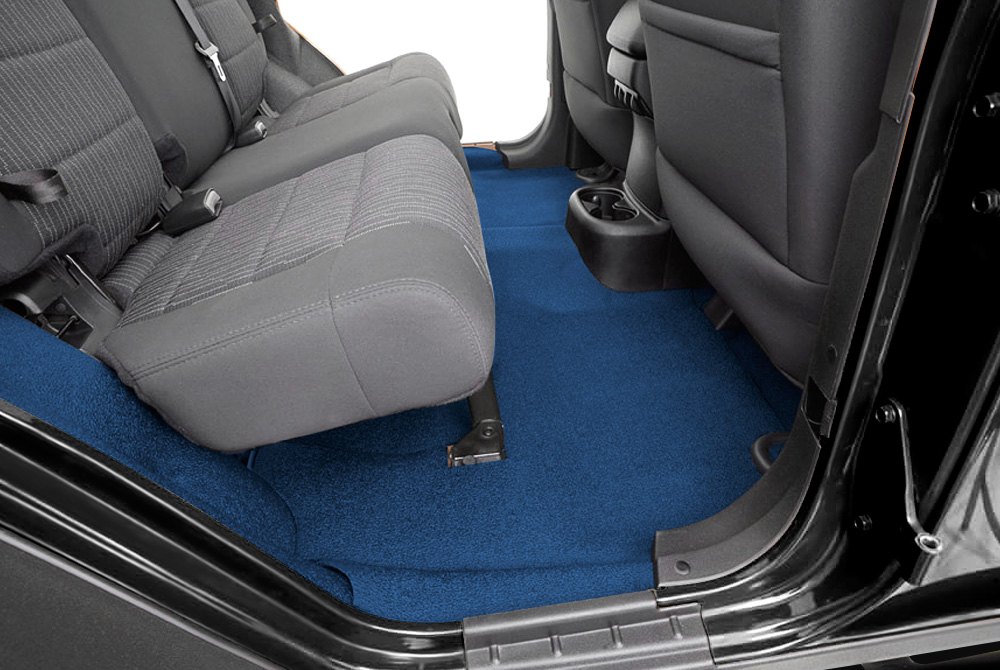
The Nissan 240SX, a beloved rear-wheel-drive sports coupe, is known for its sleek design, nimble handling, and tuner-friendly nature. However, like any vehicle of its age (produced from 1989 to 1998), the interior can show wear and tear, with the carpet being a prime example. A faded, stained, or torn carpet can detract significantly from the overall aesthetics and value of your 240SX. Replacing it with a molded carpet kit is a popular and effective way to revitalize your interior.
This article provides a comprehensive guide to replacing and installing molded carpet kits in your Nissan 240SX. We'll cover everything from selecting the right kit to the step-by-step installation process, ensuring a professional-looking result.
Why Replace Your 240SX Carpet?
There are several compelling reasons to consider replacing your 240SX's carpet:
- Aesthetics: A new carpet dramatically improves the interior appearance, making the car feel newer and more refined.
- Value: A clean and well-maintained interior increases the resale value of your 240SX.
- Hygiene: Old carpets can harbor dirt, allergens, and mold, impacting air quality and potentially affecting your health.
- Noise Reduction: New carpet, especially with added padding, can reduce road noise and improve the overall driving experience.
- Restoration: If you're restoring your 240SX to its former glory, a new carpet is an essential step.
Choosing the Right Molded Carpet Kit
Selecting the appropriate molded carpet kit is crucial for a successful installation. Here's what to consider:
- Year and Model: Ensure the kit is specifically designed for your year and model of 240SX (e.g., 1991 240SX SE). Variations in floor pan shape exist between different years and trim levels.
- Material: Common carpet materials include:
- Nylon: Durable, stain-resistant, and relatively affordable.
- Cut Pile: Offers a plush and luxurious feel.
- Loop Pile: More durable than cut pile and often closer to the original factory carpet.
- Color: Choose a color that matches your original interior or complements your desired aesthetic. Be mindful of fading over time, so selecting a slightly darker shade might be beneficial.
- Backing: The backing material affects durability and ease of installation. Look for kits with a durable and flexible backing.
- Padding: Consider adding extra padding for improved sound insulation and comfort. Some kits include pre-attached padding, while others require you to purchase it separately.
- Manufacturer: Research different manufacturers and read reviews to ensure you're purchasing a quality product. Reputable brands offer better fit and finish.
Tools and Materials You'll Need
Before you begin the installation, gather the following tools and materials:
- New Molded Carpet Kit: Ensure it's the correct one for your vehicle.
- Socket Set and Wrenches: For removing seats and other interior components.
- Screwdrivers: Phillips head and flathead, in various sizes.
- Pliers: For removing clips and fasteners.
- Utility Knife or Razor Blade: For trimming the carpet.
- Scissors: For general cutting.
- Carpet Adhesive: High-quality adhesive designed for automotive carpets.
- Contact Cement: For adhering edges and corners.
- Seam Roller: To ensure good adhesion.
- Vacuum Cleaner: To thoroughly clean the floor pan.
- Wire Brush: To remove rust or debris from the floor pan.
- Rust Converter/Primer (Optional): If you find rust on the floor pan.
- Sound Dampening Material (Optional): For added noise reduction.
- Heat Gun or Hair Dryer (Optional): To help mold the carpet around curves.
- Gloves: To protect your hands.
- Eye Protection: Safety glasses are essential.
- Shop Rags: For cleaning up spills and messes.
Step-by-Step Installation Guide
Follow these steps to install your molded carpet kit:
- Preparation:
- Remove Seats: Disconnect the battery to prevent accidental airbag deployment. Unbolt the seats and carefully remove them from the vehicle. Disconnect any electrical connectors attached to the seats (e.g., for seat heaters or power adjustments).
- Remove Center Console: Remove the shift knob (if applicable) and any trim pieces surrounding the console. Disconnect any electrical connectors and unbolt the console from the floor.
- Remove Kick Panels and Door Sills: These are typically held in place by clips or screws. Gently pry them loose.
- Remove Any Other Obstructions: This may include the glove box, lower dashboard trim, and other interior components that could interfere with the carpet installation.
- Remove the Old Carpet: Carefully remove the old carpet, taking note of how it's secured and any areas where adhesive was used. This will help you with the new carpet installation.
- Cleaning and Preparation of the Floor Pan:
- Vacuum Thoroughly: Use a powerful vacuum cleaner to remove all dirt, debris, and loose material from the floor pan.
- Inspect for Rust: Carefully inspect the floor pan for any signs of rust. If you find rust, treat it with a rust converter and apply a primer to prevent further corrosion.
- Apply Sound Dampening Material (Optional): If you're adding sound dampening material, now is the time to install it. Follow the manufacturer's instructions for application.
- Clean the Floor Pan: Wipe down the floor pan with a clean cloth and a degreasing cleaner to remove any remaining residue.
- Installing the New Carpet:
- Dry Fit the Carpet: Place the new carpet in the vehicle and carefully align it with the floor pan. Check for any areas where the carpet needs to be trimmed or adjusted. This is the most important step!
- Trim the Carpet: Use a utility knife or razor blade to carefully trim the carpet as needed. Be conservative with your cuts; you can always trim more later.
- Apply Adhesive: Apply carpet adhesive to the floor pan in sections, starting with the center area. Apply the adhesive according to the manufacturer's instructions.
- Position the Carpet: Carefully position the carpet over the adhesive, ensuring it's properly aligned.
- Use a Seam Roller: Use a seam roller to firmly press the carpet onto the adhesive, ensuring good contact.
- Repeat for Remaining Sections: Repeat the process for the remaining sections of the floor pan.
- Address Edges and Corners: Use contact cement to adhere the edges and corners of the carpet.
- Use a Heat Gun (Optional): If you're having trouble molding the carpet around curves, use a heat gun or hair dryer to gently warm the carpet, making it more pliable. Be careful not to overheat the carpet.
- Reassembly:
- Reinstall Interior Components: Reinstall the center console, kick panels, door sills, seats, and any other interior components you removed.
- Reconnect Electrical Connectors: Reconnect all electrical connectors.
- Secure Components Properly: Ensure all components are properly secured with bolts, screws, or clips.
- Final Inspection:
- Inspect the Installation: Carefully inspect the carpet installation to ensure it's properly aligned and secured.
- Clean Up: Clean up any remaining debris or adhesive.
Tips and Tricks for a Professional-Looking Installation
- Take Your Time: Rushing the installation will likely result in a poor-quality job. Take your time and pay attention to detail.
- Dry Fit, Dry Fit, Dry Fit: We cannot stress this enough. Dry fitting is *essential* for a good fit.
- Use Sharp Blades: A sharp utility knife or razor blade is essential for clean and precise cuts.
- Work in a Well-Ventilated Area: Carpet adhesive can release fumes, so work in a well-ventilated area.
- Use Quality Adhesive: Don't skimp on the adhesive. Use a high-quality adhesive designed for automotive carpets.
- Consider Adding Sound Dampening: Adding sound dampening material can significantly reduce road noise and improve the driving experience.
- Don't Be Afraid to Ask for Help: If you're not comfortable with any part of the installation, don't hesitate to ask a friend or professional for help.
- Consult Online Resources: There are many online forums and videos that can provide additional guidance and tips for installing a molded carpet kit in your 240SX. Search specifically for "240SX carpet install" on YouTube.
Troubleshooting Common Issues
- Carpet Doesn't Fit Properly: Double-check that you ordered the correct carpet kit for your year and model of 240SX. If you did, carefully trim the carpet as needed, paying close attention to the contours of the floor pan. Use a heat gun to help mold the carpet around curves.
- Adhesive Doesn't Stick: Ensure the floor pan is clean and free of debris. Use a high-quality carpet adhesive and apply it according to the manufacturer's instructions. Use a seam roller to firmly press the carpet onto the adhesive.
- Bubbles or Wrinkles in the Carpet: Use a seam roller to smooth out any bubbles or wrinkles in the carpet. If necessary, use a heat gun to gently warm the carpet and make it more pliable.
- Difficulty Reinstalling Interior Components: Ensure you have all the necessary bolts, screws, and clips. Refer to a repair manual or online resources for guidance on reassembling the interior components.
Replacing your 240SX's carpet with a molded carpet kit is a rewarding project that can dramatically improve the appearance and value of your vehicle. By following these steps and taking your time, you can achieve a professional-looking result that you'll be proud of. Good luck, and enjoy your refreshed 240SX interior! Remember to always prioritize safety and consult with professionals if you're unsure about any aspect of the installation process. The investment in a high-quality kit and careful installation will pay dividends in the long run.