Replacement Of The Center Console Shifter Trim Panel On A 240sx
The Nissan 240SX, a beloved icon of the 90s, is known for its sporty handling and customizable nature. However, like any car of its age, certain interior components can become worn or damaged. One such component is the center console shifter trim panel. This seemingly simple piece of plastic can suffer from cracks, fading, or even complete breakage, detracting from the overall interior aesthetic. While replacing it might seem straightforward, understanding the process and potential pitfalls can ensure a smooth and successful repair. This guide provides a detailed look at the replacement of the center console shifter trim panel on a 240SX, focusing on the underlying mechanics and best practices.
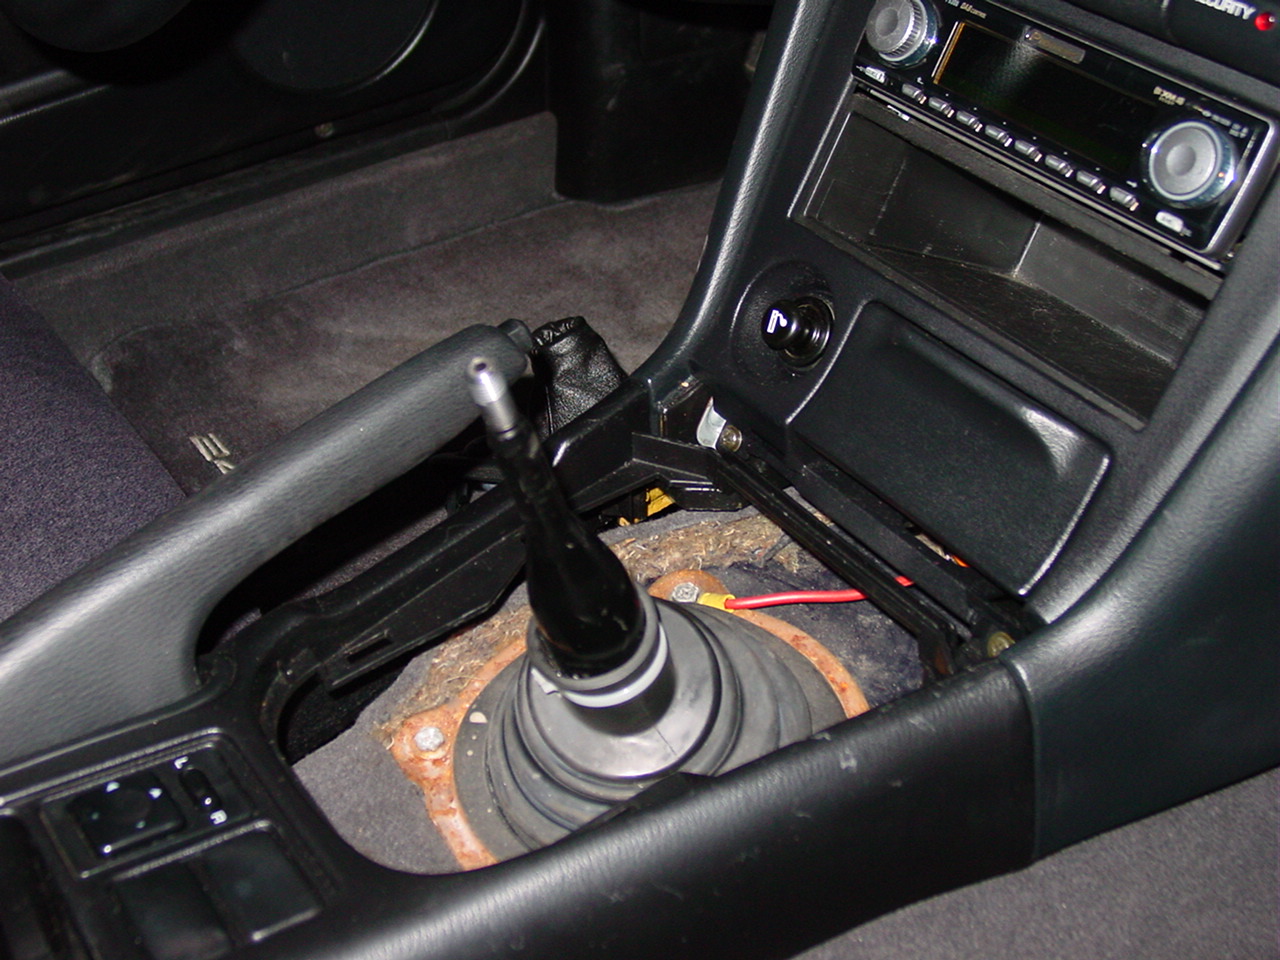
Understanding the Center Console Architecture
Before diving into the replacement procedure, it's crucial to understand how the center console is constructed and how the shifter trim panel integrates into the overall assembly. The 240SX center console is typically comprised of several interconnected pieces. These include the main console body, the shifter surround, and often separate panels for the radio and climate control units. The shifter trim panel is usually a relatively small, contoured piece designed to aesthetically cover the shifter mechanism and provide a clean transition to the surrounding console. It's often secured using a combination of clips, screws, or adhesive, depending on the specific model year and trim level.
The materials used for the trim panel can vary. Some models used durable, textured plastic, while others employed more brittle plastics prone to cracking. Understanding the material properties is important when handling the panel to avoid further damage during removal. Moreover, the design can vary across model years, meaning a trim panel from a later model *might* not fit an earlier model without modification. Always confirm compatibility before purchasing a replacement.
Tools and Materials Required
Successfully replacing the shifter trim panel requires a few essential tools and materials:
- A set of plastic trim removal tools (essential for minimizing damage to surrounding plastic components)
- A Phillips head screwdriver (various sizes may be needed)
- A flathead screwdriver (for prying, use with caution)
- A socket set (for any bolts securing the console)
- A replacement shifter trim panel (ensure it's the correct part for your model year)
- Optional: Adhesive remover (if the old panel is glued in place)
- Optional: New clips (if the old clips are broken or brittle)
- Optional: Soft cloths and interior cleaner (for cleaning the surrounding area)
Step-by-Step Replacement Procedure
The following steps outline the general process for replacing the center console shifter trim panel. Note that specific details may vary slightly depending on the exact configuration of your 240SX.
Step 1: Disconnecting the Battery (Important Safety Precaution)
Before working on any electrical components within the car, always disconnect the negative terminal of the battery. This prevents accidental shorts or damage to the electrical system.
Step 2: Removing the Shifter Knob
The shifter knob must be removed to access the trim panel. Depending on your knob, it might be threaded onto the shifter stalk or secured with a set screw. If threaded, simply unscrew it counterclockwise. If there's a set screw, use an Allen wrench (usually a small size) to loosen it before unscrewing the knob. In rare cases, the knob may be glued – *proceed with caution* if it feels excessively stiff and consider using a heat gun on low setting to soften the adhesive (though this should be a last resort).
Step 3: Removing the Surrounding Console Components (if necessary)
In some cases, other parts of the center console need to be removed or loosened to access the shifter trim panel. This often involves removing the radio surround, the ashtray (if equipped), or even the entire center console assembly. Use the plastic trim removal tools to carefully pry these components away from the console body. Pay close attention to the location of any screws or clips. Many interior trim pieces are held in place by pressure clips that can break easily if not handled correctly. Document the location and orientation of each component as you remove it to make reassembly easier.
Step 4: Removing the Old Shifter Trim Panel
This is the most delicate part of the process. The shifter trim panel is typically held in place by clips or adhesive. Use the plastic trim removal tools to gently pry the panel away from the console. Start at one corner and work your way around the perimeter. Avoid using excessive force, as this can damage the panel or the surrounding console. If the panel is glued, use an adhesive remover to soften the glue. Apply the adhesive remover sparingly and allow it to soak for a few minutes before attempting to pry the panel. Be patient and persistent, and the panel should eventually come loose.
Step 5: Cleaning the Area
Once the old panel is removed, clean the surrounding area using a soft cloth and interior cleaner. Remove any residual adhesive or debris. This will ensure a clean surface for the new panel to attach to.
Step 6: Installing the New Shifter Trim Panel
Align the new shifter trim panel with the opening in the center console. If the panel uses clips, carefully snap it into place. Ensure that all the clips are fully engaged. If the panel uses adhesive, apply a thin layer of adhesive to the back of the panel before pressing it into place. Hold the panel in place for a few minutes to allow the adhesive to set. Be careful not to get glue on the surrounding pieces.
Step 7: Reassembling the Console
Reinstall any console components that were removed in Step 3. Ensure that all screws and clips are properly secured. Refer to your documentation from Step 3 to ensure everything is reassembled in the correct order and orientation.
Step 8: Reinstalling the Shifter Knob
Screw the shifter knob back onto the shifter stalk. If there was a set screw, tighten it to secure the knob. Make sure the knob is fully tightened but avoid over-tightening, as this can damage the threads.
Step 9: Reconnecting the Battery
Reconnect the negative terminal of the battery. The car is now ready to be started.
Step 10: Testing and Final Adjustments
Start the car and test the shifter. Ensure that it moves smoothly through all the gears. If there are any issues, double-check the reassembly to ensure that everything is properly connected. Give the interior a final cleaning and enjoy your newly refreshed center console.
Common Pitfalls and Solutions
While the shifter trim panel replacement is generally a straightforward procedure, there are several potential pitfalls to be aware of:
- Broken Clips: Plastic clips can become brittle with age and break easily. If clips break, you can purchase replacement clips online or at an auto parts store. Make sure to get the correct type of clip for your 240SX.
- Damaged Surrounding Components: Using excessive force when removing the old panel or surrounding components can damage the surrounding plastic. Always use plastic trim removal tools and proceed with caution.
- Incorrect Part: Ensure that the replacement shifter trim panel is the correct part for your model year. There can be subtle differences in design that prevent the panel from fitting properly.
- Adhesive Residue: Removing adhesive residue can be a pain. Use a dedicated adhesive remover and allow it to soak for a few minutes before attempting to remove the residue. A plastic scraper can also be helpful.
- Shifter Mechanism Interference: If the new trim panel is not properly aligned, it may interfere with the shifter mechanism. Ensure that the panel is securely attached and that the shifter moves freely through all the gears.
Conclusion
Replacing the center console shifter trim panel on a 240SX is a relatively simple project that can significantly improve the interior appearance of your car. By understanding the construction of the center console, using the proper tools, and following the steps outlined in this guide, you can successfully complete this repair with minimal risk of damage. Remember to be patient, proceed with caution, and always double-check your work. A little bit of effort can go a long way in restoring the interior of your classic 240SX.