Replacement Of The Lower Rubber Shift Boot On A Nissan 240sx
The Nissan 240SX, a beloved icon of the drift and tuner scene, is known for its responsive handling and robust engine. However, like any vehicle, time and wear take their toll on its components. One common issue faced by 240SX owners is a torn or damaged lower rubber shift boot. This seemingly minor part plays a crucial role in preventing debris and moisture from entering the transmission tunnel and affecting the shifter mechanism. Replacing a worn-out shift boot is a relatively straightforward task that can significantly improve your driving experience and protect your car's internals. This article provides a comprehensive guide to replacing the lower rubber shift boot on a Nissan 240SX.
Why Replace Your 240SX Shift Boot?
Before diving into the replacement process, it's important to understand why this seemingly small piece of rubber is so vital. Here are a few key reasons:
- Preventing Debris Intrusion: The shift boot acts as a barrier against dirt, dust, road salt, and other contaminants. These particles can accumulate in the transmission tunnel and eventually find their way into the shifter assembly, leading to premature wear and tear.
- Water and Moisture Protection: Rain, snow, and even condensation can seep into the car's interior through a damaged shift boot. This moisture can cause rust and corrosion on critical components, including the shifter linkage.
- Noise Reduction: A properly sealed shift boot helps dampen road noise and vibrations, contributing to a more comfortable and refined driving experience. A torn boot will often result in increased noise levels inside the cabin.
- Improved Shifting Feel: A compromised shift boot can affect the overall feel of the shifter. It might lead to a less precise or even a crunchy shift feel.
Ignoring a damaged shift boot can lead to more significant and costly repairs down the line. Replacing it promptly is a proactive way to maintain the health and longevity of your 240SX.
Tools and Materials Needed
Before starting the replacement, gather all the necessary tools and materials. This will ensure a smooth and efficient process. Here's a comprehensive list:
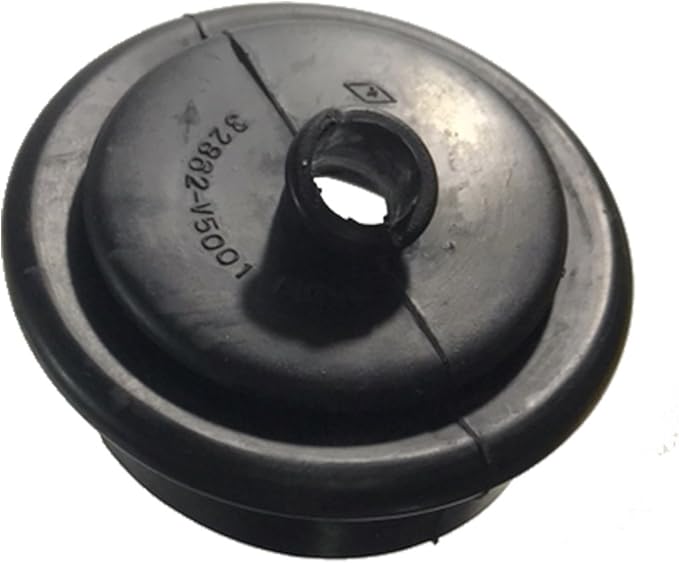
- New Lower Rubber Shift Boot: Purchase a replacement boot specifically designed for your Nissan 240SX model year. Ensure it's from a reputable manufacturer for quality and durability.
- Socket Set: A set of sockets in various sizes is essential for removing and installing bolts and nuts.
- Wrench Set: Similar to the socket set, a wrench set will provide the necessary tools for tackling different fasteners.
- Screwdrivers: Both Phillips head and flathead screwdrivers will be needed.
- Pliers: Pliers are useful for gripping, pulling, and manipulating various components.
- Jack and Jack Stands: Safely lifting the vehicle is crucial for accessing the underside components. Never work under a car supported only by a jack.
- Penetrating Oil: Applying penetrating oil to rusted or stubborn fasteners will make them easier to remove.
- Grease or Lubricant: A small amount of grease or lubricant can be applied to the new shift boot to aid in installation.
- Rags or Shop Towels: These will be useful for cleaning up any spills or debris.
- Safety Glasses: Protecting your eyes is paramount.
- Gloves: Wearing gloves will protect your hands from dirt and grease.
Step-by-Step Replacement Guide
Follow these detailed steps to successfully replace the lower rubber shift boot on your Nissan 240SX:
Step 1: Preparation and Safety
Begin by parking your 240SX on a level surface and engaging the parking brake. Disconnect the negative terminal of the battery to prevent any accidental electrical issues. Gather all your tools and materials and place them within easy reach.
Step 2: Lifting the Vehicle
Use a jack to lift the front of the car and securely place it on jack stands. Make sure the jack stands are positioned on designated jacking points for safety. Never work under a car supported only by a jack.
Step 3: Locating the Shift Boot
The lower rubber shift boot is located underneath the car, where the shifter linkage connects to the transmission. It's usually covered in grime and road debris, so you might need to clean the area to get a clear view.
Step 4: Removing the Old Shift Boot
This is often the most challenging part of the process, especially if the boot is severely deteriorated or if the fasteners are rusted. Start by spraying penetrating oil on any bolts or clamps securing the boot. Allow the oil to soak in for several minutes.
Carefully inspect how the old boot is attached. Some may use clamps, while others might be bolted in place. Use the appropriate tools (socket, wrench, screwdriver) to remove the fasteners. Be patient and avoid stripping the bolts.
Once the fasteners are removed, gently work the old boot free from the shifter linkage and the transmission tunnel. You might need to use a flathead screwdriver to carefully pry it off. Be prepared for some dirt and debris to fall out.
Step 5: Cleaning the Area
Before installing the new boot, thoroughly clean the area around the shifter linkage and the transmission tunnel. Remove any remaining debris, rust, or old sealant. This will ensure a proper seal for the new boot.
Step 6: Installing the New Shift Boot
Apply a small amount of grease or lubricant to the inside of the new shift boot. This will make it easier to slide onto the shifter linkage.
Carefully position the new boot over the shifter linkage and align it with the mounting holes in the transmission tunnel. Secure the boot using the original fasteners (or new ones if needed). Tighten the fasteners to the proper torque specifications. Do not overtighten, as this could damage the new boot or the surrounding components.
If the boot uses clamps, ensure they are properly positioned and tightened to create a secure seal. Double-check that the boot is properly seated and that there are no gaps or leaks.
Step 7: Final Checks and Lowering the Vehicle
Before lowering the car, double-check all the fasteners to ensure they are properly tightened. Inspect the new shift boot for any signs of damage or improper installation.
Carefully lower the vehicle using the jack and remove the jack stands. Reconnect the negative terminal of the battery.
Step 8: Testing and Verification
Start the engine and test the shifter through all the gears. Pay attention to the shift feel and listen for any unusual noises. If everything feels smooth and quiet, the replacement was successful.
Troubleshooting Tips
While replacing the shift boot is generally a straightforward task, you might encounter some challenges. Here are a few troubleshooting tips:
- Rusted Fasteners: If the fasteners are severely rusted, apply penetrating oil liberally and let it soak for an extended period. If they still won't budge, you might need to use a bolt extractor or even resort to cutting them off.
- Difficult Removal: If the old boot is stuck, use a flathead screwdriver to carefully pry it off. Avoid using excessive force, as this could damage the shifter linkage or the transmission tunnel.
- Improper Fit: If the new boot doesn't fit properly, double-check that you have the correct part for your 240SX model year. Also, ensure that the boot is properly aligned and that all the fasteners are tightened to the proper torque specifications.
- Shift Feel Issues: If you experience any issues with the shift feel after replacing the boot, inspect the shifter linkage for any damage or wear. You might need to lubricate the linkage or replace worn components.
Conclusion
Replacing the lower rubber shift boot on a Nissan 240SX is a relatively simple yet important maintenance task. By following this guide and taking your time, you can successfully replace the boot and protect your car's transmission and interior from dirt, moisture, and noise. Regular maintenance, including replacing worn-out components like the shift boot, will help keep your 240SX running smoothly and reliably for years to come. Remember to always prioritize safety and use the proper tools and techniques when working on your vehicle. Enjoy the improved shifting feel and peace of mind that comes with a new shift boot! Always consult a qualified mechanic if you are unsure about any aspect of this procedure. Proper maintenance is key to keeping your 240SX on the road.