Review And Installation Of Aftermarket Front Lip Spoilers For The S13 Chassis
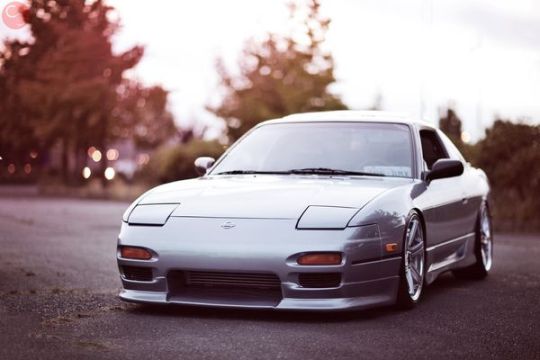
So, you're thinking about adding a front lip spoiler to your S13? Excellent choice! It's a fantastic way to improve the look of your ride and maybe even gain a little aerodynamic advantage. But before you jump in, let's talk about what you're getting into. Aftermarket lips for the S13 can be a bit of a mixed bag, and the installation isn't always as straightforward as the product description might suggest. This article is going to walk you through the common issues you might face, along with practical solutions to get that lip looking like it belongs on your car.
Choosing the Right Lip: Fitment Frustrations
The biggest hurdle with aftermarket S13 lips is, without a doubt, fitment. Let's be honest, some of these things are practically generic shapes that barely resemble the S13's front bumper. Here's a breakdown of what to look for and how to mitigate potential problems:
Material Matters
The material of the lip significantly impacts its flexibility and, consequently, its ability to conform to the bumper's contours. Here's a quick rundown:
- Fiberglass: Generally the most affordable option. However, fiberglass is rigid and prone to cracking, especially if the fitment is off or if you accidentally bump a curb. It requires meticulous prep work and can be a real pain to install.
- Polyurethane (PU): A far more forgiving material. PU is flexible and impact-resistant, meaning it can withstand minor bumps and scrapes without cracking. It's also easier to manipulate and shape during installation. While it may be more expensive initially, the increased durability often makes it a better long-term investment.
- Carbon Fiber: Lightweight and aesthetically appealing, but typically the most expensive. Carbon fiber lips can be strong, but they are also prone to cracking under impact. Fitment issues with carbon fiber are particularly frustrating because repairs can be complex and costly.
Pre-Purchase Inspection: Don't Skip This!
Before you even think about ordering, research the brand and read reviews. See what other S13 owners have to say about their experience with the same lip. Pay close attention to comments about fitment, build quality, and customer service. If possible, find pictures or videos of the lip installed on other S13s.
When your lip arrives, carefully inspect it. Look for any obvious damage, such as cracks, chips, or warping. Compare the lip to the contours of your bumper before you start drilling or applying adhesive. This initial assessment can save you a lot of headaches down the road. If the fit looks drastically off, contact the seller immediately and try to resolve the issue before proceeding with the installation.
Installation Challenges and Solutions
Alright, let's assume you've got a lip that's *mostly* right. Here's where the real fun begins:
Tools You'll Need
- Jack and Jack Stands: Safety first! You'll need to safely lift the front of your car.
- Drill with Various Drill Bits: For creating mounting holes. Start with smaller bits and gradually increase the size.
- Screwdrivers (Phillips and Flathead): For removing existing fasteners and potentially adjusting bumper alignment.
- Socket Set: For removing and installing bolts.
- Sandpaper (Various Grits): For prepping the lip and bumper surfaces.
- Masking Tape: To protect your paint and mark alignment.
- 3M Automotive Adhesive Tape: A must-have for securing the lip. Don't cheap out on this!
- Self-Tapping Screws: For additional securement, especially in areas that are difficult to reach with adhesive.
- Heat Gun (Optional but Recommended): For gently molding the lip to the bumper's contours. Use with caution!
- Safety Glasses and Gloves: Protect yourself!
The Installation Process (and Where It Goes Wrong)
- Preparation is Key: Thoroughly clean the mating surfaces of both the lip and the bumper with soap and water, followed by a degreaser like isopropyl alcohol. This will ensure proper adhesion. Lightly sand both surfaces with fine-grit sandpaper to create a better bond.
- Test Fit, Test Fit, Test Fit!: This is the most crucial step. Use masking tape to temporarily hold the lip in place. Carefully examine the fitment from all angles. Identify any gaps, areas of misalignment, or points where the lip doesn't conform to the bumper.
- Addressing Fitment Issues: This is where the real problem-solving comes in.
- Minor Gaps: If you have small gaps (less than 1/4 inch), you can often fill them with automotive-grade silicone sealant or flexible body filler *after* the lip is fully installed.
- Significant Misalignment: This is where things get tricky. You might need to:
- Heat Molding: Use a heat gun to gently warm the lip, making it more pliable. Be careful not to overheat the material, as this can cause damage. Gently bend and shape the lip to better match the bumper's contours.
- Trimming: In some cases, you might need to trim excess material from the lip. Use a sharp utility knife or a rotary tool with a cutting disc. Proceed with caution and only remove small amounts of material at a time.
- Bumper Adjustment: Sometimes, the issue isn't the lip itself, but rather the alignment of your bumper. Check the mounting points and see if you can loosen and slightly adjust the bumper's position.
- Applying Adhesive: Once you're satisfied with the fitment, apply 3M automotive adhesive tape to the mating surfaces of both the lip and the bumper. Follow the manufacturer's instructions for proper application and curing time. Don't skimp on the tape; more is better in this case.
- Securing the Lip: Carefully align the lip with the bumper and press it firmly into place. Use masking tape to hold the lip in position while the adhesive cures. You may also want to use self-tapping screws to provide additional securement, especially in areas that are prone to stress.
- Final Touches: Once the adhesive has fully cured, remove the masking tape and inspect your work. Touch up any imperfections with sealant or filler.
Common Mistakes to Avoid
- Rushing the Process: Take your time and don't cut corners. Proper preparation and careful fitment are essential for a successful installation.
- Using the Wrong Adhesive: Don't use cheap, generic adhesives. Invest in a high-quality automotive adhesive tape that is designed to withstand the elements.
- Overheating the Lip: If you're using a heat gun, be careful not to overheat the material. This can cause it to warp or melt.
- Ignoring Gaps: Don't ignore gaps between the lip and the bumper. Address them with sealant or filler to prevent water and debris from getting trapped.
- Overtightening Screws: If you're using self-tapping screws, be careful not to overtighten them. This can crack the lip or damage the bumper.
Cost Considerations
The cost of installing an aftermarket front lip spoiler on your S13 can vary widely depending on several factors:
- Lip Price: This is the biggest variable, ranging from $50 for a basic fiberglass lip to $500+ for a high-end carbon fiber piece.
- Materials: Expect to spend around $20-$50 on adhesive tape, sandpaper, sealant, and other materials.
- Professional Installation: If you're not comfortable doing the installation yourself, you can hire a professional. Labor costs can range from $100 to $300, depending on the complexity of the job and the shop's hourly rate.
- Body Work: If your lip requires significant modifications or body work to achieve proper fitment, this can add significantly to the overall cost.
Rough Estimate: A DIY installation with a polyurethane lip could cost between $150-$400, including the lip and materials. A professional installation with body work could easily exceed $500.
Conclusion
Installing an aftermarket front lip spoiler on your S13 can be a rewarding experience, but it's important to be prepared for the challenges that you might encounter. By choosing the right lip, carefully planning the installation, and addressing any fitment issues, you can achieve a professional-looking result that will enhance the appearance of your car. And remember, if you're not comfortable tackling the job yourself, don't hesitate to seek the help of a qualified professional. Good luck, and happy modding!