Review And Installation Of D-max Aerodynamic Kits On A 240sx
D-MAX Aerodynamic Kits on a 240SX: Review and Installation Guide
The Nissan 240SX, a beloved platform in the drifting and JDM communities, is known for its versatility and potential for customization. One of the most impactful modifications you can make is the addition of an aerodynamic kit, significantly altering the car's appearance and potentially improving its performance. D-MAX is a well-regarded brand in the aftermarket body kit industry, particularly known for their aggressive styling and quality. This article provides a comprehensive review of D-MAX aerodynamic kits for the 240SX and a detailed installation guide to help you through the process.
Why Choose a D-MAX Aerodynamic Kit for Your 240SX?
Several factors contribute to the popularity of D-MAX kits among 240SX enthusiasts:
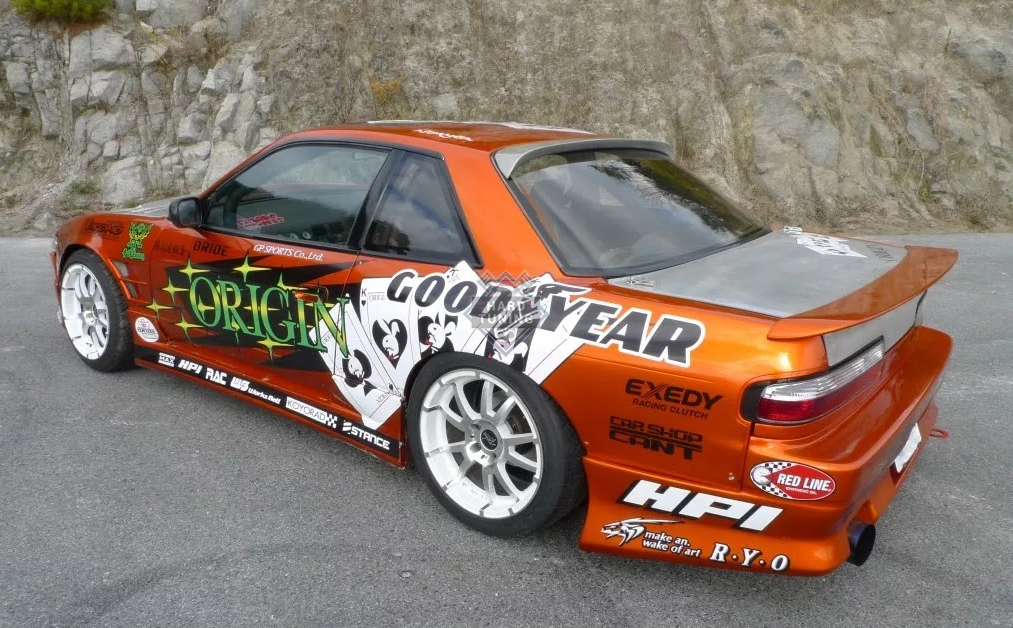
- Aggressive Styling: D-MAX kits are characterized by their bold designs, often featuring wider fenders, deep front lips, and prominent rear wings. This gives the 240SX a more aggressive and track-ready aesthetic.
- Quality Construction: While primarily made of fiberglass, D-MAX kits are generally considered to be of higher quality than some other budget options. The fiberglass tends to be thicker and more durable, reducing the risk of cracking and damage.
- Fitment: D-MAX kits, while requiring some modification as is typical with aftermarket body kits, often boast better fitment compared to cheaper alternatives. This can save you time and effort during the installation process.
- Brand Reputation: D-MAX has established a strong reputation within the JDM community for producing quality aerodynamic components. This recognition adds value and appeal to their products.
D-MAX Kit Options for the 240SX
D-MAX offers various kits for the 240SX, catering to different styles and preferences. Some of the popular options include:
- Type-3 Kit: Known for its aggressive, angular design. It usually features a deep front bumper, side skirts, and a rear bumper.
- D1 Spec Kit: A more race-oriented design, inspired by D1 Grand Prix drifting cars. It often includes wider fenders and a prominent rear wing.
- Various Wing Options: D-MAX also offers a range of standalone rear wings, allowing you to customize the rear of your 240SX without purchasing a full kit. These include GT wings and roof spoilers.
Review: What to Expect from a D-MAX Kit
Before diving into the installation, it's crucial to understand what to expect from a D-MAX kit. While D-MAX is known for its better fitment compared to some alternatives, it's essential to remember that all aftermarket body kits require some degree of modification and refinement to achieve perfect fitment. Here's a breakdown of common observations:
- Fiberglass Imperfections: Expect to find minor imperfections in the fiberglass, such as small pinholes or slight surface irregularities. These are normal and can be easily addressed with body filler and sanding.
- Trimming and Sanding: You will almost certainly need to trim and sand the edges of the kit components to achieve proper alignment and clearance with the car's body.
- Mounting Adjustments: The mounting points on the kit might not perfectly align with the factory mounting points on your 240SX. You may need to drill new holes or fabricate custom brackets to secure the kit properly.
- Professional Installation Recommended: While a determined DIY enthusiast can install a D-MAX kit, professional installation by a body shop experienced with aftermarket body kits is highly recommended. They have the tools, expertise, and experience to ensure a flawless finish.
Pro Tip: Always perform a test fit of all kit components before painting. This will allow you to identify any fitment issues and address them before investing in paint.
Installation Guide: Installing a D-MAX Body Kit on Your 240SX
This is a general guide and specific steps may vary depending on the exact D-MAX kit you are installing. Always refer to any instructions provided with the kit and consult online resources for specific tips and tricks.
Tools and Materials Required:
- Socket set and wrenches
- Screwdrivers
- Drill and drill bits
- Sanding block and sandpaper (various grits)
- Body filler
- Primer
- Paint (matching your car's color)
- Clear coat
- Masking tape and paper
- Safety glasses and dust mask
- Cutting tools (e.g., Dremel, cutoff wheel)
- Measuring tape
- Marking pen
- Rivets or bolts and nuts
- Panel bond adhesive (optional)
Step-by-Step Installation:
- Preparation:
- Park your 240SX on a level surface and disconnect the battery.
- Remove the existing bumpers, side skirts, and any other components that will be replaced by the D-MAX kit.
- Clean the surfaces where the new kit will be mounted.
- Test Fitting:
- Carefully position each component of the D-MAX kit onto your 240SX.
- Identify any areas where the fitment is not ideal.
- Mark the areas that need to be trimmed, sanded, or modified.
- Trimming and Sanding:
- Use a cutting tool to carefully trim any excess material from the edges of the kit components.
- Use sandpaper to smooth the edges and refine the fitment.
- Periodically test fit the components to ensure that you are achieving the desired fit.
- Addressing Imperfections:
- Apply body filler to any imperfections in the fiberglass, such as pinholes or surface irregularities.
- Sand the body filler smooth and flush with the surrounding surface.
- Mounting:
- Determine the best method for mounting each component of the kit. This may involve using existing mounting points, drilling new holes, or fabricating custom brackets.
- Secure the kit components using rivets, bolts and nuts, or panel bond adhesive. Ensure a secure and stable attachment.
- Painting:
- Once you are satisfied with the fitment and mounting, prepare the kit for painting.
- Clean the surfaces thoroughly and apply a coat of primer.
- Sand the primer smooth and apply several coats of paint, allowing each coat to dry completely.
- Apply a clear coat to protect the paint and add shine.
- Final Assembly:
- Carefully reassemble any components that were removed during the installation process.
- Reconnect the battery.
- Inspect the installation and make any necessary adjustments.
Common Challenges and Solutions
Installing a D-MAX kit, or any aftermarket body kit, can present some challenges. Here are some common issues and their solutions:
- Gap Issues: Gaps between the kit components and the car's body are common. These can be minimized by careful trimming, sanding, and shimming. Panel bond adhesive can also be used to fill small gaps.
- Alignment Problems: Misalignment can occur if the kit is not properly mounted. Double-check the mounting points and ensure that the kit is securely fastened. Custom brackets may be necessary to achieve proper alignment.
- Cracking: Fiberglass can crack if subjected to excessive stress. Avoid overtightening fasteners and be careful when handling the kit components. Reinforcing the kit with fiberglass matting can help prevent cracking.
Is a D-MAX Kit Right for You?
Choosing a D-MAX kit for your 240SX is a matter of personal preference and budget. Consider the following factors:
- Your Budget: D-MAX kits are generally more expensive than budget alternatives. Factor in the cost of the kit, installation (if you're not doing it yourself), and paint.
- Your Skill Level: Installing a body kit requires some degree of mechanical skill and experience. If you are not comfortable with trimming, sanding, and drilling, consider professional installation.
- Your Desired Look: D-MAX kits offer a distinctive, aggressive style. Make sure that the design aligns with your overall vision for your 240SX.
Alternatives to D-MAX:
If a D-MAX kit doesn't quite fit your needs, here are some alternative brands to consider:
- Origin Labo: Known for their aggressive and functional designs, often seen in drifting.
- Vertex: Offers a more subtle and refined look compared to D-MAX.
- BN Sports: Another popular choice for aggressive styling, similar to D-MAX.
Conclusion
Installing a D-MAX aerodynamic kit can dramatically transform the look of your 240SX. While the installation process requires time, effort, and some degree of skill, the results can be well worth it. By carefully following the steps outlined in this guide and addressing any challenges that arise, you can achieve a professional-looking installation and enjoy the aggressive styling and enhanced performance that a D-MAX kit provides. Remember to prioritize safety and consult with professionals if needed. Good luck, and enjoy your newly transformed 240SX!