S13 Clutch Pedal Assembly Installation And Adjustment
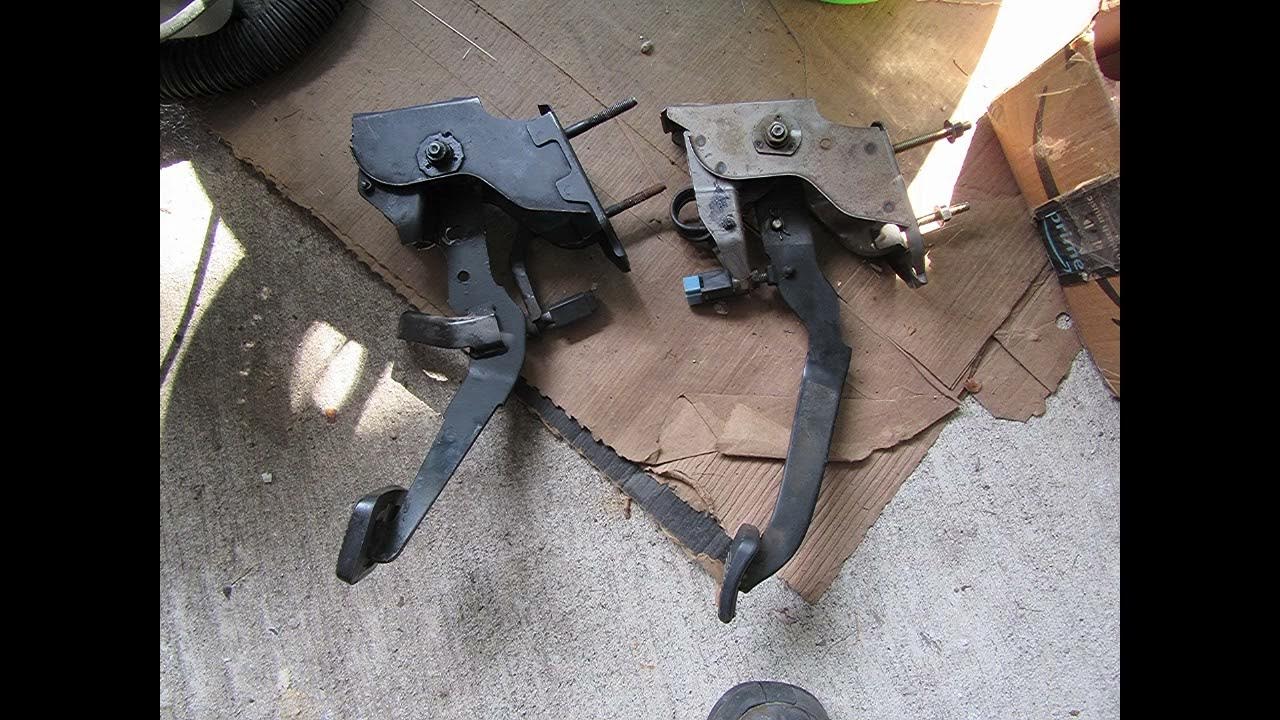
Alright, so you're tackling the clutch pedal assembly on your S13. That's a solid upgrade or repair, and we're going to walk through it. This guide assumes you have some mechanical experience and aren't afraid to get your hands dirty. We'll cover everything from removing the old assembly to properly adjusting the new one for optimal performance. Safety first – disconnect the negative battery terminal before starting to prevent any electrical mishaps.
Removing the Old Clutch Pedal Assembly
Before you can install the new assembly, the old one needs to come out. This can be a bit fiddly, especially working under the dash, so take your time and be patient.
Step 1: Disconnect the Clutch Master Cylinder Pushrod
This is the first thing you need to disconnect. The pushrod connects the clutch pedal to the clutch master cylinder. The master cylinder is what actually pushes the hydraulic fluid when you depress the clutch. Usually, there's a clevis pin held in place by a cotter pin. Remove the cotter pin and then slide out the clevis pin.
Warning: Be careful not to lose the bushing(s) that sit between the clevis and the pedal arm. They're small and easily misplaced. These ensure smooth, slop-free operation.
Step 2: Disconnect Any Electrical Connectors
Depending on your specific S13 model and any modifications, you may have a clutch start switch or other electrical connectors attached to the pedal assembly. Carefully disconnect these, noting their locations for reassembly. Make sure you don't yank on the wires – gently depress any locking tabs before pulling the connector free.
Step 3: Remove the Mounting Hardware
The clutch pedal assembly is typically bolted to the firewall or a support bracket under the dash. Locate all the mounting bolts or nuts. They're usually 10mm, 12mm, or 14mm. Use a socket wrench (preferably with extensions and a swivel joint for those hard-to-reach spots) to remove the hardware. A small impact wrench can be a lifesaver here if you have one, but be careful not to strip the bolts.
Step 4: Extract the Old Assembly
With all the connections and mounting hardware removed, you should be able to wiggle the old clutch pedal assembly free. It might take some maneuvering to get it out from under the dash, so be patient and work it gently. Take note of how it's oriented as you remove it, as this will help with the installation of the new assembly.
Installing the New Clutch Pedal Assembly
Now comes the fun part – installing the new assembly. Reverse the removal process, taking extra care with alignment and proper torque.
Step 1: Position the New Assembly
Carefully position the new clutch pedal assembly in the same orientation as the old one. This is where remembering the removal process will come in handy. Make sure all the mounting holes line up correctly.
Step 2: Install the Mounting Hardware
Install the mounting bolts or nuts, but don't tighten them fully yet. Leave a little play so you can make fine adjustments later. This is important for proper alignment and to prevent binding.
Step 3: Reconnect Electrical Connectors
Reconnect any electrical connectors that you disconnected earlier. Double-check that they are securely attached and that the locking tabs are engaged. If you're unsure of any connections, refer to a wiring diagram or take photos before disassembly.
Step 4: Reconnect the Clutch Master Cylinder Pushrod
Reconnect the clutch master cylinder pushrod to the pedal arm. Reinstall the clevis pin and secure it with a new cotter pin. Ensure that the bushings are properly seated between the clevis and the pedal arm. If the bushings are worn or damaged, replace them. Worn bushings will introduce play and affect clutch feel.
Step 5: Tighten the Mounting Hardware
Now that everything is connected, tighten the mounting bolts or nuts to the manufacturer's specified torque. If you don't have the torque specifications, a good rule of thumb is to tighten them firmly but not excessively. Over-tightening can strip the threads or damage the mounting points. Use a torque wrench whenever possible.
Adjusting the Clutch Pedal
This is arguably the most critical step. Proper clutch pedal adjustment is crucial for smooth shifting, preventing clutch slippage, and extending the life of your clutch. The goal is to achieve the correct free play and disengagement point.
Understanding Clutch Pedal Adjustment
Before we dive into the adjustments, let's define some key terms:
- Free Play: The amount of travel the clutch pedal has before it starts to engage the clutch. Too little free play can cause the clutch to slip, while too much can make it difficult to shift.
- Clutch Engagement Point: The point in the pedal travel where the clutch starts to engage. This should be smooth and predictable.
- Clutch Disengagement Point: The point in the pedal travel where the clutch is fully disengaged. This is important for smooth shifting.
Step 1: Adjusting Free Play
The free play is usually adjusted via the pushrod connecting the clutch pedal to the master cylinder. The pushrod typically has an adjustable clevis or a threaded end. To adjust the free play, loosen the lock nut (if applicable) on the pushrod. Then, rotate the pushrod to either lengthen or shorten it. Lengthening the pushrod decreases free play, while shortening it increases free play.
How to check for correct freeplay: With the engine off, gently depress the clutch pedal with your hand. You should feel a small amount of travel (typically 1/2 to 1 inch) before you feel any resistance. This is the free play. Refer to your vehicle's service manual for the exact specifications.
Step 2: Adjusting the Clutch Stop (If Applicable)
Some S13s (or modified S13s) may have a clutch stop. This is a physical stop that limits the travel of the clutch pedal. It's used to fine-tune the disengagement point and prevent over-travel of the clutch pedal. If your vehicle has a clutch stop, adjust it so that the clutch disengages fully just before the pedal hits the stop. This will ensure smooth shifting and prevent premature wear on the clutch components.
Step 3: Testing and Fine-Tuning
After making the adjustments, it's time to test the clutch. Start the engine and try shifting through all the gears. Pay attention to how the clutch feels and listen for any unusual noises. If you experience any of the following, you may need to readjust the clutch:
- Difficulty shifting: This could indicate insufficient clutch disengagement.
- Clutch slippage: This could indicate insufficient free play or a worn clutch.
- Grinding noises: This could indicate improper synchronization in the transmission or incomplete clutch disengagement.
Make small adjustments and retest until you achieve smooth shifting and a consistent clutch feel. Remember, patience is key. It may take several attempts to get the adjustment just right.
Final Checks
Once you're satisfied with the clutch pedal adjustment, double-check all the connections and mounting hardware. Make sure everything is tight and secure. Also, inspect the clutch master cylinder and the clutch slave cylinder for any leaks. If you find any leaks, address them immediately.
Congratulations! You've successfully installed and adjusted your S13's clutch pedal assembly. With proper care and maintenance, your new clutch should provide years of reliable service.
Important Notes:
- Always refer to your vehicle's service manual for specific instructions and torque specifications.
- If you are not comfortable performing any of these steps, seek professional assistance.
- Replacing the clutch pedal assembly is a good opportunity to inspect the clutch master cylinder and the clutch slave cylinder. If they are worn or leaking, consider replacing them as well.