S13 Rocket Bunny Widebody Kit Fitment And Clearance Requirements
The Rocket Bunny/Pandem widebody kit, designed by Kei Miura of TRA Kyoto, has become synonymous with aggressive styling and performance enhancement, particularly on platforms like the Nissan S13. However, simply bolting on these visually striking fender flares is far from a plug-and-play affair. A successful installation requires a deep understanding of fitment considerations, clearance requirements, and the necessary modifications to ensure both form and function are preserved. This article delves into the technical intricacies of fitting a Rocket Bunny widebody kit to an S13, providing insights for those considering this modification.
I. Understanding the Kit Components and Design Philosophy
Before diving into the practical aspects, it's crucial to understand what constitutes a typical Rocket Bunny S13 widebody kit. These kits generally include:
- Front Fenders: Significantly wider than stock, often incorporating integrated ducts and vents.
- Rear Fenders: Similar to the front, offering substantial width increase and typically requiring significant cutting of the original quarter panels.
- Side Skirts: Designed to bridge the gap between the widened front and rear fenders, enhancing the overall aggressive stance.
- Front Bumper: Often a complete replacement, complementing the widened front fenders and improving airflow.
- Rear Wing/Spoiler (optional): A large, often GT-style wing to improve downforce and complete the aesthetic.
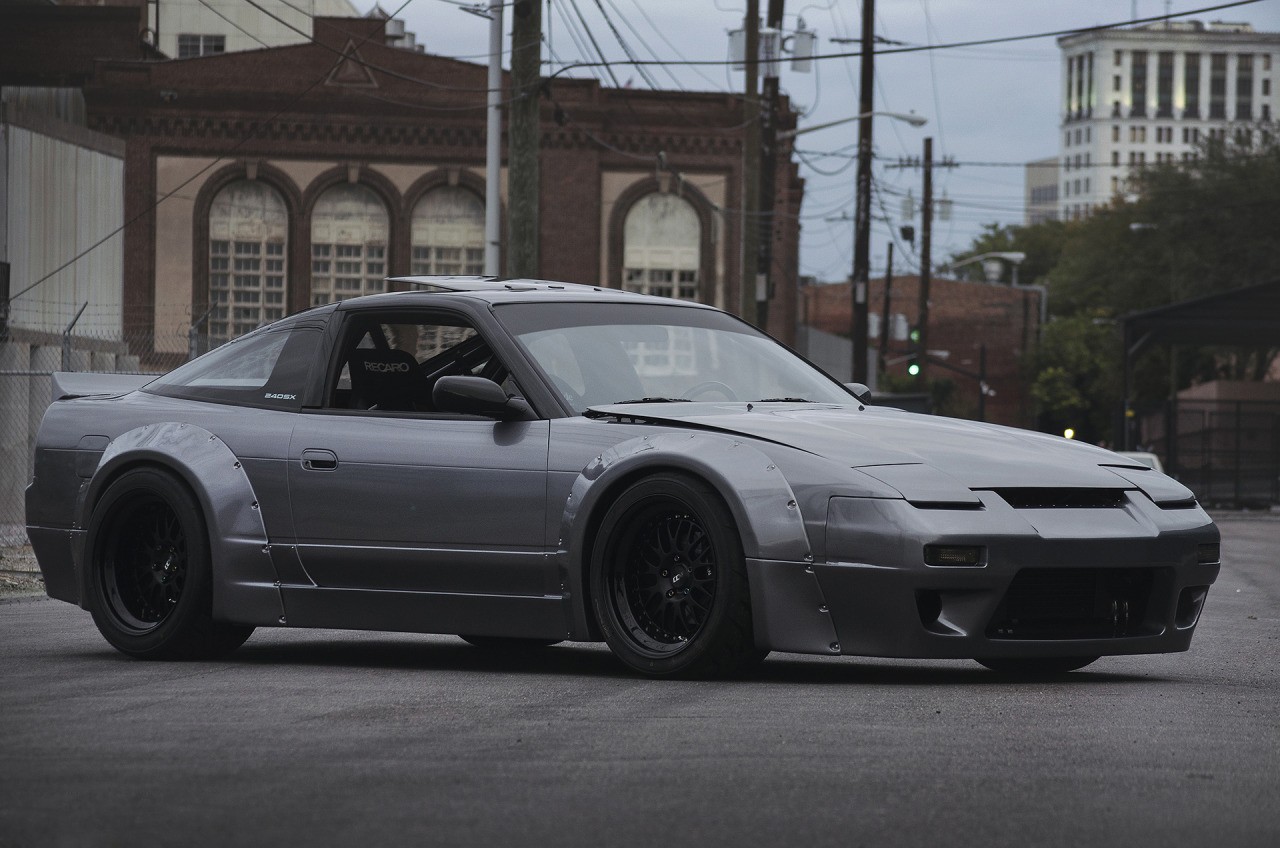
Miura's design philosophy prioritizes a raw, exposed aesthetic, often incorporating visible rivets or bolts to attach the fenders. This contrasts with seamlessly blended body kits, emphasizing the "functional" nature of the modification, even though the primary benefit is often aesthetic.
II. Preliminary Considerations: Chassis Condition and Wheel Choice
The foundation for any successful widebody installation is a sound chassis. Before even considering the kit, inspect the S13 for rust, damage, and previous repairs. Any underlying issues must be addressed, as the widebody kit will only exacerbate them. Key areas to examine include:
- Rocker Panels: A common rust location on S13s.
- Frame Rails: Ensure straightness and absence of corrosion.
- Wheel Wells: Check for previous collision damage.
Furthermore, the entire purpose of a widebody kit is to accommodate wider wheels and tires. Therefore, determining your desired wheel and tire setup is paramount before commencing the installation. Consider the following:
- Wheel Width and Offset: Calculate the necessary offset to achieve the desired stance and avoid rubbing. Use online calculators and consult with wheel specialists. This is critical for achieving the right look and preventing tire rub.
- Tire Size: Select a tire size that complements the wheel width and diameter, while maintaining appropriate rolling diameter to avoid speedometer inaccuracies and ABS issues.
- Suspension Setup: Consider the impact of the wider wheels and tires on your suspension. You might need stiffer springs, adjustable dampers, and modified sway bars to maintain handling performance.
III. The Infamous Cut: Quarter Panel Modification
The most daunting aspect of any widebody installation, particularly on the rear, is the inevitable cutting of the factory quarter panels. This is a point of no return and requires meticulous planning and execution. The goal is to remove enough material to provide adequate clearance for the wider wheels and tires, while retaining enough structural integrity. Here's a breakdown of the process:
- Marking the Cut Line: This is arguably the most important step. Use the new fender flare as a template, carefully marking the cut line onto the existing quarter panel. Allow for a *minimum* of 1-2 inches of overlap to facilitate welding and structural reinforcement. Remember, it's better to cut too little and trim later than to cut too much.
- Cutting the Quarter Panel: Use a cut-off wheel, plasma cutter, or reciprocating saw (Sawzall) to carefully follow the marked cut line. Wear appropriate safety gear, including eye and ear protection. Consider cutting in stages, removing small sections at a time to maintain control.
- Folding or Bending the Remaining Lip: After cutting, a sharp lip of the original quarter panel will remain. This lip needs to be either folded inwards or bent outwards to create clearance for the new fender flare. Using a hammer and dolly or specialized fender rolling tool, carefully manipulate the metal. Heat can be applied to make the metal more pliable, but be careful not to overheat it, which can damage the paint or warp the metal.
- Rust Protection: This is critical! Once the metal has been cut and manipulated, it's highly susceptible to rust. Immediately apply a rust inhibitor or primer to all exposed metal surfaces.
IV. Fender Flare Fitment and Alignment
With the quarter panels modified, the next step is to test-fit the fender flares. This involves carefully aligning the flares with the body and securing them in place, typically using clamps or temporary fasteners. During this stage, pay close attention to the following:
- Panel Gaps: Ensure consistent and even gaps between the fender flares and the existing body panels. Uneven gaps can indicate misalignment or underlying issues.
- Flushness: The fender flares should sit flush against the body, without any warping or distortion. If the flares are not perfectly flush, you may need to shim or trim them to achieve the desired fit.
- Riveting/Bolting: Determine the optimal placement for the rivets or bolts that will secure the fender flares. Ensure that the rivets or bolts are evenly spaced and that they are positioned in areas where they will not interfere with any underlying components.
Be prepared to modify the flares themselves. Fiberglass, the material of many aftermarket kits, is notorious for imperfections. Minor trimming, sanding, and even filling may be necessary to achieve a perfect fit. Patience is key.
V. Structural Reinforcement and Welding
Removing a significant portion of the quarter panel compromises the structural integrity of the chassis. Therefore, it's essential to reinforce the remaining metal to prevent flexing and cracking. This can be achieved through several methods:
- Welding Seams: Weld the remaining lip of the quarter panel to the inner wheel well to create a stronger connection. Stitch welding can be used to minimize heat input and prevent warping.
- Adding Reinforcement Plates: Fabricate and weld reinforcement plates to the inner wheel well to provide additional support. These plates can be made from steel or aluminum.
- Roll Cage/Subframe Connectors: If you're building a dedicated track car, consider installing a roll cage or subframe connectors to further enhance chassis rigidity.
Welding should only be performed by a qualified professional. Improper welding can weaken the chassis and create safety hazards.
VI. Clearance Checks and Adjustments
Once the fender flares are securely mounted, it's crucial to perform thorough clearance checks to ensure that the wheels and tires do not rub against the body. This involves:
- Static Clearance: Check for rubbing at ride height, with the wheels straight and turned fully to each side.
- Dynamic Clearance: Simulate suspension travel by jacking up one corner of the car and checking for rubbing as the suspension compresses.
- Under Load: The most critical test is under load, which involves driving the car aggressively and listening for any signs of rubbing. This might involve a test drive with a passenger and/or additional weight in the trunk.
If rubbing occurs, you may need to adjust the ride height, camber, or wheel spacers to create more clearance. In extreme cases, you may need to further trim the fender flares or modify the inner wheel wells.
VII. Finishing Touches: Paint and Detailing
With the fitment and clearance issues resolved, the final step is to paint the fender flares and blend them seamlessly with the existing bodywork. This involves:
- Surface Preparation: Thoroughly sand and prime the fender flares to create a smooth and even surface for paint.
- Paint Matching: Match the paint color of the fender flares to the existing bodywork. This may require the expertise of a professional paint shop.
- Blending: Blend the paint from the fender flares to the existing bodywork to create a seamless transition.
- Detailing: Apply a clear coat to protect the paint and enhance the shine. Consider adding detailing touches such as pinstriping or decals to personalize the look.
Installing a Rocket Bunny widebody kit on an S13 is a significant undertaking that requires careful planning, meticulous execution, and a deep understanding of automotive mechanics. While the visual rewards are undeniable, the technical challenges should not be underestimated. By following the guidelines outlined in this article and seeking the expertise of qualified professionals, you can achieve a stunning and functional widebody conversion that enhances both the appearance and performance of your S13.