S14 Front Bumper Mounting Points And Fitment
Alright, let's talk about S14 front bumper fitment. Specifically, how these things mount and the common issues you'll run into. Getting a bumper to sit flush and square on an S14 can be a surprisingly fiddly job, even if you're dealing with a stock bumper. Aftermarket options? Well, that often introduces a whole new layer of complexity. This guide will walk you through the various mounting points, potential problem areas, and some tips to ensure a clean, professional-looking installation.
Understanding the Mounting Points
The S14 (both Zenki and Kouki models, although there are subtle differences we'll cover) utilizes a combination of bolts, clips, and sometimes adhesives (though we strongly advise against adhesive unless it's specifically designed for automotive body panels and used sparingly) to secure the front bumper. Let's break down each location:
1. Bumper Support Brackets (Reinforcement Bar):
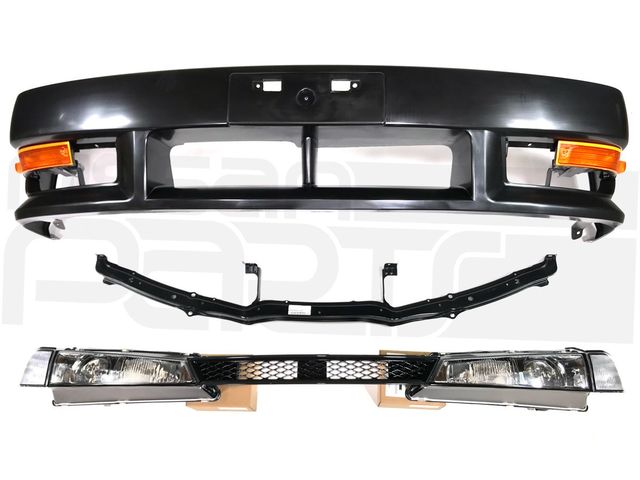
The foundation of the bumper mounting system is the bumper support, also sometimes referred to as the reinforcement bar or crash bar. This is a substantial piece of metal that runs horizontally across the front of the car, providing structural integrity and impact resistance. The bumper itself doesn't directly bolt to the chassis, but instead attaches to this support.
The bumper support brackets are typically welded to the unibody. The bumper, in turn, has mounting points – often tabs or slots – that align with studs or bolt holes on the bumper support. These are usually secured with nuts (often 10mm or 12mm, depending on the year and model). Correct alignment here is crucial; if the bumper support is damaged or misaligned (common after minor accidents), the entire bumper will sit crooked.
Zenki vs. Kouki Note: While the overall design is similar, the Zenki (pre-facelift) and Kouki (facelift) bumper supports and bumpers are not directly interchangeable without modification. The mounting points and overall shape differ.
2. Fender Brackets (Side Mounts):
These are smaller brackets that attach to the inside of the front fenders, typically near the wheel wells. They provide lateral support and help to pull the bumper flush with the fender panels. These brackets usually use small bolts or screws (often self-tapping screws in aftermarket applications) that thread into tabs on the bumper itself. These are notorious for being a source of frustration.
Common Issues: These brackets are easily bent or damaged, especially if the car has been lowered or has experienced any fender rolling/pulling. Aftermarket bumpers often have poorly designed or flimsy tabs in this area, making a perfectly flush fit a real challenge. It is vital to ensure these are square with the fenders, otherwise you will get bulging from the sides of the bumper at the fender lines.
3. Under Tray/Splash Shield Mounting Points:
Many S14s came equipped with an under tray (also known as a splash shield) that attaches to the underside of the bumper and the chassis. This tray helps to improve aerodynamics and protect the engine bay from debris. The bumper typically has mounting points along its lower edge to accommodate the under tray. These are usually secured with plastic push clips or small screws.
Important Tip: Don't neglect these mounting points! Properly securing the under tray contributes to overall bumper stability and prevents it from flapping around at speed, which can damage the bumper and the under tray itself.
4. Grille/Center Section Mounting (If Applicable):
Depending on the bumper design (particularly with some aftermarket options), there may be additional mounting points for a grille or other center section components. These are usually secured with small screws or clips. The center grille is often a tight fit and will require patience. A lot of the time the grille will also be bolted to the bumper support bar as well.
Troubleshooting Fitment Issues
Okay, so you're trying to install your bumper and it's just not lining up right. Here's a systematic approach to diagnosing the problem:
1. Inspect the Bumper Support:
This is the first place to start. Is it straight? Are the mounting studs intact? Are any of the bolt holes damaged or stripped? If the bumper support is bent, you'll need to straighten it (carefully!) or replace it. If the studs are broken, you may be able to weld new ones on (if you have the skills and equipment) or use threaded inserts.
2. Check the Fender Brackets:
Are they bent or misaligned? Try to straighten them as best you can. If they're badly damaged, consider replacing them. With aftermarket bumpers, you might even need to fabricate custom brackets to achieve a proper fit. These are typically made from aluminum or steel, and are easy to make.
3. Verify Bumper Integrity:
Is the bumper itself warped or damaged? Fiberglass bumpers, in particular, are prone to cracking and distortion. Carefully inspect the bumper for any signs of damage that might be affecting its shape or mounting points. Pay close attention to the mounting tabs; these are often weak points.
4. Loosely Install Everything First:
Don't tighten any of the bolts or screws completely until everything is lined up as best as possible. This allows for some wiggle room and helps to prevent binding. Start by attaching the bumper to the bumper support, then move on to the fender brackets and finally the under tray.
5. Use Shims and Spacers:
Sometimes, even with everything properly aligned, you'll still need to make minor adjustments to get the bumper to sit perfectly flush. Shims (thin pieces of metal or plastic) can be used to fill gaps between the bumper and the fender or bumper support. Spacers can be used to adjust the depth of the bumper relative to the fender. These are easily obtained at your local hardware store or auto parts store. Be sure to pick the right material as some material may break under pressure.
6. Consider Professional Help:
If you're truly stuck and can't get the bumper to fit properly, don't hesitate to consult a professional body shop. They have the tools, experience, and expertise to diagnose and correct even the most challenging fitment issues.
Aftermarket Bumper Considerations
Installing an aftermarket bumper on an S14 is often more involved than installing a stock bumper. Here are a few things to keep in mind:
- Material Quality: Aftermarket bumpers are typically made from fiberglass, polyurethane (PU), or ABS plastic. Fiberglass bumpers are often the cheapest but are also the most fragile and prone to cracking. PU bumpers are more flexible and durable. ABS bumpers offer a good balance of strength and flexibility.
- Fitment Issues: Aftermarket bumpers are notorious for having poor fitment. Don't be surprised if you have to do some trimming, sanding, or even fabricating to get the bumper to fit properly. This is where those shims and spacers really come in handy.
- Mounting Hardware: Aftermarket bumpers often come with generic or incomplete mounting hardware. You may need to purchase additional bolts, screws, or clips to complete the installation.
- Test Fit Before Painting: Always test fit the bumper before painting it! It's much easier to make adjustments to an unpainted bumper. Trying to make adjustments to a freshly painted bumper is a recipe for disaster.
- Proper Preparation: Surface preparation is key. Make sure your car's fender mounting points are smooth and level, this reduces the amount of prep work needed to get the bumper looking good.
Torque Specs
While specific torque specs may vary slightly depending on the exact bolt sizes and materials used, here are some general guidelines:
- Bumper Support Nuts: 15-20 ft-lbs
- Fender Bracket Bolts/Screws: Snug but not overly tight (avoid stripping the threads)
- Under Tray Bolts/Screws: Snug but not overly tight
Important Note: Always use a torque wrench to ensure that you're tightening the bolts to the correct specifications. Over-tightening can damage the threads or even break the bolts. Remember to consult your service manual for vehicle specific torque specs.
By understanding the S14 front bumper mounting points and following these troubleshooting tips, you'll be well-equipped to tackle any bumper installation project, whether it's a stock replacement or an aftermarket upgrade. Good luck!