Selection And Installation Of Aerodynamic Body Kits For The Nissan 240sx
Transform Your Nissan 240SX: A Guide to Aerodynamic Body Kits
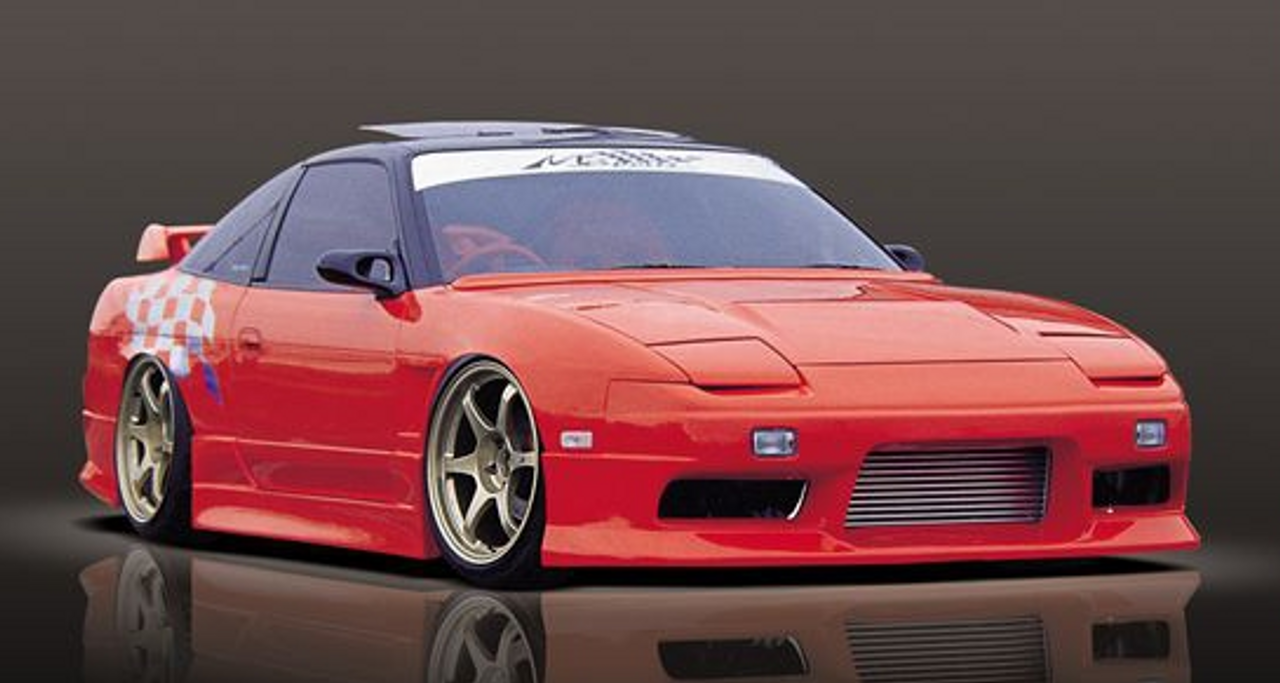
The Nissan 240SX, a beloved platform for tuners and car enthusiasts alike, offers a fantastic canvas for personalization. One popular modification is the addition of an aerodynamic body kit. Not only can a well-chosen kit dramatically enhance the aesthetic appeal of your 240SX, but it can also improve its performance by increasing downforce and reducing drag. This guide provides a comprehensive overview of selecting and installing aerodynamic body kits for your Nissan 240SX.
Why Choose an Aerodynamic Body Kit?
Before diving into the specifics, let's consider the benefits of installing a body kit:
- Enhanced Aesthetics: A body kit can drastically change the look of your 240SX, giving it a more aggressive, modern, or personalized style.
- Improved Aerodynamics: A properly designed kit can improve airflow around the car, reducing drag and increasing downforce. This translates to better stability at higher speeds and improved cornering performance.
- Personalization: Body kits allow you to customize your 240SX to reflect your unique taste and preferences.
Choosing the Right Body Kit for Your 240SX
Selecting the perfect body kit requires careful consideration of several factors. Here's a breakdown of the key elements to keep in mind:
Material Matters: Understanding Body Kit Materials
Body kits are typically made from several materials, each with its own advantages and disadvantages:
- Fiberglass: Fiberglass is the most common and affordable material. It's relatively easy to repair, but it can be brittle and prone to cracking upon impact.
- Polyurethane (PU): Polyurethane is a more flexible and durable option than fiberglass. It can withstand minor impacts without cracking and is generally more resistant to damage. PU kits are generally more expensive.
- Carbon Fiber: Carbon fiber is the lightest and strongest material, offering superior strength and weight reduction. However, it's also the most expensive and can be difficult to repair. Carbon fiber is typically used for individual components like spoilers or diffusers, rather than entire body kits on the 240SX due to cost.
- ABS Plastic: ABS plastic offers a good balance of durability and affordability. It's more impact-resistant than fiberglass and easier to repair than carbon fiber. Some OEM replacement bumpers are made from ABS plastic.
"Consider your budget and intended use when choosing a body kit material. If you're primarily focused on aesthetics and want to save money, fiberglass might be a suitable option. If you prioritize durability and performance, polyurethane or ABS plastic would be better choices."
Style and Design Considerations
The visual style of the body kit is crucial. Consider the overall look you want to achieve:
- Aggressive and Race-Inspired: These kits often feature wide fender flares, large spoilers, and prominent diffusers.
- Sleek and Modern: These kits focus on clean lines and subtle enhancements to the factory bodywork.
- OEM-Style: Some kits aim to replicate the look of factory upgrade packages.
Ensure the kit complements the existing lines of your 240SX and aligns with your personal aesthetic preferences. Also, think about how the kit will look with your wheels and ride height. It's recommended to browse online forums and galleries to see how different body kits look on other 240SX models.
Fitment and Quality
Proper fitment is paramount. A poorly fitting body kit will not only look bad but also compromise the aerodynamics and structural integrity of your car. Consider these factors:
- Brand Reputation: Research the manufacturer's reputation for quality and fitment. Read reviews and seek recommendations from other 240SX owners.
- Precision Molding: Look for kits made with precise molds and consistent dimensions.
- Pre-Drilled Holes: Kits with pre-drilled mounting holes will simplify the installation process.
It's generally wise to avoid extremely cheap, unbranded body kits, as they often suffer from poor fitment and low-quality materials. Investing in a reputable brand will save you time, money, and frustration in the long run.
Completeness of the Kit
Carefully review the contents of the body kit to ensure it includes all the necessary components. A typical body kit may include:
- Front bumper
- Rear bumper
- Side skirts
- Spoiler (optional)
- Mounting hardware
Verify that all parts are included and undamaged before beginning the installation process. If any components are missing or damaged, contact the seller or manufacturer immediately.
Installing Your Aerodynamic Body Kit: A Step-by-Step Guide
Installing a body kit can be a challenging task, but with the right tools and preparation, it's manageable for experienced DIYers. If you're not comfortable working on cars, it's best to have a professional install the kit.
Preparation is Key
- Gather Your Tools: You'll need a socket set, wrenches, screwdrivers, a drill, a grinder (for minor adjustments), masking tape, sandpaper, body filler (if necessary), primer, and paint.
- Prepare Your Workspace: Work in a well-lit and ventilated area. Protect your car's paint with drop cloths or masking tape.
- Read the Instructions: Thoroughly review the manufacturer's instructions before starting the installation.
Step-by-Step Installation Process
- Remove Existing Body Panels: Carefully remove the existing bumpers, side skirts, and other body panels that will be replaced by the body kit. Take photos of the removal process to help with reassembly.
- Test Fit the New Components: Before painting, test fit each component to ensure proper fitment. Make any necessary adjustments with a grinder or body filler.
- Prepare the Surfaces for Painting: Sand down any imperfections and apply a primer coat to the body kit components.
- Paint the Body Kit: Apply several coats of paint, allowing each coat to dry thoroughly before applying the next. Follow the paint manufacturer's instructions for best results.
- Install the Body Kit Components: Carefully install the painted body kit components, using the provided mounting hardware. Ensure all parts are securely attached.
Important Considerations During Installation
- Proper Alignment: Pay close attention to the alignment of the body kit components. Gaps or misalignments can detract from the overall appearance.
- Secure Mounting: Ensure all mounting points are properly secured. Loose parts can vibrate and cause damage.
- Professional Help: If you're unsure about any aspect of the installation, seek professional assistance.
Post-Installation Care and Maintenance
Once your body kit is installed, proper care and maintenance will help keep it looking its best.
- Regular Cleaning: Wash your car regularly to remove dirt, grime, and road salt. Use a mild detergent and a soft cloth to avoid scratching the paint.
- Waxing and Polishing: Apply wax and polish periodically to protect the paint and maintain its shine.
- Inspect for Damage: Regularly inspect the body kit for cracks, chips, or other damage. Repair any damage promptly to prevent it from worsening.
Finding a Reputable Installer
If you decide to have a professional install your body kit, it's essential to find a reputable installer with experience working on Nissan 240SX models. Look for a shop with positive reviews, a proven track record, and a commitment to quality workmanship.
The Legal Side of Body Kits
Always check your local laws regarding modifications to your vehicle's body. Some areas have restrictions on the size or protrusion of body kit components.
By following these guidelines, you can choose and install an aerodynamic body kit that enhances the appearance and performance of your Nissan 240SX, transforming it into a truly unique and personalized machine. Remember to prioritize safety, quality, and proper fitment throughout the entire process.
Disclaimer: Modifying your vehicle may affect its performance, handling, and safety. Always consult with a qualified mechanic or automotive professional before making any modifications.