Silvia Front End Conversion Mounting Points And Alignment
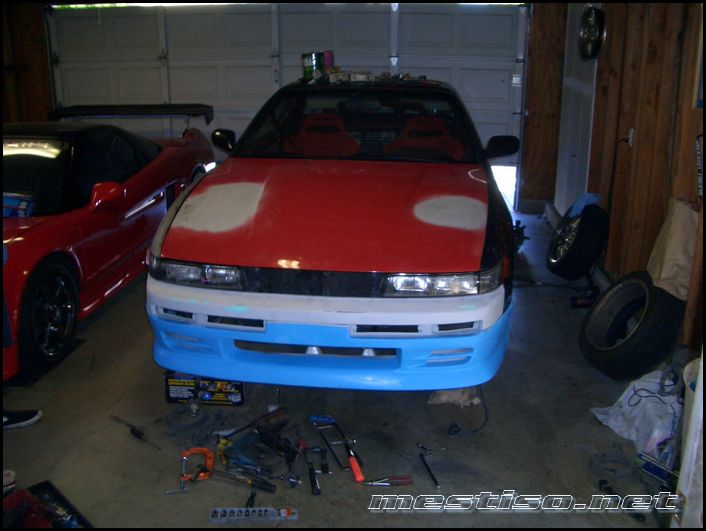
So, you're thinking about doing a Silvia front end conversion on your S-chassis Nissan? Excellent choice! It's a popular and visually striking modification. But let's be clear: while bolt-on kits exist, getting a *perfect* fit and proper alignment takes careful planning and execution. This article will break down the critical mounting points and alignment considerations to help you achieve professional-looking results, minimizing headaches along the way. This isn't a paint-by-numbers guide, it's a breakdown of what you need to know to do it right.
Identifying Critical Mounting Points
The success of your conversion hinges on accurately locating and securing the new Silvia front end. Here's a rundown of the key areas to pay attention to:
Frame Rails
The frame rails are the backbone of your chassis, and they're crucial for supporting the front end. Typically, you'll be dealing with the forward sections of the rails where the original bumper support and headlight brackets were attached. The quality of the frame rails is paramount. Any previous accident damage or rust needs to be addressed *before* you even think about fitting the new front end. We're talking proper metal repair and reinforcement – Bondo won't cut it. Consider welding in reinforcing plates if you suspect the rails have seen better days.
Pro Tip: Before you remove anything, take meticulous measurements of the existing mounting points on the frame rails. Use a plumb bob, level, and measuring tape to record their exact location in relation to fixed points on the chassis (e.g., strut towers, firewall). This will serve as your baseline for aligning the Silvia front end.
Fender Mounting Points
The fenders attach to the body shell at multiple points. These typically include mounting brackets welded to the inner fender wells, along the A-pillar, and sometimes along the door frame. The accuracy of these mounting points is crucial for achieving proper panel gaps and preventing the dreaded "wonky" look. Check for any damage or distortion around these areas. Minor imperfections can be straightened with careful hammering and dollies. Major damage may require professional bodywork.
Note: Silvia fenders might have slightly different mounting points compared to your original fenders. Be prepared to modify or fabricate brackets to achieve a secure and flush fit. Some aftermarket conversion kits provide these brackets, but their quality can vary.
Hood Hinges and Latch
The hood hinges and latch assembly are critical for proper hood alignment and secure closure. Misaligned hinges can lead to uneven hood gaps, difficulty closing the hood, and even damage to the hood or fenders. The latch mechanism needs to align perfectly with the striker plate on the core support for a secure and reliable closure. Consider using adjustable hood hinges or shims to fine-tune the hood's position.
Core Support
The core support (or radiator support) provides crucial support for the radiator, headlights, and often the front bumper. Depending on the specific Silvia front end you're installing, you might need to modify the core support or even replace it entirely. Some conversions require cutting and welding to accommodate the Silvia's headlight buckets and bumper mounting points. Precision is key here; a misaligned core support will throw off the entire front end's alignment.
Alignment Considerations: A Step-by-Step Approach
Once you've identified the mounting points, the real work begins: aligning the Silvia front end. Here's a structured approach to minimize frustration and maximize accuracy:
1. Rough Fitment and Initial Assessment
Before you start welding or permanently attaching anything, perform a rough fitment of all the components. This involves loosely bolting or clamping the fenders, hood, bumper, and headlights in place. Step back and assess the overall appearance. Look for any major discrepancies in panel gaps, hood alignment, or bumper fitment. This initial assessment will help you identify potential problem areas that need to be addressed early on.
2. Frame Rail Alignment
The frame rails are your foundation. Using the measurements you took earlier, carefully align the Silvia front end's mounting points with the corresponding locations on the frame rails. You may need to fabricate custom brackets or modify existing ones to achieve a perfect fit. Use a combination of levels, squares, and measuring tools to ensure that everything is square and level. Don't underestimate the importance of using a quality plumb bob to establish vertical references.
3. Fender Alignment
With the frame rail alignment established, focus on aligning the fenders. This involves adjusting the fender mounting points until the panel gaps are even and consistent. Pay close attention to the gaps between the fenders and the doors, the fenders and the hood, and the fenders and the bumper. Use shims to fine-tune the fender's position and achieve a flush fit.
Important: Remember that panel gaps are not always perfectly uniform from the factory. However, you should strive for the best possible alignment within reasonable tolerances.
4. Hood Alignment
Next, align the hood. Adjust the hood hinges and latch assembly until the hood closes smoothly and sits flush with the fenders and cowl. Use shims to fine-tune the hood's height and position. Check the hood gaps along the fenders and the cowl. Aim for even and consistent gaps on both sides. A slight adjustment to the hood latch striker plate can often resolve minor alignment issues.
5. Bumper Alignment
Finally, align the front bumper. This often involves adjusting the bumper mounting brackets or shimming the bumper to achieve a flush fit with the fenders and the hood. Pay close attention to the gaps between the bumper and the headlights, the bumper and the fenders, and the bumper and the lower valance. The bumper should sit level and evenly spaced on both sides.
6. Welding and Final Adjustments
Once you're satisfied with the alignment of all the components, it's time to weld any necessary brackets or modifications to the frame rails or core support. Before you start welding, double-check your alignment one last time. Once the welding is complete, allow the metal to cool completely before making any further adjustments. Final adjustments may involve fine-tuning the fender mounting points, hood hinges, or bumper brackets.
Tools of the Trade
Having the right tools will significantly improve the accuracy and efficiency of your Silvia front end conversion. Here's a list of essential tools:
- Measuring tape and ruler: For accurate measurements.
- Level and square: To ensure that everything is square and level.
- Plumb bob: For establishing vertical references.
- Welder: For welding brackets and modifications. A MIG welder is generally preferred for automotive work.
- Grinder: For removing rust, smoothing welds, and shaping metal.
- Hammer and dollies: For straightening minor imperfections in the body panels.
- Socket set and wrenches: For removing and installing bolts and fasteners.
- Shims: For fine-tuning the alignment of body panels.
- Clamps: For holding components in place during alignment.
- Marking pen: For marking cut lines and reference points.
Final Thoughts
A Silvia front end conversion is a challenging but rewarding project. By carefully considering the mounting points, following a systematic alignment process, and using the right tools, you can achieve a professional-looking result that will turn heads. Remember to take your time, double-check your work, and don't be afraid to seek help from experienced professionals if you encounter any difficulties. Good luck!