Technical Guide To Aerodynamic Body Kit Selection And Installation For The S14 Chassis
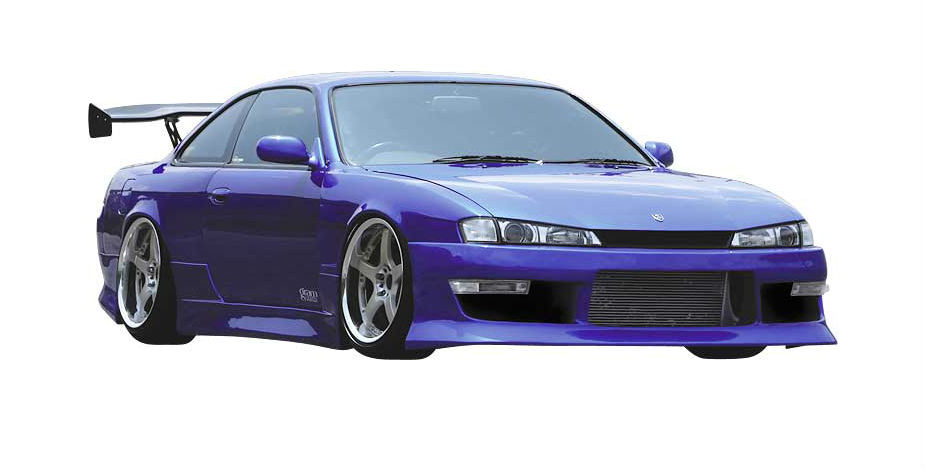
So, you're thinking about adding an aerodynamic body kit to your S14? Awesome! It's a fantastic way to personalize your ride, improve its looks, and potentially even enhance its performance on the track. But before you jump in, let's talk about the process of selecting the right kit and getting it installed properly. This guide will help you navigate the options and avoid common pitfalls.
Selecting the Right Aerodynamic Body Kit
Choosing a body kit is more than just picking something that looks cool. You need to consider several factors to ensure a good fit, lasting durability, and functionality.
Material Matters: FRP, Polyurethane, or Carbon Fiber?
The most common materials for body kits are:
- FRP (Fiberglass Reinforced Plastic): This is often the most affordable option. FRP kits are generally lightweight, but can be brittle and prone to cracking, especially in colder climates or if subjected to impacts. Expect to spend extra time on prep work, as FRP kits often require significant sanding and filling to achieve a smooth finish.
- Polyurethane: This material is much more flexible and impact-resistant than FRP. Polyurethane kits are generally more expensive, but they offer better durability and are less likely to crack. They also tend to fit better out of the box, requiring less modification.
- Carbon Fiber: The premium choice. Carbon fiber kits are incredibly lightweight and strong. However, they are also the most expensive and require specialized installation techniques. If you're considering carbon fiber, make sure you're prepared to invest in professional installation to avoid damaging the delicate material.
Choosing the right material depends on your budget, intended use, and tolerance for imperfections. If you're primarily concerned with aesthetics and occasional street driving, FRP might suffice. If you plan on tracking your car or live in an area with rough roads, polyurethane is a better investment.
Fitment is Key
Not all body kits are created equal. A cheap kit might look tempting, but poor fitment can lead to hours of frustration and a final result that looks worse than stock. Here's what to consider:
- Reputation of the Manufacturer: Research the manufacturer before you buy. Look for online reviews and forum discussions to see what other S14 owners have experienced with their products. Well-regarded brands are often worth the extra cost.
- Test Fit Before Painting: This is crucial! Before you even think about applying primer or paint, thoroughly test fit all the components of the kit. This will reveal any gaps, misalignments, or areas that need trimming.
- Professional Installation: If you're not comfortable with bodywork, consider hiring a professional. A skilled body shop can properly align the kit, fill any imperfections, and ensure a seamless integration with your S14's body.
Aesthetic Considerations
Of course, you want your body kit to look good! Think about the overall style you're going for. Are you aiming for a subtle upgrade or a more aggressive, track-inspired look? Consider the following:
- Full Kit vs. Individual Components: You can purchase a complete body kit (front bumper, side skirts, rear bumper) or individual components. Mixing and matching components from different manufacturers can be tricky, as they may not always complement each other.
- Spoiler/Wing: A rear spoiler or wing can significantly alter the appearance of your S14. Consider the size and style carefully. A large, aggressive wing might look out of place on a street car.
- Color Matching: Getting the paint color matched perfectly to your S14's existing paint is essential. Bring a sample of your car's paint (e.g., the fuel door) to the paint shop for accurate matching.
Installation Guide: A Step-by-Step Approach
Alright, you've chosen your body kit. Now it's time to get it installed. This is a general guide, and specific steps may vary depending on the kit you purchased.
Tools and Materials Needed:
- Socket set and wrenches
- Screwdrivers (Phillips and flathead)
- Trim removal tools
- Drill with various drill bits
- Sanding paper (various grits)
- Body filler (if necessary)
- Primer
- Paint
- Clear coat
- Masking tape and paper
- Safety glasses and gloves
- Measuring tape
- Level
- Jack and jack stands
- Heat gun (optional, for minor adjustments)
Step 1: Preparation
Park your S14 on a level surface and secure it with jack stands. Remove the existing bumpers and side skirts. Take your time and be careful not to damage any underlying components or wiring harnesses. Label any connectors you disconnect to make reassembly easier.
Step 2: Test Fit and Modification
This is where you test fit each component of the body kit. Don't skip this step! Identify any areas that need trimming, sanding, or filling. Use a marker to outline the areas you need to modify. * Gaps: If there are small gaps between the body kit and the car's body, you can use body filler to close them. Apply the filler in thin layers, allowing each layer to dry completely before sanding it smooth. * Misalignments: If the body kit doesn't align properly with the car's mounting points, you may need to drill new holes or modify the existing ones. Use a drill bit that is slightly larger than the mounting bolts to allow for some adjustment. * Trimming: If the body kit is too long or wide, you can use a cutting tool or a sander to trim it down. Be careful not to remove too much material, as you can't put it back on.
Step 3: Sanding and Priming
Once you're satisfied with the fit, it's time to prepare the body kit for painting. Start by sanding the entire surface of the kit with a medium-grit sandpaper (e.g., 220 grit). This will create a smooth surface for the primer to adhere to. Then, apply a coat of primer and let it dry completely. Sand the primer with a fine-grit sandpaper (e.g., 400 grit) to remove any imperfections.
Step 4: Painting
Apply several thin coats of paint, allowing each coat to dry completely before applying the next. Use a high-quality automotive paint that is designed for use on plastic or fiberglass. Once the paint is dry, apply a coat of clear coat to protect the paint and give it a glossy finish.
Step 5: Installation
Carefully install the body kit components onto your S14. Use the original mounting hardware whenever possible. If you need to drill new holes, make sure to use a drill bit that is slightly larger than the mounting bolts. Use a level to ensure that the body kit is properly aligned.
Step 6: Final Touches
Once the body kit is installed, inspect it carefully for any imperfections. Touch up any areas that need it with paint or clear coat. Clean the body kit with a soft cloth and apply a coat of wax to protect the paint.
Common Problems and Solutions
Even with careful planning and execution, you might encounter some issues during the installation process.
* Problem: Gaps between the body kit and the car's body. * Solution: Use body filler to close the gaps. Apply the filler in thin layers, allowing each layer to dry completely before sanding it smooth. * Problem: Misalignment of the body kit. * Solution: Drill new mounting holes or modify the existing ones. Use a drill bit that is slightly larger than the mounting bolts to allow for some adjustment. You may also need to use shims to properly align the body kit. * Problem: Cracking of the body kit (especially with FRP). * Solution: Reinforce the cracked area with fiberglass resin and cloth. Sand the area smooth and repaint it. To prevent future cracks, consider adding additional reinforcement to the body kit in high-stress areas. * Problem: Paint chipping or peeling. * Solution: Sand the affected area and repaint it. Make sure to use a high-quality automotive paint that is designed for use on plastic or fiberglass. Apply a clear coat to protect the paint.Estimated Costs
The cost of installing an aerodynamic body kit on your S14 can vary widely depending on the material of the kit, the complexity of the installation, and whether you do it yourself or hire a professional.
* Body Kit: $300 - $2000+ (depending on material and brand) * Paint and Supplies: $200 - $500 * Professional Installation: $500 - $2000+ (depending on the shop and the amount of bodywork required)Doing the installation yourself can save you money on labor costs, but it will also require more time and effort. If you're not comfortable with bodywork, it's best to hire a professional to ensure a high-quality result.
Adding an aerodynamic body kit to your S14 can transform its appearance and potentially improve its performance. By carefully selecting the right kit and following these installation guidelines, you can achieve a stunning result that you'll be proud of. Remember to prioritize fitment, take your time, and don't be afraid to seek professional help when needed. Happy modding!