Technical Review Of Jsk-racing Coilover Systems For The Nissan 240sx
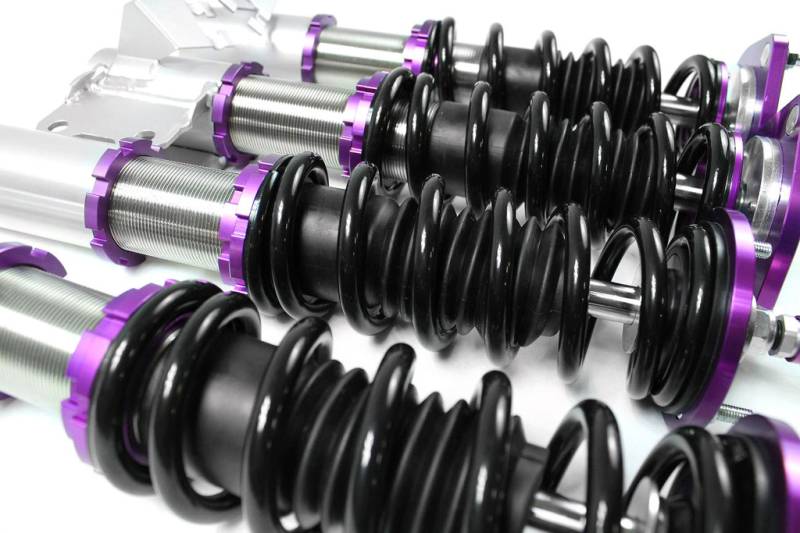
So, you're thinking about (or already have) a JSK-Racing coilover system on your Nissan 240SX? Great choice! They offer a fantastic balance of performance and affordability, making them a popular option for everything from spirited street driving to track days. However, like any aftermarket suspension component, they can sometimes present challenges. This article breaks down some common issues encountered with JSK-Racing coilovers on the 240SX and offers practical solutions to get you back on the road (or track) quickly.
Common Issues & Troubleshooting
1. Ride Height Adjustment Problems
One of the key benefits of coilovers is the ability to precisely adjust your ride height. But what happens when you can't seem to get it right?
Problem: Difficult or impossible to adjust ride height, seized locking collars.
Possible Causes:
- Corrosion: Road salt, dirt, and grime can build up on the coilover threads, causing the locking collars to seize.
- Improper Installation: Overtightening the locking collars can damage the threads or bind them together.
- Damage: Stripped threads or damaged locking collars due to excessive force.
Solutions:
- Cleaning and Lubrication: This is often the first and easiest fix.
- Tools Needed: PB Blaster or similar penetrating oil, wire brush (brass is gentler on aluminum), coilover wrenches (usually supplied with the kit).
- Procedure: Liberally apply penetrating oil to the threads and locking collars. Let it soak for at least 30 minutes (longer for heavily corroded coilovers). Use the wire brush to gently clean the threads. Try using the coilover wrenches to loosen the collars. If they are still stuck, gently tap the wrench with a rubber mallet. Repeat the cleaning and lubrication process as needed. Important: Avoid using excessive force, as this can further damage the threads.
- Preventative Maintenance: Regularly clean your coilovers, especially after driving in inclement weather. Apply a light coat of anti-seize compound to the threads to prevent future corrosion.
- Heat Application: If penetrating oil alone doesn't work, applying some heat can help loosen seized collars.
- Tools Needed: Heat gun (Warning: Use caution to avoid damaging rubber components like dust boots), coilover wrenches, penetrating oil.
- Procedure: Carefully apply heat to the locking collars for a few minutes. Be careful not to overheat the area. While the collars are still warm, try loosening them with the coilover wrenches. Important: Do NOT use a torch, as this can damage the coilover body and potentially compromise the shock absorber.
- Collar Replacement: If the threads are severely damaged or the locking collars are beyond repair, you'll need to replace them.
- Cost: Replacement locking collars can range from $20-$50 per collar, depending on the source and material.
- Tip: Contact JSK-Racing directly or a reputable coilover parts supplier to ensure you get the correct replacement parts.
- Thread Repair: If the threads on the coilover body are damaged, you might be able to repair them with a thread chaser or die. This is a more advanced repair and requires specialized tools. If you're not comfortable with this, consult a professional mechanic.
2. Noisy Suspension
Squeaks, clunks, and rattles coming from your suspension can be incredibly annoying. Identifying the source of the noise is key to fixing the problem.
Problem: Suspension noises (squeaks, clunks, rattles).
Possible Causes:
- Loose Components: Check all bolts and fasteners associated with the coilovers, including the top mounts, lower mounts, and sway bar end links.
- Worn or Damaged Bushings: Inspect the bushings in the top mounts, lower mounts, and sway bar end links for wear, cracks, or damage.
- Insufficient Preload: If the coilovers don't have enough preload, the springs can move and rattle.
- Damaged Damper: A leaking or damaged damper can cause clunking noises.
- Improper Installation: Incorrect torque on suspension components can lead to premature wear and noise.
- Sway Bar End Links: Often overlooked, these are a common source of noise.
Solutions:
- Torque Check: Start by checking the torque on all bolts and fasteners related to the coilovers and suspension components. Refer to the JSK-Racing installation manual or a reputable service manual for the correct torque specifications.
- Tools Needed: Torque wrench, socket set, wrench set.
- Tip: Use a quality torque wrench to ensure accurate tightening.
- Bushing Inspection and Replacement: Carefully inspect all bushings for wear or damage. Replace any worn or damaged bushings.
- Cost: Replacement bushings can range from $10-$50 per bushing, depending on the material (polyurethane vs. rubber).
- Tip: Polyurethane bushings offer increased durability and performance but can sometimes transmit more noise than rubber bushings.
- Preload Adjustment: Adjust the preload on the coilovers according to the JSK-Racing instructions. Adding a small amount of preload can sometimes eliminate spring rattle.
- Tools Needed: Coilover wrenches.
- Tip: Avoid adding excessive preload, as this can negatively affect ride quality and handling.
- Damper Inspection: Visually inspect the dampers for any signs of leakage. If a damper is leaking, it needs to be replaced.
- Cost: Replacing a damper can range from $150-$300 per damper, depending on the specific model and source.
- Tip: Consider replacing both dampers on the same axle for balanced performance.
- Sway Bar End Link Inspection/Replacement: These are a common culprit. Check for play and replace if necessary.
- Cost: Usually relatively inexpensive. Figure $20-$60 per end link.
3. Uneven Ride Height or Handling
If your 240SX is sitting unevenly or handling strangely after installing coilovers, there are a few things to investigate.
Problem: Uneven ride height, pulling to one side, unstable handling.
Possible Causes:
- Incorrect Ride Height Adjustment: Double-check that the ride height is adjusted evenly on both sides of the vehicle.
- Damaged Damper: A damaged damper can cause uneven damping force, leading to unstable handling.
- Bent Suspension Components: Inspect the suspension components for any signs of bending or damage, especially after an impact.
- Incorrect Spring Rate: Ensure that the spring rates are appropriate for your driving style and vehicle setup.
- Alignment Issues: After installing coilovers, it's essential to get a professional wheel alignment.
Solutions:
- Ride Height Adjustment Verification: Use a tape measure to accurately measure the ride height on all four corners of the vehicle. Adjust the coilovers as needed to achieve the desired ride height and ensure that it's even on both sides.
- Tip: Measure from a consistent point on the chassis to the ground.
- Damper Inspection: As mentioned above, inspect the dampers for leakage or damage.
- Suspension Component Inspection: Carefully inspect all suspension components for bending or damage. Replace any damaged parts.
- Alignment: This is critical! After any suspension modification, a professional wheel alignment is absolutely necessary. This will ensure that your vehicle handles properly and prevents premature tire wear.
- Cost: Wheel alignment typically costs between $75-$150.
- Tip: Choose a reputable alignment shop with experience working on modified vehicles.
4. Coilover Failure
While JSK-Racing coilovers are generally reliable, they can eventually fail due to wear and tear or damage.
Problem: Leaking damper, blown damper, broken spring.
Possible Causes:
- Normal Wear and Tear: Over time, the seals in the dampers can wear out, leading to leakage.
- Damage from Impacts: Hitting potholes or other road hazards can damage the dampers or springs.
- Improper Installation: Incorrect installation can stress the components and lead to premature failure.
- Overloading: Exceeding the weight capacity of the coilovers can cause them to fail.
Solutions:
- Damper Replacement: If a damper is leaking or blown, it needs to be replaced.
- Tip: Consider upgrading to a higher-performance damper for improved handling and durability.
- Spring Replacement: If a spring is broken, it needs to be replaced.
- Tip: Ensure that you replace the spring with one that has the correct spring rate for your vehicle setup.
- Complete Coilover Replacement: In some cases, it may be more cost-effective to replace the entire coilover unit rather than individual components.
General Tips for JSK-Racing Coilover Maintenance
- Regular Cleaning: Keep your coilovers clean by washing them regularly with soap and water.
- Lubrication: Apply a light coat of anti-seize compound to the threads of the coilovers to prevent corrosion.
- Inspection: Regularly inspect your coilovers for any signs of wear or damage.
- Proper Installation: Ensure that your coilovers are installed correctly by a qualified mechanic.
- Wheel Alignment: Get a professional wheel alignment after installing coilovers.
By following these tips and troubleshooting steps, you can keep your JSK-Racing coilovers performing at their best and enjoy a comfortable and controlled ride in your Nissan 240SX. Remember to always prioritize safety and consult a professional mechanic if you're not comfortable performing any of these repairs yourself.