Titan Model 60 Brake Actuator Manual
So, you're having trouble with your Titan Model 60 brake actuator. Don't worry, it happens. It's a robust piece of equipment, but like anything mechanical, it can experience issues over time. This guide is designed to help you troubleshoot some common problems and, hopefully, get you back on the road safely.
Understanding the Titan Model 60
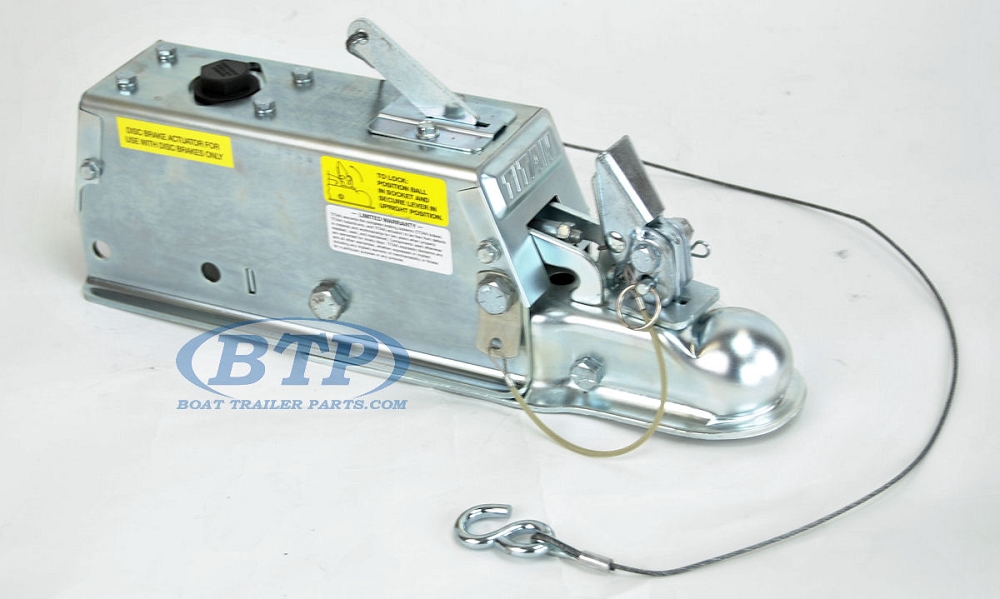
First, let's quickly recap what the Titan Model 60 does. This is a surge-type brake actuator, meaning it relies on the inertia of the trailer pushing against the tow vehicle during braking. This force activates a master cylinder within the actuator, which in turn applies the brakes on your trailer. It's a simple but effective system, commonly found on boat trailers, utility trailers, and smaller RVs.
Before we dive into specific problems, remember safety first. Always disconnect the trailer from the tow vehicle and chock the wheels before working on the brake actuator or any part of the braking system. And if you're not comfortable working on brakes, it's always best to consult a qualified mechanic.
Common Problems and Solutions
1. Brakes Not Applying
This is probably the most common complaint. If your trailer brakes aren't engaging when you brake the tow vehicle, here are a few things to check:
- Coupler Binding: Is the coupler (the part that attaches to the tow ball) moving freely? A seized or binding coupler will prevent the actuator from engaging the master cylinder. Lubricate the coupler regularly with a marine-grade grease to prevent corrosion and binding. If it's severely seized, you may need to disassemble and clean it, or even replace it.
- Master Cylinder Issues: The master cylinder is the heart of the actuator. If it's leaking, corroded, or has internal damage, it won't generate the necessary pressure to activate the brakes. Look for signs of brake fluid leakage around the master cylinder. If you see any, it's almost certainly time for a replacement. You can usually find replacement master cylinders for the Titan Model 60 online or at your local trailer supply store. Expect to pay between $50 and $100 for a quality replacement.
- Brake Line Problems: Check the brake lines for leaks, kinks, or damage. Even a small leak can reduce brake pressure significantly. Replace any damaged brake lines immediately. Consider using stainless steel brake lines for increased durability and corrosion resistance.
- Brake Adjustment: Are your trailer brakes properly adjusted? If the brake shoes are too far from the drums, the actuator may not be able to generate enough force to engage them. You'll need to adjust the brakes at each wheel. This usually involves using a brake adjusting tool to turn a star wheel inside the brake drum. Consult your trailer's owner's manual for specific instructions.
- Bleeding the Brakes: Air in the brake lines can also prevent the brakes from working properly. You'll need to bleed the brakes to remove any air. This is a fairly simple process, but it requires two people: one to operate the brake pedal (or surge actuator) and one to open and close the bleeder screws at each wheel. Make sure you use the correct type of brake fluid (usually DOT 3 or DOT 4) as specified in your trailer's manual.
Tools Needed: Wrenches (various sizes), brake line wrench, brake adjusting tool, jack, jack stands, bleeder bottle, brake fluid.
2. Brakes Locking Up
On the other end of the spectrum, you might experience your trailer brakes locking up unexpectedly. This can be dangerous and can also damage your brakes.
- Over-Adjustment: If your brakes are adjusted too tightly, they can lock up. Back off the brake adjustment at each wheel until the wheels spin freely.
- Master Cylinder Return Spring: The master cylinder has a return spring that helps release the pressure when you're not braking. If this spring is broken or weak, the brakes may not release completely. You can try lubricating the coupler mechanism to see if that resolves the issue, but you might need to replace the master cylinder.
- Sticking Brakes: Rust or corrosion inside the brake drums can cause the brake shoes to stick. You may need to disassemble the brakes, clean the components, and lubricate the moving parts. If the brake drums are severely rusted or damaged, they may need to be replaced.
- Damaged Brake Lines: A collapsed brake line can act like a one-way valve, allowing pressure to build up but not release. Inspect your brake lines carefully for any signs of damage.
Tools Needed: Wrenches (various sizes), brake adjusting tool, jack, jack stands, brake cleaner, lubricant.
3. Noisy Brakes
Squealing, grinding, or other unusual noises coming from your trailer brakes can indicate a variety of problems.
- Worn Brake Shoes: If the brake shoes are worn down to the metal, they'll make a grinding noise. You'll need to replace the brake shoes. This is usually a straightforward repair, but it's important to use high-quality brake shoes.
- Contaminated Brake Shoes: Oil, grease, or other contaminants on the brake shoes can cause them to squeal. Clean the brake shoes with brake cleaner. If the contamination is severe, you may need to replace the brake shoes.
- Rusty Brake Drums: Surface rust on the brake drums can cause a squealing noise, especially when the brakes are first applied. This usually goes away after a few uses. However, if the rust is severe, you may need to have the brake drums resurfaced or replaced.
- Loose Components: Check for loose brake hardware, such as backing plates, springs, or adjusters. Tighten any loose components.
Tools Needed: Wrenches (various sizes), jack, jack stands, brake cleaner, sandpaper, torque wrench.
4. Actuator Leaking Brake Fluid
A leaking brake actuator is a serious problem that needs to be addressed immediately. Not only will it compromise your braking performance, but brake fluid is also corrosive and can damage other components of your trailer.
- Master Cylinder Seals: The most common cause of a leaking actuator is worn or damaged seals in the master cylinder. Replacing the master cylinder is usually the best solution.
- Cracked Housing: In rare cases, the actuator housing itself can crack, leading to a leak. If you find a crack in the housing, the entire actuator needs to be replaced.
- Loose Fittings: Check all the fittings on the actuator and brake lines for tightness. Tighten any loose fittings, but be careful not to overtighten them, as this can damage the threads.
Tools Needed: Wrenches (various sizes), catch pan, brake fluid, rags.
Titan Model 60 Maintenance Tips
Preventive maintenance is key to keeping your Titan Model 60 brake actuator in good working order. Here are a few tips:
- Regularly Grease the Coupler: Keep the coupler well-lubricated with a marine-grade grease. This will prevent corrosion and binding.
- Inspect Brake Lines: Check the brake lines for leaks, cracks, or damage at least once a year. Replace any damaged brake lines immediately.
- Check Brake Fluid Level: Make sure the brake fluid reservoir is filled to the proper level. Use the correct type of brake fluid as specified in your trailer's manual.
- Adjust Brakes Regularly: Check and adjust your trailer brakes every 3,000 miles or at least once a year.
- Flush Brake Fluid: Brake fluid absorbs moisture over time, which can lead to corrosion and reduced braking performance. Flush the brake fluid every two years to remove any moisture.
- Clean and Inspect Brake Components: If you live in an area with harsh winters or frequently tow your trailer in saltwater, consider disassembling and cleaning the brake components every few years. This will help prevent corrosion and ensure that the brakes are working properly.
When to Call a Professional
While many Titan Model 60 brake actuator problems can be resolved with some basic troubleshooting and repair skills, there are times when it's best to call a professional. These include:
- If you're not comfortable working on brakes. Brakes are a critical safety system, and it's important to have them repaired correctly.
- If you're having trouble diagnosing the problem. If you've tried the troubleshooting steps outlined in this guide and you're still not sure what's wrong, it's best to consult a qualified mechanic.
- If the actuator housing is cracked or damaged. This requires replacing the entire actuator, which can be a more complex repair.
- If you're experiencing recurring brake problems. This could indicate a more serious underlying issue that needs to be addressed by a professional.
Approximate Repair Costs: It's difficult to give exact repair costs without knowing the specific problem, but here are some general estimates:
- Master Cylinder Replacement: $150-$300 (parts and labor)
- Brake Shoe Replacement (per axle): $200-$400 (parts and labor)
- Brake Line Replacement: $50-$150 per line (parts and labor)
- Actuator Replacement: $300-$600 (parts and labor)
These are just estimates, and the actual cost of repair may vary depending on your location and the specific mechanic you use.
By following these troubleshooting tips and maintenance guidelines, you can keep your Titan Model 60 brake actuator in good working order and ensure safe and reliable braking performance for years to come. Safe travels!