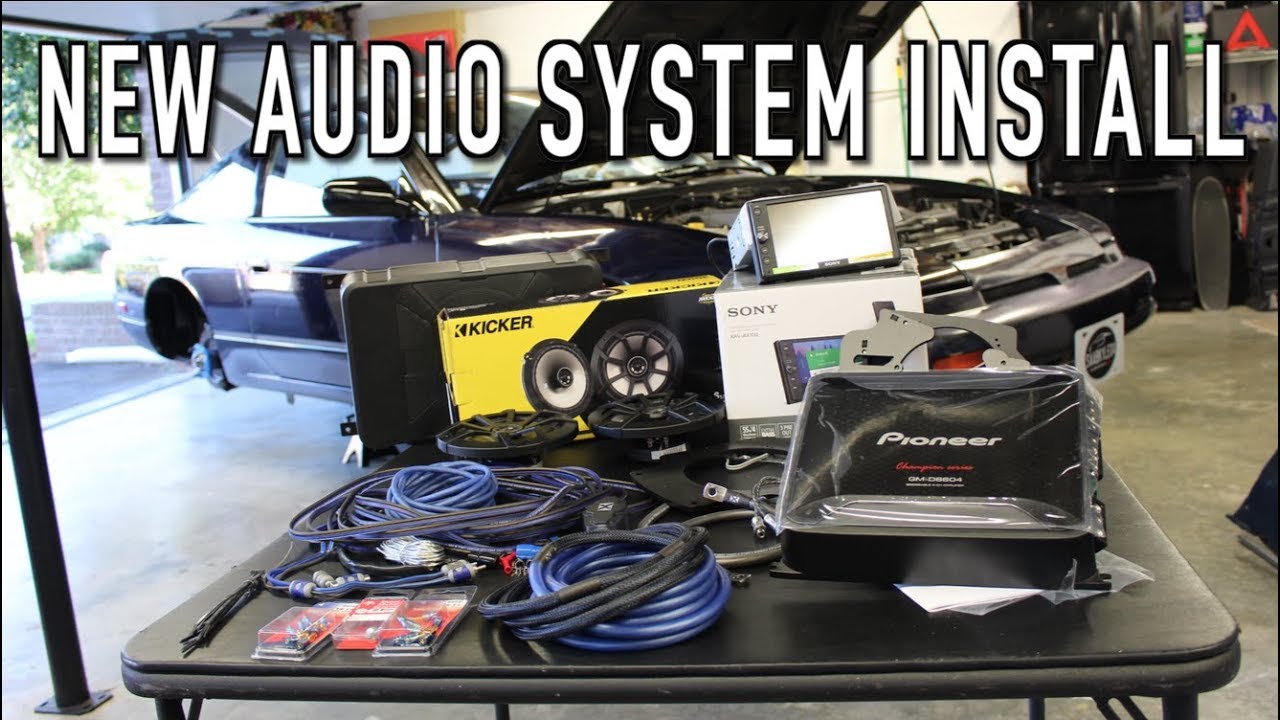
Upgrading The Oem Audio System In A Nissan 240sx
So, you're looking to upgrade the audio system in your trusty Nissan 240SX? Excellent choice! The factory setup, while adequate in its day, is definitely showing its age. This article will guide you through the process, covering everything from assessing your needs to installing the new components. We'll assume you have a basic understanding of automotive electrical systems and are comfortable using hand tools and a multimeter. Remember to always disconnect the negative terminal of your battery before working on any electrical components. Safety first!
Assessing Your Needs and Planning the Upgrade
Before you start tearing into your dashboard, take a moment to consider what you want to achieve with your audio upgrade. Are you simply looking for better sound quality, or are you aiming for a full-blown competition-level system? Understanding your goals will help you choose the right components and avoid wasting time and money. Here are some questions to ask yourself:
- Budget: How much are you willing to spend? This is the most important factor.
- Sound Quality: Are you an audiophile who craves pristine audio, or are you happy with a noticeable improvement over the factory system?
- Features: Do you need Bluetooth connectivity, Apple CarPlay/Android Auto, a touchscreen display, or other modern features?
- Power: Do you plan to use external amplifiers to drive your speakers, or will you rely on the head unit's built-in amplifier?
- Subwoofer: Do you want to add a subwoofer for deeper bass?
Once you have a clear idea of your needs, you can start planning your upgrade. Here's a breakdown of the key components:
Head Unit
The head unit, or receiver, is the heart of your audio system. It's responsible for playing music from various sources (radio, CDs, USB, Bluetooth) and controlling the volume, tone, and other settings. When choosing a head unit, consider the following:
- DIN Size: The 240SX uses a standard single-DIN head unit. This means you can install any single-DIN aftermarket receiver. A double-DIN unit is possible, but it will usually require extensive modification.
- Power Output: Look for a head unit with a decent built-in amplifier. Most aftermarket head units will output around 15-22 watts RMS (Root Mean Square, a more accurate measure of power) per channel. If you plan to use external amplifiers, this is less important.
- Preamp Outputs: Preamp outputs (also known as RCA outputs) are used to connect the head unit to external amplifiers. Look for a head unit with at least two pairs of preamp outputs (front and rear) if you plan to add amplifiers. A dedicated subwoofer output is also desirable.
- Features: Consider features like Bluetooth, USB input, CD player, touchscreen display, and compatibility with Apple CarPlay/Android Auto.
Speakers
Upgrading your speakers is one of the most effective ways to improve sound quality. The 240SX typically has speakers in the front doors and rear deck. Consider the following when choosing speakers:
- Size: The front door speakers are typically 6.5 inches. The rear deck speakers are also often 6.5 inches but may require some modification depending on the depth of the speaker. Measure before you buy!
- Component vs. Coaxial: Component speakers consist of separate tweeters and woofers, allowing for better sound staging and clarity. Coaxial speakers (also known as full-range speakers) combine the tweeter and woofer into a single unit. Component speakers generally offer better performance, but they are also more expensive and require more installation effort.
- Sensitivity: Speaker sensitivity is a measure of how loud the speaker will play with a given amount of power. A higher sensitivity rating means the speaker will play louder with the same amount of power. This is especially important if you are not using an external amplifier.
- Power Handling: Make sure the speakers can handle the power output of your head unit or amplifier. RMS power handling is the continuous power the speaker can handle, while peak power handling is the maximum power the speaker can handle for short bursts.
Amplifiers (Optional)
If you want to significantly increase the power and clarity of your audio system, consider adding external amplifiers. Amplifiers provide more power to the speakers, allowing them to play louder and with greater detail. There are different types of amplifiers, including:
- Multi-Channel Amplifiers: These amplifiers can power multiple speakers, such as the front and rear speakers.
- Mono Amplifiers: These amplifiers are designed specifically for powering subwoofers.
When choosing an amplifier, consider the following:
- Power Output: Match the amplifier's power output to the power handling of your speakers.
- Impedance: Impedance is the electrical resistance of the speaker. Most speakers have an impedance of 4 ohms. Make sure the amplifier is compatible with the impedance of your speakers.
- Signal-to-Noise Ratio (SNR): A higher SNR indicates less background noise.
Subwoofer (Optional)
A subwoofer is a specialized speaker designed to reproduce low-frequency sounds (bass). Adding a subwoofer can significantly enhance the listening experience, especially for music with strong bass lines. Subwoofers come in various sizes and configurations, including:
- Enclosed Subwoofers: These subwoofers are pre-mounted in an enclosure, making them easy to install.
- Component Subwoofers: These subwoofers require a separate enclosure, allowing you to customize the sound and appearance.
When choosing a subwoofer, consider the following:
- Size: Subwoofers typically range in size from 8 inches to 15 inches. Larger subwoofers generally produce deeper bass.
- Power Handling: Match the subwoofer's power handling to the power output of your amplifier.
- Enclosure Type: The type of enclosure can significantly affect the sound of the subwoofer. Common enclosure types include sealed, ported, and bandpass.
Installation
Now that you have your components, it's time to install them. This section provides a general overview of the installation process. Always refer to the manufacturer's instructions for your specific components.
Head Unit Installation
- Disconnect the Battery: Disconnect the negative terminal of your battery.
- Remove the Factory Head Unit: Use a panel removal tool to carefully remove the trim surrounding the head unit. Then, use the appropriate tools to remove the screws or clips holding the head unit in place.
- Disconnect the Wiring Harness: Disconnect the wiring harness from the back of the factory head unit.
- Install the Aftermarket Wiring Harness: Use a wiring harness adapter to connect the aftermarket head unit to the factory wiring harness. This will allow you to easily connect the power, ground, and speaker wires without cutting any wires. Match the colors of the wires on the aftermarket harness to the colors of the wires on the adapter. Solder and heat shrink the connections for a secure and reliable connection.
- Connect the Head Unit: Connect the wiring harness to the back of the aftermarket head unit. Also, connect any RCA cables for preamp outputs, if applicable.
- Install the Head Unit: Slide the head unit into the dashboard and secure it with the screws or clips.
- Test the Head Unit: Reconnect the battery and turn on the head unit to make sure it's working properly.
- Reinstall the Trim: Reinstall the trim around the head unit.
Speaker Installation
- Remove the Door Panels or Rear Deck Trim: Use a panel removal tool to carefully remove the door panels or rear deck trim.
- Remove the Factory Speakers: Remove the screws or clips holding the factory speakers in place.
- Disconnect the Wiring Harness: Disconnect the wiring harness from the back of the factory speakers.
- Install the Aftermarket Speakers: Use a speaker adapter to connect the aftermarket speakers to the factory wiring harness. If necessary, drill new mounting holes for the speakers.
- Connect the Speakers: Connect the wiring harness to the back of the aftermarket speakers.
- Install the Speakers: Secure the speakers with screws or clips.
- Reinstall the Door Panels or Rear Deck Trim: Reinstall the door panels or rear deck trim.
Amplifier Installation
- Choose a Mounting Location: Choose a location for the amplifier that is well-ventilated and protected from moisture. Common locations include under the seats, in the trunk, or on the back of the rear seats.
- Mount the Amplifier: Secure the amplifier to the chosen mounting location.
- Run the Power Wire: Run a heavy-gauge power wire from the battery to the amplifier. Use a fuse near the battery to protect the electrical system.
- Run the Ground Wire: Connect a ground wire from the amplifier to a clean, bare metal ground point on the vehicle's chassis.
- Run the Signal Wires: Run RCA cables from the head unit to the amplifier.
- Run the Speaker Wires: Run speaker wires from the amplifier to the speakers.
- Connect the Wires: Connect all the wires to the amplifier and the speakers.
- Set the Gains: Set the gains on the amplifier according to the manufacturer's instructions. This is crucial for preventing distortion and damaging the speakers. Use a multimeter and online guides to properly set your gain. Many advocate for using an Oscilloscope but that is not needed for the average user.
Subwoofer Installation
- Choose a Mounting Location: Choose a location for the subwoofer that is large enough to accommodate the enclosure. The trunk is the most common location.
- Secure the Subwoofer Enclosure: Secure the subwoofer enclosure to the vehicle to prevent it from moving around.
- Run the Speaker Wires: Run speaker wires from the amplifier to the subwoofer.
- Connect the Wires: Connect the wires to the subwoofer.
Troubleshooting
If you encounter any problems during the installation process, here are some common troubleshooting tips:
- No Power: Check the fuse on the power wire to the head unit or amplifier. Make sure the ground wire is securely connected to a clean, bare metal ground point.
- No Sound: Check the speaker wires to make sure they are properly connected. Make sure the head unit is turned up and that the fader and balance are properly adjusted.
- Distorted Sound: Check the gains on the amplifier to make sure they are not set too high. Make sure the speakers are not being over-powered.
- Static or Noise: Check the ground connections to make sure they are clean and secure. Try running the RCA cables away from the power wires. A ground loop isolator may be needed in some cases.
Upgrading the audio system in your Nissan 240SX can be a rewarding experience. By carefully planning your upgrade and following these instructions, you can significantly improve the sound quality and enjoy your favorite music on the road.
Disclaimer: This article is for informational purposes only. The author is not responsible for any damage or injury that may occur during the installation process. Always consult a qualified professional if you are not comfortable performing any of these tasks.