Upgrading The Oem Mechanical Fan To An Electric Fan Setup
Upgrading from a belt-driven mechanical fan to an electric fan setup is a popular modification that offers several benefits for your vehicle. These benefits can include improved fuel economy, increased horsepower, and quieter operation. While it might seem daunting, this project is achievable for the experienced DIYer with a decent understanding of automotive electrical systems and some patience. This guide will walk you through the process, highlighting key considerations and potential pitfalls.
Benefits and Considerations
Before diving in, let's briefly outline the advantages and disadvantages of switching to electric fans.
Advantages:
- Improved Fuel Economy: Mechanical fans are constantly driven by the engine, drawing power even when cooling isn't needed. Electric fans only operate when the coolant temperature reaches a certain threshold, reducing parasitic drag on the engine. This translates to a slight, but noticeable, improvement in fuel efficiency.
- Increased Horsepower: By reducing parasitic drag, more engine power is available to turn the wheels. While the gain isn't massive, it can be noticeable, especially in smaller engines.
- Quieter Operation: Electric fans are generally quieter than mechanical fans, especially at higher RPMs.
- More Precise Cooling: Electric fans, when paired with a proper controller, offer more precise cooling control, keeping engine temperature stable and preventing overheating, particularly in stop-and-go traffic or when towing.
- More Space: Removing the mechanical fan can free up valuable space in the engine bay, which can be beneficial for other modifications or repairs.
Disadvantages:
- Cost: Electric fan setups can be more expensive than a simple mechanical fan replacement, especially when considering the fan itself, the controller, and wiring.
- Complexity: Wiring and installation can be more complex than a direct mechanical fan replacement. Proper wiring and relay placement are crucial.
- Potential for Electrical Issues: A poorly installed or undersized electrical system can lead to blown fuses, overheating, or even damage to the vehicle's electrical system.
- Reliability Concerns: Electric fans rely on electrical components, which can fail. While modern electric fans are generally reliable, it's important to choose a quality brand and maintain the system properly.
Parts and Tools Required
Gathering the necessary parts and tools before you start will make the process much smoother.
Parts:
- Electric Fan(s): Choose a fan with sufficient CFM (cubic feet per minute) rating for your engine. Consider the engine size, horsepower, and climate. A good rule of thumb is to aim for a CFM rating that matches or slightly exceeds your engine's displacement in cubic inches. Also, consider whether you need a single or dual fan setup. Dual fans often offer better coverage and redundancy.
- Fan Controller: This regulates the fan's operation based on coolant temperature. Options include adjustable controllers, those with specific temperature setpoints, and those that integrate with the ECU (Engine Control Unit) for even finer control. Some controllers allow for variable fan speed control using PWM (Pulse Width Modulation).
- Wiring Harness: A pre-made wiring harness simplifies the wiring process and often includes relays and fuses. If building your own harness, ensure you use appropriately sized wire for the amperage draw of the fan(s).
- Relay(s): A relay is an electrically operated switch that allows a low-current circuit to control a high-current circuit. Electric fans draw a significant amount of current, so a relay is essential to protect the fan controller and other electrical components. A standard 30/40 amp automotive relay is usually sufficient for most applications.
- Fuse(s): A fuse protects the electrical system from overloads. Choose a fuse with an amperage rating slightly higher than the fan's maximum current draw.
- Temperature Sensor (if not included with the controller): This sensor monitors the coolant temperature and sends a signal to the fan controller.
- Mounting Hardware: Universal mounting kits are available, or you may need to fabricate custom brackets.
- Connectors, Terminals, and Heat Shrink Tubing: For making secure and weatherproof electrical connections.
Tools:
- Wrenches and Sockets: For removing the mechanical fan and installing the electric fan.
- Screwdrivers: Assorted sizes for various screws and bolts.
- Wire Strippers and Crimpers: For preparing and connecting wires.
- Multimeter: For testing electrical circuits and verifying connections.
- Drill (if needed): For mounting the fan and temperature sensor.
- Heat Gun or Lighter: For shrinking heat shrink tubing.
- Pliers: For gripping and manipulating wires and connectors.
- Voltmeter: To check for voltage and diagnose any electrical problems.
- Coolant Catch Pan: To collect any coolant that spills during the sensor installation.
Installation Procedure
Now for the fun part! Follow these steps carefully for a successful installation.
1. Removing the Mechanical Fan:
Safety First! Disconnect the negative battery cable before starting any electrical work. This will prevent accidental short circuits.
Locate the mechanical fan and the bolts securing it to the water pump pulley. Use the appropriate wrenches or sockets to remove these bolts. Some fans may have a fan clutch that needs to be loosened or removed. Consult your vehicle's service manual for specific instructions.
Carefully remove the mechanical fan and set it aside. Inspect the water pump pulley for any damage and replace it if necessary.
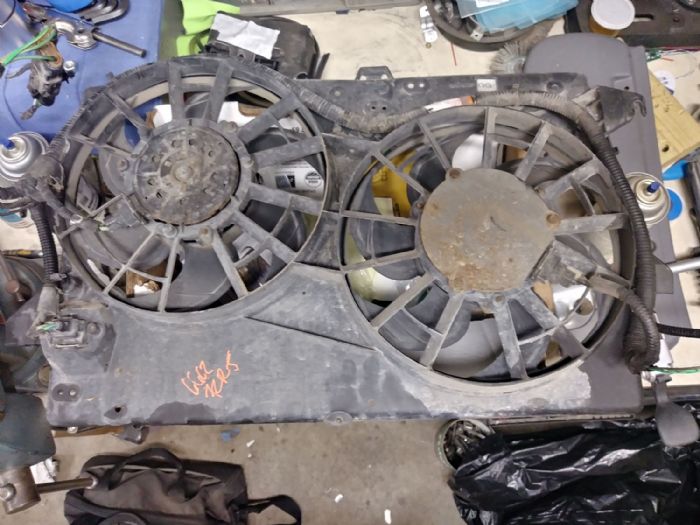
2. Mounting the Electric Fan(s):
Position the electric fan(s) on the radiator, ensuring they are oriented to pull air through the radiator (most common). Some fans can be configured to push air, but this is generally less efficient.
Use the provided mounting hardware or fabricate custom brackets to secure the fan(s) to the radiator. Be careful not to damage the radiator core during this process. Consider using rubber isolators to reduce vibration and noise.
3. Installing the Temperature Sensor:
The temperature sensor needs to be placed in a location where it can accurately measure coolant temperature. Common locations include:
- Radiator Fin Probe: These sensors clip onto the radiator fins. They are easy to install but may not be as accurate as other methods.
- Threaded Sensor in Water Jacket: Some vehicles have spare threaded ports in the water jacket. This is the most accurate method, but may require an adapter to match the sensor's thread size.
- Inline Hose Adapter: These adapters are installed in the upper radiator hose and provide a threaded port for the temperature sensor. This is a good compromise between accuracy and ease of installation.
If using a threaded sensor, drain some coolant from the radiator before removing the plug or installing the adapter. Wrap the sensor threads with Teflon tape to prevent leaks. Connect the sensor wires to the fan controller.
4. Wiring the Fan Controller and Relay(s):
This is the most critical step. Follow the wiring diagram provided with the fan controller and relay(s) carefully. A typical wiring setup involves the following:
- Power Source: Connect the relay's power input (usually pin 30) to a fused 12V power source, such as the battery or a distribution block. Use appropriately sized wire (e.g., 10-12 gauge) for this connection.
- Ground: Connect the relay's ground (usually pin 85) to a good chassis ground.
- Trigger Wire: Connect the relay's trigger wire (usually pin 86) to the fan controller's output. This wire will energize the relay when the coolant temperature reaches the setpoint.
- Fan Power: Connect the relay's output (usually pin 87) to the positive wire of the electric fan(s). Connect the negative wire of the fan(s) to a good chassis ground.
- Fan Controller Power: Connect the fan controller's power wire to a fused 12V power source.
- Fan Controller Ground: Connect the fan controller's ground wire to a good chassis ground.
Use proper crimping techniques and heat shrink tubing to ensure secure and weatherproof connections. Route the wires carefully, avoiding sharp edges and moving parts. Use zip ties to secure the wires and keep them organized.
5. Testing and Adjustments:
Reconnect the negative battery cable.
Start the engine and let it idle until it reaches operating temperature. Monitor the coolant temperature gauge and verify that the electric fan(s) turn on when the coolant temperature reaches the setpoint on the fan controller.
If the fan(s) don't turn on, check the following:
- Fuse: Make sure the fuse is not blown.
- Relay: Test the relay to make sure it's functioning properly.
- Wiring: Check all wiring connections for continuity and proper voltage.
- Temperature Sensor: Verify that the temperature sensor is working correctly.
- Fan Controller: Check the fan controller settings and make sure it's programmed correctly.
Adjust the fan controller settings as needed to achieve the desired coolant temperature range. Monitor the engine temperature closely during the first few drives to ensure the cooling system is functioning properly. Check the coolant level and add coolant as needed.
Troubleshooting Tips
- Fan Runs Constantly: Could be a faulty temperature sensor, a short in the wiring, or the fan controller is set too low.
- Fan Doesn't Turn On: Check the fuse, relay, wiring, temperature sensor, and fan controller.
- Engine Overheats: The fan may not be providing enough airflow. Check the CFM rating of the fan and consider adding a second fan. Also, check for other cooling system problems, such as a clogged radiator or a faulty thermostat.
- Electrical Noise: Poor grounding can cause electrical noise that interferes with other vehicle systems. Ensure all ground connections are clean and secure.
By following these steps and taking your time, you can successfully upgrade your vehicle's cooling system with an electric fan setup. This modification can improve fuel economy, increase horsepower, and provide more precise cooling control. Remember to prioritize safety and double-check all wiring connections before operating your vehicle.