How Do I Shampoo My Car Seats
So, you're ready to tackle shampooing your car seats? Excellent. It's a project that can dramatically improve the look and feel of your interior. We're going to break down the process step-by-step, focusing on the techniques and tools that deliver professional-level results. This isn't just a quick wipe-down; we're talking deep cleaning to remove embedded dirt, stains, and odors. This process is relevant for regular maintenance, preparing your car for sale, or recovering from a spill or mishap.
Key Specs and Main Parts (Your Cleaning Arsenal)
Before you begin, let's gather the essentials. Think of these as the key components of your seat-shampooing system:
- Vacuum Cleaner: A shop vacuum is ideal. Crucially, make sure it has a hose attachment and brush attachments. The brush is your friend for loosening debris.
- Carpet and Upholstery Cleaner: This is your chemical workhorse. Look for a product specifically designed for automotive interiors. Check the pH level, more neutral pH will be more gentle for sensitive materials. Pay attention to the type of material your seats are made from!
- Spray Bottles: You'll need at least one, maybe two. One for the cleaner, and another for clean water (for rinsing).
- Microfiber Towels: Stock up! You'll use these for scrubbing, wiping, and drying. Different colors can help keep things organized (one color for cleaning, another for drying).
- Upholstery Brush: A stiff-bristled brush, but not too stiff, is perfect for agitating the cleaner. Avoid brushes that could damage the fabric.
- Detailing Brushes: Smaller, finer brushes for getting into seams and crevices. An old toothbrush can work in a pinch.
- Leather Conditioner (If Applicable): If your seats are leather, this is a must to prevent drying and cracking after cleaning.
- Optional: Steam Cleaner: A portable steam cleaner can be a powerful tool for lifting stubborn stains and sanitizing the upholstery. Use sparingly if you're not experienced.
- Optional: Wet/Dry Vacuum: Also known as an extractor, it applies and vacuums the cleaning solution simultaneously, making it more effective than a vacuum alone. This is the real professional tool.
- PPE (Personal Protective Equipment): Gloves and eye protection are a good idea, especially when working with cleaning chemicals.
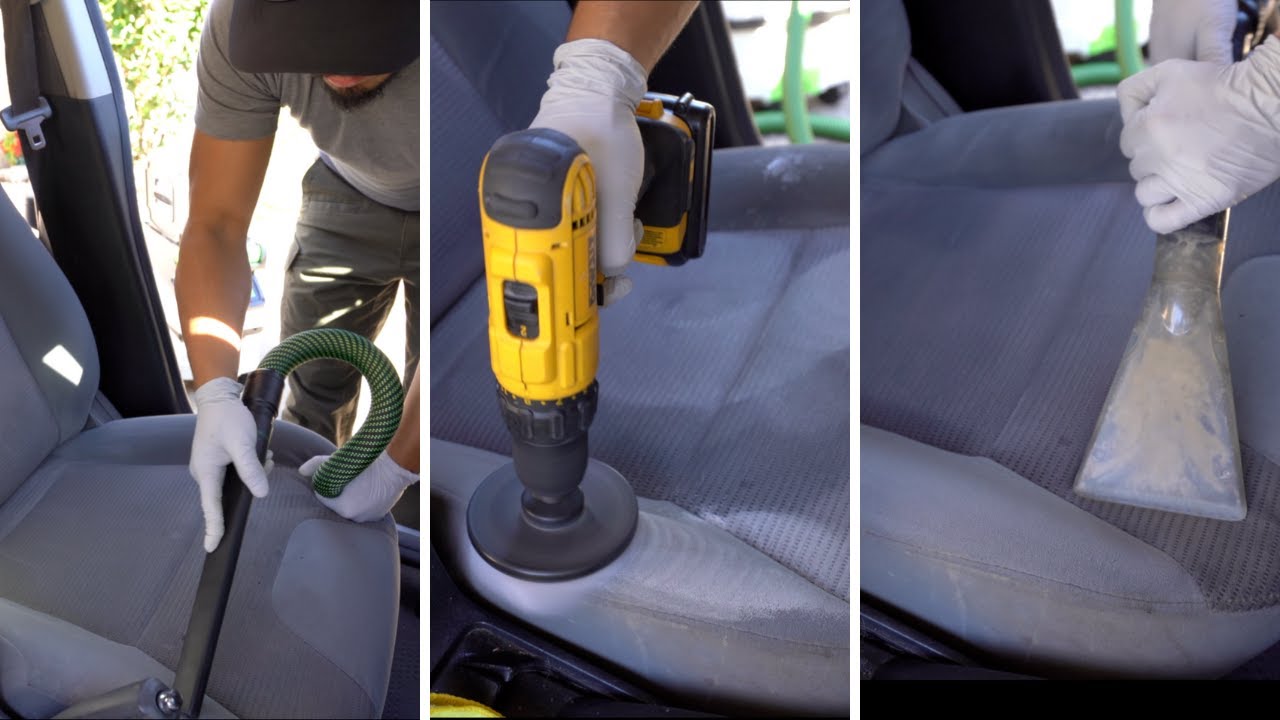
How It Works: The Shampooing Process
The goal is to lift dirt and grime from the seat fibers without soaking the upholstery excessively. Excessive moisture can lead to mold and mildew growth, which is something you definitely want to avoid.
- Vacuuming: This is the most crucial first step. Thoroughly vacuum the entire seat, including crevices, seams, and under the seat. Use different attachments to reach every nook and cranny.
- Spot Treatment: Identify any stubborn stains. Pre-treat these with a stain remover designed for the specific type of stain (e.g., grease, ink, food). Follow the product instructions carefully. Consider a dedicated enzyme cleaner for organic stains, these utilize enzymatic reactions to break down the organic stain.
- Applying the Cleaner: Lightly spray the upholstery cleaner onto a small section of the seat. Avoid oversaturating the fabric. A light mist is all you need.
- Agitation: Use the upholstery brush to gently agitate the cleaner into the fabric. Work in circular motions, paying attention to areas that are particularly dirty or stained.
- Wiping: Use a clean microfiber towel to wipe away the dirty cleaner. Blot, don't rub, to avoid damaging the fabric.
- Rinsing (Critical Step): Spray the area with clean water and immediately wipe it away with a clean, dry microfiber towel. This removes cleaner residue, which can attract dirt and leave a sticky feeling. This is often overlooked!
- Drying: Allow the seats to air dry completely. Open the car doors and windows to promote airflow. You can use fans to speed up the drying process. Avoid direct sunlight, which can fade the upholstery. Alternatively, use an extractor.
- Leather Conditioning (If Applicable): Once the leather seats are completely dry, apply a leather conditioner to keep them supple and prevent cracking.
- Final Vacuum: After the seats are completely dry, give them one final vacuum to remove any remaining loose debris.
Real-World Use: Troubleshooting Tips
- Stubborn Stains: If a stain persists, try repeating the cleaning process. You may need to use a stronger cleaner or a stain remover specifically designed for that type of stain. A paste of baking soda and water can be effective for some stains.
- Water Stains: Water stains can occur if the upholstery dries unevenly. To remove them, lightly dampen the entire seat with water and allow it to dry evenly.
- Odor Removal: For lingering odors, try sprinkling baking soda on the seats, letting it sit for several hours, and then vacuuming it up. Ozone generators can also be effective, but use them with caution and follow the manufacturer's instructions carefully. Consider also that the carpets may be holding odor.
- Discoloration: Cleaners can sometimes cause discoloration. Test the cleaner in an inconspicuous area first to make sure it doesn't damage the fabric.
- Mold or Mildew: If you find mold or mildew, it's crucial to address it immediately. Use a mold and mildew remover specifically designed for automotive interiors. Ensure the area is thoroughly dried to prevent re-growth. Wearing a mask during mold removal is recommended.
Safety: Risky Components and Precautions
While shampooing car seats isn't inherently dangerous, there are a few safety considerations to keep in mind:
- Cleaning Chemicals: Always wear gloves and eye protection when working with cleaning chemicals. Read the product labels carefully and follow the manufacturer's instructions. Avoid mixing different cleaning products, as this can create hazardous fumes. Ensure adequate ventilation while cleaning.
- Electrical Components: Be careful not to get electrical components wet, especially around seat heaters and airbags. Disconnect the battery if you're concerned about accidentally triggering an airbag.
- Sharp Objects: Be mindful of any sharp objects that may be hidden under the seats. Use caution when reaching into tight spaces.
- Slip Hazards: Wet seats can be slippery. Take care when getting in and out of the car while the seats are drying.
This process, while seeming daunting, boils down to careful application, agitation, and extraction. The key is not to soak the seats and always to allow for proper drying.
We've got a detailed diagram of the entire process, including specific product recommendations and application techniques, available for download. It's a great resource to have on hand as you tackle this project. Just let us know and we can provide it.