How Do Nails Get In Tires
Understanding how nails end up puncturing your tires is crucial for preventative maintenance, efficient repairs, and informed decision-making regarding tire selection and driving habits. This article delves into the common pathways that lead to nail intrusions, providing you with the knowledge to minimize risks and effectively address punctures when they occur. Having a good grasp of this will help you better understand where to focus your inspection efforts during routine maintenance, and might even save you a call to a tow truck one day.
Key Specs and Main Parts Involved
While a nail itself isn't a tire component, understanding the tire's construction is vital for grasping the vulnerability to punctures. Key specs to consider are:
- Tire Pressure (PSI): Proper inflation is critical. Underinflated tires have larger contact patches, increasing the likelihood of picking up road debris. Conversely, overinflated tires may become more susceptible to punctures due to reduced pliability.
- Tread Depth: Adequate tread depth channels water away from the tire and provides grip. Worn tires are more prone to punctures as less rubber protects the tire's carcass.
- Tire Construction: Radial tires, the most common type, consist of a carcass built with plies running radially from bead to bead. The belts, located beneath the tread, provide stiffness and puncture resistance. Understanding the number and material of the belts (e.g., steel, aramid) indicates the tire's overall robustness.
- Sidewall Construction: The sidewall's flexibility allows the tire to absorb impacts. However, sidewall punctures are generally irreparable due to the constant flexing.
The main parts directly involved in a nail puncture scenario are:
- Tire Tread: The outermost layer that contacts the road surface. It's the primary point of entry for nails and other debris.
- Belts: Layers of reinforcing material beneath the tread, typically made of steel, aramid, or other high-strength fibers. They offer puncture resistance but can be penetrated by sufficiently sharp objects.
- Carcass Plies: The structural framework of the tire, providing strength and flexibility.
- Inner Liner: An airtight layer that prevents air leakage. Punctures in the tread area must penetrate this layer to cause air loss.
How It Works: The Journey of a Nail
The process of a nail embedding itself in a tire is often a combination of unfortunate circumstances. Here's a breakdown:
- Presence of Debris: Nails, screws, metal shards, and other sharp objects are common on roads, particularly construction zones and areas with high traffic.
- Tire Rotation and Contact: As the tire rotates, it encounters debris on the road surface. The tire's weight and the rotational force can cause the nail to be pressed against the tire.
- Penetration: If the nail is sharp and the tire's surface offers insufficient resistance (e.g., worn tread, underinflation), the nail can pierce the tread. The angle of entry, the nail's sharpness, and the tire's condition all play a role.
- Continued Rotation and Embedding: Once the nail penetrates, continued rotation forces it deeper into the tire. The tire's flexing motion can further drive the nail in and potentially cause it to bend or break off.
- Air Leakage (if applicable): If the nail penetrates through the inner liner, air will begin to leak out of the tire, leading to pressure loss. The rate of leakage depends on the size and location of the puncture. Sometimes a nail can get embedded and not cause a leak right away. These slow leaks can be very difficult to diagnose.
The likelihood of a nail puncture is increased by:
- Driving on shoulders or road edges: Debris tends to accumulate in these areas.
- Driving in construction zones: Construction sites are notorious for scattered nails and metal fragments.
- Worn tires: Reduced tread depth offers less protection.
- Underinflated tires: A larger contact patch increases the chance of encountering debris and makes the tire more susceptible to penetration.
Real-World Use: Basic Troubleshooting Tips
If you suspect a nail puncture:
- Check Tire Pressure: Use a reliable tire pressure gauge to verify if the tire is losing air. A sudden drop in pressure is a strong indicator of a puncture.
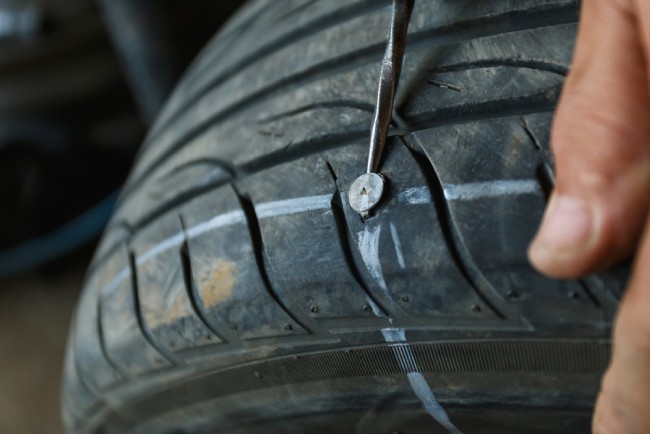
- Visual Inspection: Carefully examine the tire's tread surface for any embedded objects. Pay close attention to areas that came into contact with the road.
- Listen for Leaks: With the vehicle parked in a quiet location, listen for a hissing sound emanating from the tire. This can help pinpoint the location of the puncture.
- Soapy Water Test: Mix a solution of soapy water and spray it onto the tire's surface. Bubbles forming at a specific spot indicate an air leak.
If you find a nail:
- Do NOT remove the nail immediately unless you are prepared to immediately repair the tire. The nail may be acting as a plug, slowing down the air leak.
- Assess the Location: Punctures in the tread area can often be repaired, while sidewall punctures typically require tire replacement.
- Consider Professional Repair: For most punctures, it's best to have a qualified tire technician perform the repair. They have the expertise and equipment to ensure a safe and lasting fix.
- Use a Tire Plug or Patch (DIY with caution): If you're comfortable with DIY repairs, you can use a tire plug or patch kit. Follow the instructions carefully and ensure the repair is done correctly. Tire plugs are generally considered a temporary fix, while patches are a more permanent solution when applied properly from the inside of the tire.
Safety: Risky Components and Practices
Tire repair and maintenance involve inherent risks. Be mindful of the following:
- High Pressure: Tires contain a significant amount of compressed air. Improper handling can lead to tire explosions, causing serious injury. Always deflate tires before removing them from the vehicle or attempting any repairs.
- Jacking the Vehicle: Securely support the vehicle with jack stands before working underneath it. Never rely solely on the jack.
- Wheel Removal: Ensure the parking brake is engaged and the wheels are chocked to prevent the vehicle from rolling.
- Improper Repair Techniques: Incorrectly applied tire plugs or patches can fail, leading to sudden tire deflation while driving. Always follow the manufacturer's instructions and err on the side of caution. Sidewall punctures are *never* safe to repair and require tire replacement.
- Overinflation: Exceeding the maximum recommended tire pressure can cause the tire to burst. Refer to the tire's sidewall or the vehicle's door placard for the appropriate pressure.
Important Safety Tip: When dealing with a suspected tire puncture, prioritize your safety. If you're unsure about any aspect of the repair process, seek professional assistance. A compromised tire can lead to a loss of control and potentially cause an accident.
Remember, maintaining proper tire inflation, regularly inspecting your tires for damage, and avoiding driving in areas known for debris are key steps in preventing nail punctures and ensuring safe driving.
We have a detailed diagram illustrating tire construction and common puncture locations available for download. This diagram provides a visual representation of the concepts discussed in this article, further enhancing your understanding of tire vulnerabilities.