How Do You Charge A Chevy Volt
Alright, let's dive into how to charge a Chevy Volt. Understanding the charging system is crucial, not just for keeping your Volt running, but also for diagnosing potential issues, making informed decisions about modifications, and potentially even performing some repairs yourself. This guide is geared towards those of you who are comfortable working on your car and are familiar with basic electrical concepts.
Purpose of Understanding the Volt Charging System
Think of this knowledge as having the keys to your Volt's electrical kingdom. Instead of blindly relying on a mechanic, you can:
- Diagnose charging problems: Is it the car, the charger, or your home wiring?
- Understand charging speeds: Are you getting the expected charge rate?
- Plan home charging upgrades: Do you need a dedicated circuit or a higher-powered charger?
- Perform basic repairs: Replacing a faulty charge port, for example.
- Customize your charging experience: Integrate smart home features or monitor energy usage.
Key Specs and Main Parts
The Chevy Volt's charging system is primarily designed to work with two levels of AC (Alternating Current) charging:
- Level 1 Charging (120V): This uses a standard household outlet. It's slow, typically adding about 4 miles of range per hour. The Volt comes with a Level 1 charger, often referred to as an Electric Vehicle Supply Equipment (EVSE), although technically the EVSE is part of the cord and doesn't actually charge the car. The charger is built into the car.
- Level 2 Charging (240V): This is faster, adding around 10-25 miles of range per hour, depending on the amperage. It requires a dedicated 240V circuit and a Level 2 EVSE.
Here's a breakdown of the main components involved:
- Charge Port (Inlet): This is where you plug in the charging cable. It's located on the driver's side front fender. It uses a standard J1772 connector.
- Onboard Charger (OBC): This is the brains of the operation, located inside the Volt. It converts AC power from the charging station into DC (Direct Current) power that the battery can store. The Volt's OBC has a maximum charging rate, typically around 3.3 kW (kilowatts) or 3.6kW depending on the model year.
- Battery Pack: The Volt uses a lithium-ion battery pack. The capacity varies slightly by model year, ranging from about 16 kWh (kilowatt-hours) to 18.4 kWh.
- Battery Management System (BMS): This critical system monitors the battery's voltage, current, temperature, and state of charge, ensuring safe and efficient operation. It communicates with the OBC to control the charging process.
- Electric Vehicle Supply Equipment (EVSE): This is the charging station or charging cable. It's essentially a smart extension cord that provides safety features like ground fault detection and communication with the vehicle.
How It Works
Let's walk through the charging process step-by-step:
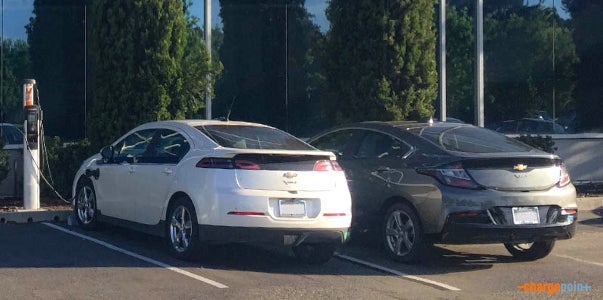
- Plug In: You connect the EVSE connector to the Volt's charge port.
- Communication: The EVSE communicates with the Volt, verifying that it's a valid charging source and negotiating the available amperage. This communication happens through the J1772 protocol.
- Safety Checks: The EVSE performs safety checks, such as verifying the ground connection and looking for ground faults.
- Power Delivery: If everything checks out, the EVSE starts delivering AC power to the Volt's OBC.
- AC to DC Conversion: The OBC converts the AC power into DC power.
- Battery Charging: The DC power is then used to charge the battery pack, under the supervision of the BMS. The BMS monitors the charging process, adjusting the charging rate as needed to optimize battery health and prevent overcharging.
- Charge Termination: Once the battery is fully charged (or reaches a user-defined charging limit), the BMS signals the OBC to stop charging. The OBC then signals the EVSE to stop delivering power.
Real-World Use – Basic Troubleshooting Tips
Here are some common charging issues and how to troubleshoot them:
- Won't Charge:
- Check the EVSE: Make sure it's properly plugged in and that the outlet is working. Try a different outlet.
- Check the charge port: Look for any debris or damage.
- Check the car's display: Are there any error messages related to charging?
- Reset the car: Sometimes a simple reboot can fix things. Turn the car off, open the driver's door, and wait a few minutes before restarting.
- Slow Charging:
- Verify the EVSE amperage: Is it set to the maximum supported by your car and your circuit?
- Check the voltage: A weak 120V circuit can significantly slow down Level 1 charging.
- Temperature: Extreme temperatures can affect charging rates. The BMS will slow down charging to protect the battery.
Symbols Explained (Simplified)
While a full schematic diagram is beyond the scope of this article, here are some basic symbols you might encounter in diagrams related to the Volt's charging system:
- Solid Lines: Represent electrical conductors (wires).
- Dashed Lines: Often indicate communication or control signals.
- Lightning Bolt Icon: Indicates electricity or charging.
- Ground Symbol: Indicates a connection to ground, which is essential for safety.
- J1772 Connector Symbol: Represents the J1772 charging port.
Safety – Highlight Risky Components
WARNING: Working with high-voltage electrical systems can be extremely dangerous and potentially lethal. Always disconnect the power supply before working on any electrical components. Here's what to watch out for:
- High-Voltage Battery Pack: The battery pack stores a significant amount of energy and can deliver a dangerous shock. Do not attempt to disassemble or repair the battery pack yourself unless you are a qualified technician with specialized training and equipment.
- Onboard Charger: The OBC converts AC power to DC power, and it operates at high voltages. Avoid touching any internal components of the OBC.
- EVSE: Even the EVSE can deliver a shock if it's faulty or improperly wired. Always use a properly grounded EVSE and inspect it regularly for damage.
Before doing ANY work on your electrical system, do this:
- De-energize – Disconnect the power!
- Ground – Ensure proper grounding.
- Test – Double-check everything!
If you are not comfortable working with high-voltage electrical systems, it's best to leave the repairs to a qualified mechanic.
Conclusion
Hopefully, this guide has given you a solid understanding of how the Chevy Volt's charging system works. Remember, knowledge is power. By understanding the system, you can better troubleshoot issues, plan for upgrades, and make informed decisions about your Volt's care. Remember to always prioritize safety when working with electrical systems.
For a detailed schematic diagram and more in-depth technical information, we have the file available. Contact us, and we can get you the information.