How Do You Check Brake Pads
Alright, let's talk about brake pads. Knowing how to check them properly is crucial for safe driving and preventing costly repairs. This article provides a comprehensive guide to inspecting your brake pads, aimed at the experienced DIYer. We'll cover the essential aspects, from identifying key components to diagnosing common problems. This isn't just about saving money; it's about ensuring your safety and the safety of others on the road.
Purpose of Checking Your Brake Pads
Regularly checking your brake pads serves several important purposes:
- Safety: Worn brake pads significantly reduce your braking performance, increasing stopping distances and the risk of accidents.
- Cost Savings: Catching wear early can prevent damage to other components, like rotors. Replacing only the pads is far cheaper than replacing pads and rotors.
- Performance Tuning: If you're a performance enthusiast, knowing your brake pad wear allows you to optimize pad compound selection for your driving style and conditions.
- Preventing Rotor Damage: When brake pads wear down completely, the metal backing plate can grind against the rotor. This causes significant damage and necessitates rotor replacement.
Key Specs and Main Parts
Before we dive into the inspection process, let's review the key components of a disc brake system and important specifications:
Main Parts:
- Brake Pad: The friction material that presses against the rotor to slow the vehicle. It's comprised of a friction material bonded to a metal backing plate.
- Brake Rotor (Disc): The rotating metal disc that the brake pads clamp onto. Rotors can be solid, vented, or drilled/slotted for improved cooling and performance.
- Caliper: The housing that contains the brake pads and the piston(s) that apply pressure to the pads.
- Caliper Piston(s): Hydraulic piston(s) that extend from the caliper to press the brake pads against the rotor.
- Brake Lines: Hoses that carry brake fluid from the master cylinder to the calipers.
- Brake Fluid: Hydraulic fluid that transmits pressure from the brake pedal to the calipers.
- Dust Shield: A metal shield behind the rotor to protect it from debris.
Key Specs:
- Minimum Pad Thickness: This is the most critical specification. Most manufacturers recommend replacing brake pads when the friction material is worn down to 2-3mm (approximately 1/8 inch). Refer to your vehicle's service manual for the exact specification.
- Rotor Thickness: Rotors have a minimum thickness specification. Machining a rotor can remove enough material to make it unsafe for further use. The minimum thickness is usually stamped on the rotor itself.
- Brake Fluid Type: Using the correct brake fluid is crucial. Common types include DOT 3, DOT 4, and DOT 5.1. Mixing incompatible fluids can damage your braking system.
How It Works
The braking system is a hydraulic system. When you press the brake pedal, it pushes a piston in the master cylinder. This forces brake fluid through the brake lines to the calipers at each wheel. The fluid pressure pushes the caliper piston(s) outward, pressing the brake pads against the rotor. The friction between the pads and rotor slows the vehicle. When you release the brake pedal, the pressure is released, and the pistons retract, allowing the wheels to turn freely.
The efficiency of this system relies heavily on the condition of the brake pads and rotors. Worn pads require more pedal force to achieve the same braking effect, and damaged rotors can cause vibrations and uneven braking.
Checking Your Brake Pads: The Process
Here's a step-by-step guide to checking your brake pads:
- Gather Your Tools: You'll need a lug wrench, jack, jack stands, wheel chocks, a flashlight, a ruler or brake pad measuring tool, and potentially a flathead screwdriver for removing stubborn wheel covers.
- Safety First: Park on a level surface, engage the parking brake, and chock the rear wheels.
- Loosen Lug Nuts: Before lifting the vehicle, slightly loosen the lug nuts on the wheel you'll be inspecting.
- Raise the Vehicle: Use a jack to lift the vehicle and securely support it with jack stands. Never work under a vehicle supported only by a jack.
- Remove the Wheel: Fully remove the lug nuts and take off the wheel.
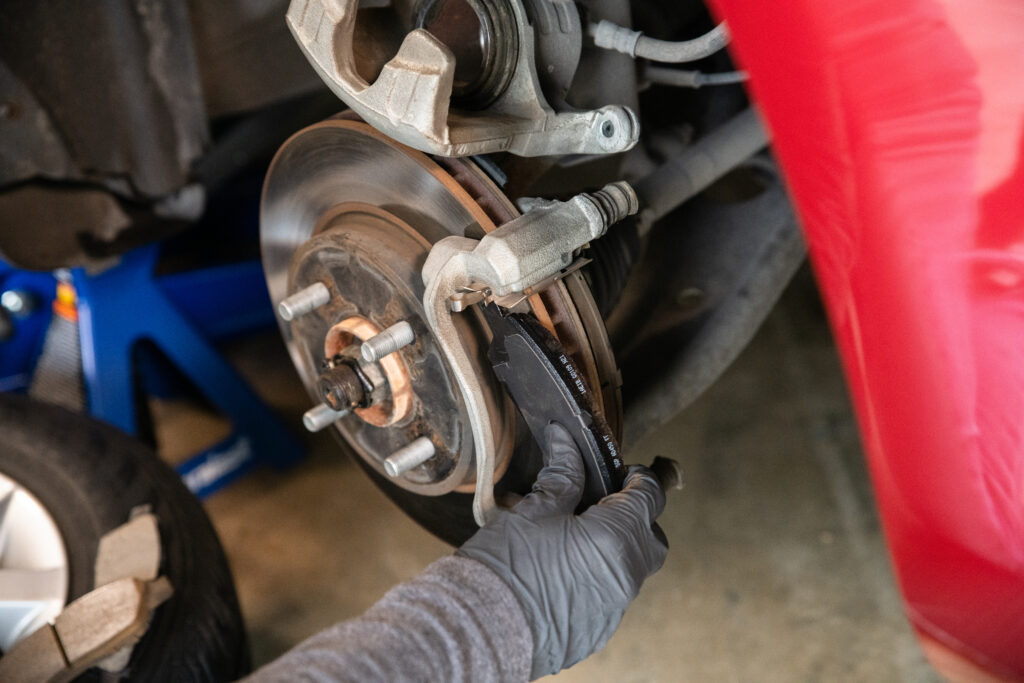
- Inspect the Brake Pads:
- Visual Inspection: Use a flashlight to examine the brake pads. Look for the thickness of the friction material. If it's close to the minimum thickness specification (2-3mm), it's time to replace them.
- Measuring Pad Thickness: Use a ruler or a dedicated brake pad measuring tool to accurately measure the remaining pad thickness. Measure the thinnest part of the pad.
- Check for Uneven Wear: Uneven wear can indicate a problem with the caliper, such as a sticking piston or worn slide pins.
- Inspect for Damage: Look for cracks, chips, or delamination of the friction material. Any of these indicate the need for replacement.
- Inspect the Rotors: Look for scoring, grooves, cracks, or excessive rust on the rotor surface. Minor scoring is normal, but deep grooves or cracks indicate the need for rotor resurfacing or replacement.
- Repeat for Other Wheels: Repeat the process for the other wheels.
- Reinstall the Wheels: Carefully reinstall the wheels, tighten the lug nuts in a star pattern, lower the vehicle, and torque the lug nuts to the manufacturer's specifications.
- Test Drive: After inspecting all the brakes, take the vehicle for a short test drive to ensure proper braking function. Listen for any unusual noises, such as squealing or grinding.
Real-World Use – Basic Troubleshooting Tips
- Squealing Brakes: Squealing brakes can be caused by worn brake pads, glazed pads, or a lack of lubrication on the brake pad shims. Sometimes a simple cleaning and re-lubrication can solve the problem, but worn pads will require replacement.
- Grinding Brakes: Grinding brakes are a serious warning sign. This usually indicates that the brake pads are completely worn down, and the metal backing plate is grinding against the rotor. This requires immediate attention to avoid further damage.
- Pulsating Brakes: Pulsating brakes can be caused by warped rotors. This can often be corrected by resurfacing the rotors, but if the rotors are too thin, they will need to be replaced.
- Pulling to One Side: If your vehicle pulls to one side when braking, it could be caused by a sticking caliper, uneven brake pad wear, or a problem with the brake lines.
Safety – Highlight Risky Components
Working on brakes involves several potential hazards:
- Asbestos: Older brake pads may contain asbestos. Avoid creating dust when handling old brake pads. Wear a respirator and dispose of the pads properly. Newer pads do not contain asbestos.
- Brake Fluid: Brake fluid is corrosive and can damage paint and skin. Wear gloves and eye protection when handling brake fluid.
- Suspension Components: Be careful when working around suspension components, as they can be under tension. Always use appropriate spring compressors when working on struts or coil springs.
- Working Under a Vehicle: Never work under a vehicle supported only by a jack. Always use jack stands to support the vehicle safely.
- Hot Components: Brakes can get extremely hot after driving. Allow the brakes to cool down completely before working on them.
Conclusion
By following these steps and understanding the key concepts, you can confidently inspect your brake pads and ensure the safety and performance of your vehicle. Remember to consult your vehicle's service manual for specific recommendations and torque specifications. Brake systems are critical for safety, so if you are uncomfortable performing any of these tasks, consult a qualified mechanic.
You now have the knowledge to check your brake pads. We have a detailed diagram available for download, which visually illustrates the components and process discussed in this article. Contact us to receive the file and further enhance your understanding.