How Do You Make Silver Paint
So, you want to make your own silver paint? Excellent! Whether you're touching up your classic Mustang, customizing your motorcycle fairings, or just experimenting with coatings, understanding the process of creating silver paint gives you a huge advantage. This article will break down the technical aspects of silver paint formulation, covering the key components, processes, and safety considerations involved. Consider this your deep dive into the science and art of DIY silver paint.
Purpose and Key Specs
Why bother making your own silver paint when you can buy it off the shelf? The reasons are numerous. Firstly, customization. You gain precise control over the shade, metallic flake size, and overall finish. Secondly, cost savings. For large projects or frequent touch-ups, mixing your own paint can be significantly cheaper. Thirdly, repair accuracy. Matching a faded or aged silver paint can be a nightmare, but with the right knowledge, you can create a near-perfect blend.
Key Specs to Consider:
- Binder/Resin: This is the glue that holds everything together. Common choices include acrylic lacquers, urethanes, and epoxies. Each offers different levels of durability, gloss, and chemical resistance.
- Solvent/Reducer: This thins the binder to the desired viscosity for spraying or brushing. The correct solvent is crucial for proper paint flow and drying. Use the solvent recommended by the binder manufacturer.
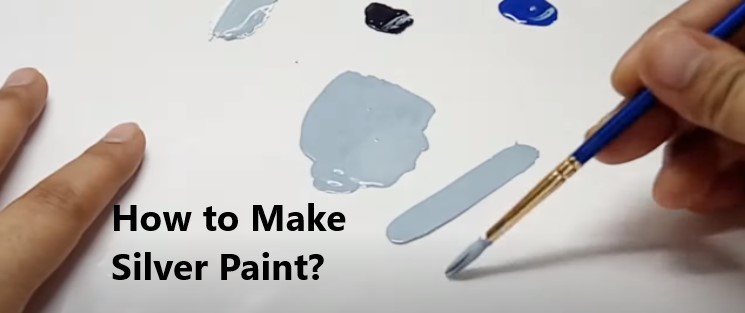
- Pigment: This provides the color. For silver paint, we're talking about metallic pigments, typically aluminum flakes.
- Additives: These are used to modify paint properties such as UV resistance, gloss, and drying time.
- Mixing Ratio: The precise ratio of binder, solvent, pigment, and additives is critical to achieving the desired result. This information will be provided by the manufacturer of the binder and metallic pigment.
Main Parts and Their Roles
Let's delve into the specific components that make up silver paint and their individual contributions:
Binder/Resin
The binder, also known as the resin, is the backbone of the paint. It provides the film-forming properties that allow the paint to adhere to the substrate and create a durable coating. Different binder types offer varying levels of performance. For example:
- Acrylic Lacquers: Dry quickly and offer good adhesion, but are less durable and have lower chemical resistance. Ideal for small touch-ups and interior applications.
- Urethanes: Offer excellent durability, UV resistance, and gloss. They are more resistant to chemicals and scratches, making them suitable for automotive applications.
- Epoxies: Known for their exceptional hardness and chemical resistance. Often used as primers or for applications requiring extreme durability.
Solvent/Reducer
The solvent, or reducer, is used to thin the binder to a workable viscosity. Viscosity is the measure of a fluid’s resistance to flow. It's essential to use the correct solvent recommended by the binder manufacturer. Using the wrong solvent can cause the paint to curdle, separate, or not dry properly.
Pigment (Metallic Flakes)
The pigment provides the color and metallic effect. In silver paint, the pigment consists of fine aluminum flakes. The size and shape of these flakes significantly influence the paint's appearance. Larger flakes create a more pronounced metallic sparkle, while smaller flakes produce a smoother, more subtle sheen. Particle size is typically measured in microns (µm). The orientation of the flakes during application is also important, influencing light reflection and perceived color.
Additives
Additives are used to fine-tune the paint's properties. Common additives include:
- UV Absorbers: Protect the paint from fading due to sunlight exposure.
- Flow Improvers: Enhance the paint's flow and leveling properties, reducing brush marks or orange peel.
- Defoamers: Prevent the formation of bubbles during mixing and application.
- Catalysts (for two-part systems): Initiate the curing process in certain types of paints, such as urethanes and epoxies.
How It Works
The process of making silver paint involves several key steps:
- Preparation: Gather all necessary materials and equipment, including the binder, solvent, metallic pigment, additives, mixing containers, stirring sticks, and safety gear. Ensure your workspace is well-ventilated and free of dust and contaminants.
- Mixing: Carefully measure the binder and solvent according to the manufacturer's recommendations. Add the solvent to the binder and mix thoroughly until a uniform consistency is achieved.
- Pigment Incorporation: Gradually add the metallic pigment to the binder/solvent mixture. It’s crucial to add the pigment slowly while continuously stirring to prevent clumping. Use a low-speed mixer to avoid damaging the delicate aluminum flakes.
- Additive Incorporation: Add any desired additives, such as UV absorbers or flow improvers, according to the manufacturer's instructions. Mix thoroughly.
- Filtering: Strain the paint through a fine-mesh filter to remove any undispersed pigment particles or contaminants. This will ensure a smooth, even finish.
- Testing: Before applying the paint to your project, test it on a small, inconspicuous area to ensure the color and finish are correct. Adjust the mixture as needed.
Real-World Use: Basic Troubleshooting
Even with careful preparation, problems can arise. Here are some common issues and potential solutions:
- Uneven Metallic Distribution: This can result from improper mixing or using the wrong solvent. Ensure thorough mixing and use the solvent recommended by the binder manufacturer.
- Clumping: Clumping occurs when the pigment is not properly dispersed. Add the pigment slowly and stir continuously. You may need to use a dispersing agent to break up the clumps.
- Poor Adhesion: This can be caused by inadequate surface preparation or using the wrong binder. Ensure the surface is clean, dry, and properly primed. Choose a binder that is compatible with the substrate.
- Orange Peel: Orange peel is a textured surface resembling the skin of an orange. It can be caused by spraying the paint too thick, using the wrong solvent, or spraying in a hot environment. Adjust the spray gun settings, use a slower-drying solvent, and spray in a cooler environment.
- Runs and Sags: Runs and sags occur when the paint is applied too thick or the viscosity is too low. Apply the paint in thin, even coats and adjust the viscosity with the appropriate solvent.
Safety
Working with paint involves handling potentially hazardous materials. Always prioritize safety.
- Ventilation: Work in a well-ventilated area to avoid inhaling harmful fumes. Use a respirator with organic vapor cartridges.
- Protective Gear: Wear gloves, eye protection, and protective clothing to prevent skin and eye contact.
- Flammability: Many paint components, especially solvents, are highly flammable. Keep away from open flames, sparks, and heat sources.
- Disposal: Dispose of waste paint and solvents properly according to local regulations. Do not pour them down the drain.
- Mixing Ratios: Mixing certain chemicals improperly can create dangerous fumes or reactions. Always follow the manufacturer's instructions carefully.
Specifically, metallic pigments are conductive, so avoid contact with electrical sources during mixing.
Making your own silver paint requires knowledge, patience, and attention to detail. By understanding the key components and processes involved, you can create custom finishes that meet your specific needs. Remember to always prioritize safety and consult the manufacturer's instructions for each product you use.
We have a detailed diagram illustrating the silver paint mixing process, including precise mixing ratios and material recommendations. This diagram offers a visual guide to each step, ensuring accuracy and consistency in your paint formulation. You can download the diagram by clicking [link to diagram - placeholder]. Happy painting!