How Long To Install Remote Start
So, you're thinking about adding remote start to your ride. Excellent choice! Nothing beats hopping into a pre-warmed (or cooled) car on a brutal winter or scorching summer day. The big question, though, is: how long will this project realistically take? Let's break it down, assuming you're a relatively experienced DIYer with some basic automotive electrical knowledge.
Purpose: Why You Need to Understand the Remote Start Installation Process
Understanding the remote start installation process is critical for a few reasons. First, it allows you to accurately estimate the time commitment involved. Underestimating this can lead to frustration and a half-finished project. Second, it equips you with the knowledge to troubleshoot issues that may arise during installation. Third, and perhaps most importantly, understanding the process ensures you can perform the installation safely. Working with automotive electrical systems requires respect and a solid grasp of the fundamentals.
This guide provides a comprehensive overview of a typical remote start installation. We'll cover the essential components, wiring diagrams, installation steps, and troubleshooting tips. By the end, you'll have a much clearer understanding of what's involved and can confidently decide if this is a project you want to tackle yourself or entrust to a professional.
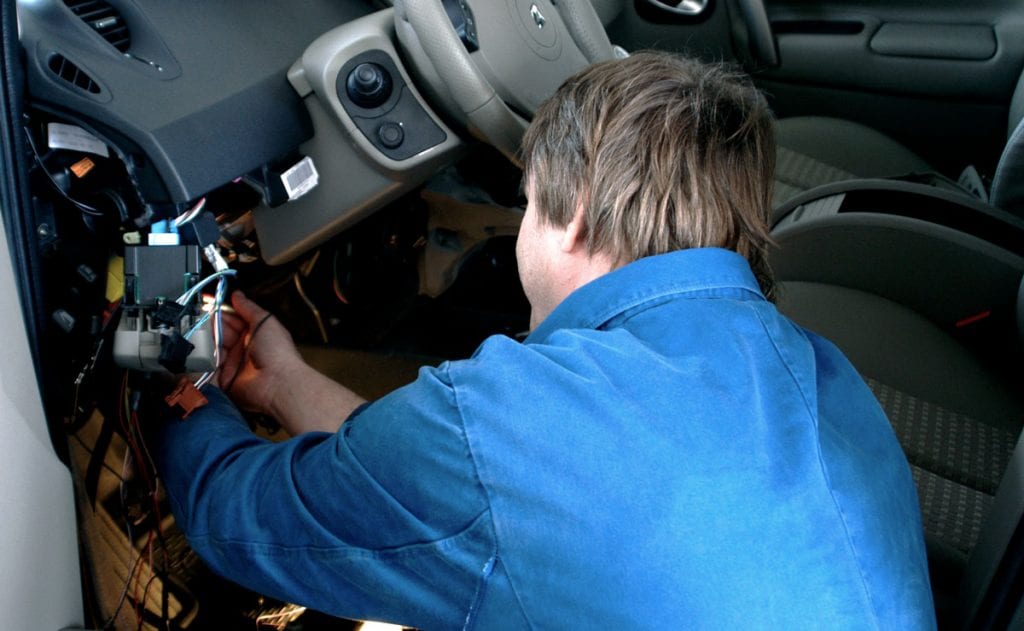
Key Specs and Main Parts of a Remote Start System
A typical aftermarket remote start system isn't just a single component; it's a collection of parts working together. Here's a rundown of the key players:
- Remote Start Module: This is the brain of the operation. It receives the signal from your remote, interprets it, and then sends the appropriate commands to the vehicle's electrical system.
- Remote Transmitter (Fob): This is what you'll use to start your car remotely. Some systems use your factory key fob with a 3x lock press functionality, while others include dedicated remotes with extended range.
- Wiring Harness: A collection of wires that connect the remote start module to the vehicle's various circuits. These harnesses are often vehicle-specific or require customization based on your car's wiring.
- Hood Pin Switch: A safety device that prevents the remote start from activating if the hood is open. This is crucial to prevent accidental starting while working under the hood.
- Brake Shutdown Wire: Connected to the brake light circuit, this wire disables the remote start if the brake pedal is pressed. This is another important safety feature.
- Tachometer Wire (or equivalent): The remote start system needs to know the engine's RPM (revolutions per minute) to properly manage the starting process and prevent over-cranking. Some systems use a tachometer wire connected directly to the engine, while others learn the RPM signal through other data buses in the car like the CAN bus.
- Immobilizer Bypass Module (if required): Modern vehicles have immobilizer systems that prevent the car from starting without the correct key present. This module bypasses the immobilizer during remote start, allowing the engine to run. The type of bypass required varies greatly by vehicle make, model, and year.
When choosing a remote start system, pay attention to the range of the remote, the features offered (e.g., two-way communication, smartphone control), and compatibility with your vehicle's immobilizer system. Vehicle specific install guides will be essential for the immobilization bypass module.
Understanding Wiring Diagrams and Symbols
A wiring diagram is your roadmap for this project. Learning to read one is essential. Here's a basic breakdown:
- Lines: Lines represent wires. The thickness of the line doesn't usually indicate wire gauge (size); that's usually specified with a label near the line (e.g., 18 AWG).
- Colors: Each wire has a color code (e.g., RED, BLK, BLU/WHT). Pay close attention to these! Connecting the wrong wires can damage your car's electrical system.
- Symbols:
- Circles: Often represent connectors or splice points.
- Rectangles: Can represent modules, switches, or other components.
- Ground Symbol: A series of decreasing horizontal lines indicating a connection to the vehicle's chassis ground.
- Fuses: Represented by a zigzag line enclosed in a rectangle.
Understanding these symbols, wire colors, and abbreviations will drastically reduce the chances of mistakes. Always double-check your connections against the wiring diagram!
How Remote Start Systems Work: A Simplified Explanation
The process, in a nutshell, goes like this:
- You press the remote start button on your fob.
- The remote transmitter sends a radio frequency (RF) signal to the remote start module in your car.
- The remote start module receives the signal and verifies its authenticity.
- The module then sends a series of commands to the vehicle's electrical system to simulate the starting process.
- This typically involves activating the starter motor, disabling the immobilizer (if necessary), and managing the fuel and ignition systems.
- Once the engine starts, the module monitors the engine's RPM to ensure it's running smoothly.
- If the brake pedal is pressed or the hood is opened, the module shuts down the engine for safety.
The key is that the remote start module acts as an intermediary, safely automating the starting process without requiring you to physically turn the key.
Real-World Use: Basic Troubleshooting Tips
Even with careful planning, things can go wrong. Here are a few common issues and potential solutions:
- Remote Start Doesn't Work:
- Check the hood pin switch. Make sure it's properly installed and functioning.
- Verify the battery voltage in your remote.
- Double-check all wiring connections. A loose connection can cause intermittent problems.
- Ensure the immobilizer bypass module is programmed correctly.
- Engine Starts But Immediately Shuts Off:
- The tachometer signal might be incorrect or missing. Verify the tach wire connection or programming method.
- The system may be detecting an error code that's causing it to shut down for safety reasons.
- Remote Start Works Intermittently:
- Check for RF interference. Large metal objects or other electronic devices can interfere with the signal.
- Ensure the antenna for the remote start module is properly positioned.
A multimeter is your best friend when troubleshooting electrical issues. Use it to check for voltage, continuity, and resistance. Don't be afraid to consult the remote start system's installation manual for specific troubleshooting steps.
Safety First: Identifying Risky Components
Working with automotive electrical systems can be dangerous if you're not careful. Here are some key safety considerations:
- Airbags: Never probe or tamper with airbag wiring. Accidental airbag deployment can cause serious injury. Disconnect the battery and wait at least 15 minutes before working near airbag components.
- Fuel System: Avoid working near the fuel system unless you have experience with it. Fuel leaks can create a fire hazard.
- Battery: Always disconnect the negative battery terminal before starting any electrical work. This will prevent accidental shorts and potential damage to your car's electrical system.
- Fuses: Never replace a fuse with one of a higher amperage. This can overload the circuit and cause a fire.
- Wiring: Use proper crimping tools and connectors to ensure secure and reliable connections. Loose or poorly crimped connections can cause shorts and other problems.
If you're not comfortable working with any of these components, it's best to leave the installation to a qualified professional. Your safety and the integrity of your vehicle are paramount.
Estimating the Installation Time: The Bottom Line
So, back to the original question: how long will it take? For an experienced DIYer, a typical remote start installation can take anywhere from 6 to 12 hours. This estimate can vary depending on several factors:
- Vehicle Complexity: Some vehicles have simpler electrical systems than others. Cars with complex immobilizer systems or data buses will require more time and expertise.
- Remote Start System Complexity: More advanced systems with more features will require more wiring and programming.
- Your Experience Level: If you're new to automotive electrical work, expect the installation to take longer.
- Available Resources: Having access to a wiring diagram, a multimeter, and other helpful tools will speed up the process.
Remember to factor in time for research, planning, and troubleshooting. It's always better to underestimate the time required than to rush the job and make mistakes.
By carefully considering these factors and following the steps outlined in this guide, you can confidently tackle a remote start installation project and enjoy the convenience and comfort of a pre-warmed or cooled car.
We have a comprehensive wiring diagram available for download. It provides a detailed visual representation of a typical remote start installation. Download Wiring Diagram