How Much Does A Oil Pan Cost
So, you're looking at replacing your oil pan, or maybe you're just curious about the cost. Either way, understanding the factors that influence the price of an oil pan is crucial for any experienced DIYer. This isn't just about slapping on a new part; it's about knowing what you're buying, understanding the potential pitfalls, and making informed decisions. We'll break down the costs, the types of pans, and everything in between, ensuring you're well-equipped for the task.
Purpose: Why Understanding Oil Pan Costs Matters
Knowing the factors affecting oil pan cost is vital for several reasons:
- Repairs: Identifying a damaged or leaking oil pan is the first step. Knowing the costs involved allows you to budget effectively and decide whether a repair or replacement is more economical.
- Upgrades: Perhaps you're considering a performance upgrade, such as a larger capacity or baffled oil pan for improved oil control. Understanding the cost spectrum of aftermarket options is essential.
- Maintenance: Regularly inspecting your oil pan and understanding its vulnerabilities can prevent catastrophic engine damage. Early detection and cost estimation can save you significant money in the long run.
- Knowledge: As an experienced DIYer, expanding your understanding of automotive components like the oil pan empowers you to tackle more complex repairs and modifications.
Key Specs and Main Parts of an Oil Pan
The oil pan, also known as the oil sump, is a critical component of your engine's lubrication system. Its primary function is to hold the engine oil when it's not circulating.
Main Components:
- Pan Body: This is the main reservoir that holds the oil. It's typically made of stamped steel or cast aluminum.
- Drain Plug: Located at the bottom of the pan, it allows you to drain the oil during an oil change. The drain plug usually has a crush washer to create a tight seal.
- Gasket or Sealant: This ensures a leak-proof seal between the oil pan and the engine block. Materials vary, but common options include rubber, cork, or RTV sealant.
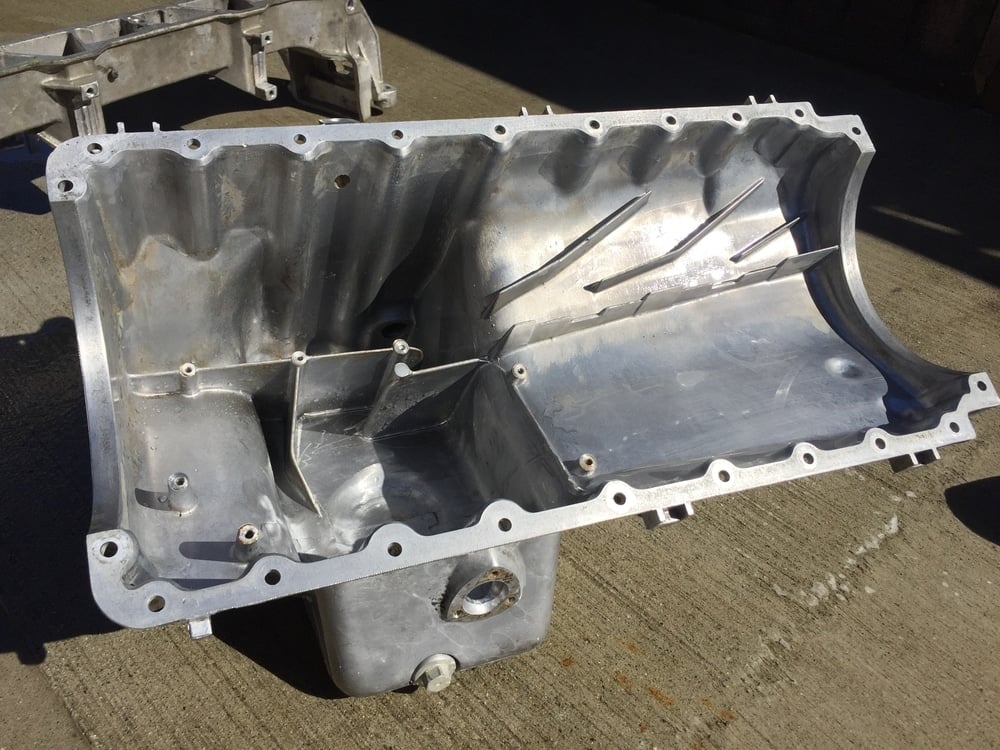
- Baffles (Optional): Found in performance or racing applications, baffles help prevent oil starvation during hard acceleration, braking, or cornering by keeping the oil pickup submerged.
- Oil Level Sensor Port (Optional): Some pans have a port for an oil level sensor, which alerts the driver to low oil levels.
- Oil Pickup Tube Mounting Point: Provides securement for the oil pickup tube, which draws oil from the pan into the oil pump.
Key Specifications that Influence Cost:
- Material: Steel pans are generally cheaper than aluminum pans. Aluminum offers better heat dissipation and is often lighter.
- Capacity: Larger capacity pans, often found in performance applications, will generally cost more.
- Engine Compatibility: The specific engine the oil pan is designed for is crucial. A pan designed for a specific engine model might have a higher cost due to lower production volume.
- Features: Baffles, oil level sensor ports, and other special features will increase the price.
- Brand: Aftermarket performance brands typically command a premium over OEM (Original Equipment Manufacturer) or generic brands.
How It Works
The oil pan is a relatively simple component, but its function is vital for engine health. Here's how it works:
- Oil Collection: Oil that has circulated through the engine, lubricating various components, drains back down into the oil pan due to gravity.
- Reservoir: The oil pan acts as a reservoir, holding the oil until it's needed again.
- Oil Pickup: The oil pump, via the oil pickup tube, draws oil from the bottom of the pan. The pickup tube has a screen to prevent large debris from entering the pump.
- Oil Circulation: The oil pump sends the oil through the oil filter, then through the engine's lubrication system, and the cycle repeats.
Real-World Use: Troubleshooting and Cost Estimation
Diagnosing an oil pan issue is usually straightforward. The most common problem is an oil leak.
Troubleshooting Oil Pan Issues:
- Visual Inspection: Look for oil leaks around the pan's perimeter or drain plug. Clean the area and re-inspect after driving to pinpoint the source.
- Oil Spots: Oil spots under your car are a telltale sign of a leak. Determine the location of the drip to narrow down the source.
- Low Oil Level: Regularly check your oil level. Consistently low levels, even after topping off, can indicate a leak.
- Damaged Pan: Inspect the pan for dents or cracks, which can occur from road debris or bottoming out.
Cost Estimation:
The cost of an oil pan replacement varies significantly depending on several factors:
- Type of Vehicle: Cars with more complex engine configurations or rare models often have more expensive oil pans.
- Pan Material: Steel pans are generally cheaper, ranging from $50 to $150. Aluminum pans can range from $100 to $400 or more.
- Brand: OEM pans from dealerships can be pricey, while aftermarket options offer a range of prices and quality. Expect to pay more for reputable brands.
- Labor Costs: If you're not doing the replacement yourself, factor in labor costs. This can vary significantly depending on your location and the complexity of the job. Some vehicles require exhaust components or subframes to be removed for oil pan access, significantly increasing labor time.
- Additional Parts: Don't forget the cost of the oil pan gasket or sealant, new drain plug washer, and fresh oil.
Example Scenario: Replacing a steel oil pan on a common sedan might cost $80 for the pan, $10 for the gasket, $5 for the drain plug washer, and $50 for labor (if applicable). Total: $145.
Example Scenario: Replacing an aluminum oil pan on a performance vehicle with aftermarket baffled pan can range from $200-$500. If you factor in high end brand, specialized sealant, new pickup tube and the labor costs involved with dropping the subframe to access the pan, the final bill could easily be around $800 - $1200.
Safety Precautions
Working on the oil pan involves working under the vehicle. Safety is paramount.
- Support the Vehicle Properly: Use jack stands on a level surface to support the vehicle. Never rely solely on a jack.
- Hot Exhaust: Be mindful of the exhaust system, which can be very hot. Allow it to cool completely before working near it.
- Eye Protection: Wear safety glasses to protect your eyes from debris.
- Gloves: Wear gloves to protect your hands from oil and chemicals.
- Proper Disposal: Dispose of used oil and parts properly according to local regulations.
- Tightening Torques: Always use a torque wrench to tighten the oil pan bolts to the manufacturer's specifications. Overtightening can damage the pan or gasket, leading to leaks.
Final Thoughts
Replacing an oil pan is within the realm of possibility for an experienced DIYer, but it requires careful planning, the right tools, and a commitment to safety. Understanding the factors that influence the cost, from material to features to brand, empowers you to make informed decisions and ensure a successful repair or upgrade.
Remember to consult your vehicle's service manual for specific instructions and torque specifications. Taking your time and paying attention to detail will result in a job well done and peace of mind knowing your engine's lubrication system is in good shape.