How Much Does An Oil Change
Understanding the True Cost of an Oil Change: A Deep Dive
As an experienced DIYer, you already know the importance of regular maintenance, and few tasks are as fundamental as the oil change. But have you ever stopped to consider the true cost, beyond just the price of oil and a filter? This article breaks down all the factors involved, helping you budget accurately and potentially save money.
Purpose: Beyond Just "Changing the Oil"
Understanding the costs associated with an oil change matters for several reasons:
- Accurate Budgeting: Knowing the full cost allows you to plan your vehicle maintenance budget effectively.
- Informed Decision Making: You can decide if doing it yourself is truly cheaper than taking it to a shop.
- Preventive Maintenance: By understanding the factors that affect oil change intervals and costs, you're better equipped to maintain your engine properly, preventing costly repairs down the line.
- Spotting Potential Issues: During an oil change, you have a prime opportunity to inspect other critical components. Recognizing potential problems early can save you significant money and hassle.
Key Specs and Main Parts
Let's break down the key components and specifications that influence the cost of an oil change:
- Oil Type: This is a major cost driver.
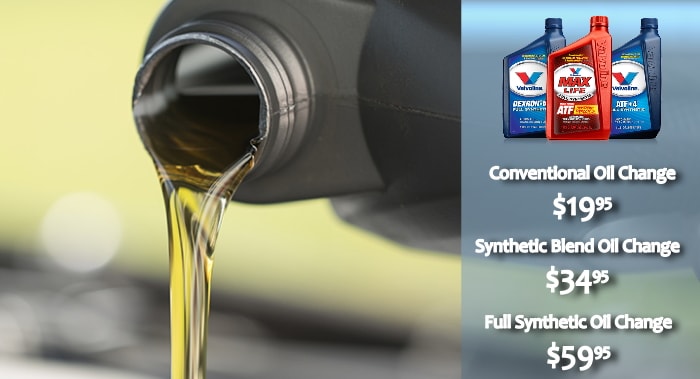
- Conventional Oil: The least expensive option, suitable for older vehicles with simpler engines.
- Synthetic Blend: A mix of conventional and synthetic oils, offering enhanced protection at a moderate price.
- Full Synthetic Oil: Provides the best protection and performance, especially for modern, high-performance engines. Usually has longer change intervals.
- Oil Filter: The filter's job is to remove contaminants from the oil. Quality varies, and a better filter will last longer and provide better protection.
- Oil Capacity: The amount of oil your engine requires. This is usually specified in your owner's manual and directly impacts the oil cost.
- Drain Plug Washer/Gasket: A small but crucial part that ensures a tight seal on the oil pan drain plug. Replacing this washer is recommended at each oil change to prevent leaks. Material and type vary by vehicle.
Decoding the Bill: The True Cost Breakdown
While the raw materials are important, they are not the only cost factor.
- Oil Cost: This depends on the oil type, quantity, and brand. Full synthetic oil typically costs significantly more than conventional oil.
- Filter Cost: Oil filters vary in price depending on the brand, quality, and the specific vehicle they are designed for.
- Labor Cost (if applicable): If you're not doing it yourself, this is the biggest variable. Labor rates vary by shop and location.
- Disposal Fees: Shops typically charge a small fee for the proper disposal of used oil and filters.
- Shop Supplies: Some shops may add a small charge for shop supplies like rags, cleaners, and gloves.
- Taxes: Sales tax will be added to the total cost.
- Opportunity Cost: If you do it yourself, consider the time spent. Is that time better used elsewhere?
- Tool Investment (if applicable): If you're just starting out, you may need to purchase basic tools like a wrench, oil filter wrench, and drain pan.
How It Works: The Oil Change Process (and What It Reveals)
The oil change process is relatively straightforward, but paying attention to details can reveal potential issues:
- Preparation: Gather your supplies: oil, filter, wrench, drain pan, rags, and drain plug washer.
- Warm-Up (Optional, But Recommended): Briefly running the engine warms the oil, allowing it to drain more completely.
- Draining the Oil: Locate the oil pan drain plug, position the drain pan, and carefully remove the plug. Let the oil drain completely.
- Filter Removal: Remove the old oil filter, being careful to catch any residual oil.
- Filter Installation: Lightly lubricate the new filter's rubber gasket with fresh oil and install it, tightening it hand-tight, then usually another 1/2 to 3/4 turn, or according to the filter's instructions.
- Drain Plug Installation: Install a new drain plug washer/gasket and tighten the drain plug to the correct torque specification (consult your vehicle's repair manual). Overtightening can damage the oil pan.
- Refilling with Oil: Add the correct amount of new oil, as specified in your owner's manual.
- Checking the Oil Level: Use the dipstick to check the oil level and add more oil if necessary.
- Running the Engine: Start the engine and let it run for a few minutes, checking for leaks around the drain plug and oil filter.
- Final Check: Recheck the oil level after the engine has been running.
- Disposal: Properly dispose of the used oil and filter at a recycling center or auto parts store.
Real-World Use: Basic Troubleshooting Tips
Here are some common issues you might encounter and how to address them:
- Leaking Drain Plug: This is often caused by a damaged or missing drain plug washer. Replace the washer and ensure the drain plug is tightened to the correct torque.
- Leaking Oil Filter: Ensure the oil filter is properly tightened. If it continues to leak, the gasket may be damaged, or you may have double-gasketed (left the old gasket on the engine).
- Low Oil Pressure After Oil Change: This could indicate a clogged oil filter, incorrect oil type, or a more serious engine problem. Stop the engine immediately and investigate. Don't drive if you have low oil pressure.
- Difficulty Removing Oil Filter: Use an oil filter wrench that fits properly. If the filter is stuck, you may need to use a specialized filter wrench or resort to carefully puncturing the filter with a long screwdriver and using it as a lever (exercise extreme caution).
- Rounded Drain Plug: If the drain plug is rounded, use a specialized drain plug socket or a locking pliers to remove it. Consider replacing the drain plug with a new one.
Safety: Proceed with Caution
While an oil change is a relatively simple task, it's important to take necessary safety precautions:
- Hot Oil: Be careful when draining hot oil, as it can cause severe burns. Wear gloves and eye protection.
- Jacking Up the Vehicle: Use jack stands to support the vehicle. Never work under a vehicle supported only by a jack.
- Proper Disposal: Dispose of used oil and filters properly to avoid environmental contamination.
- Chemical Exposure: Wear gloves to protect your skin from prolonged contact with oil.
Summary: Taking Control of Your Oil Change Costs
By understanding the factors that influence the cost of an oil change, you can make informed decisions about whether to do it yourself or take it to a shop. Doing it yourself can save money, especially if you factor in the long term. Even if you have someone else do the work, you can bring in your own high quality filter and oil to reduce markups. Careful planning and attention to detail will help you ensure your engine stays healthy and your wallet stays happy.