How Much Is A Tail Light Cover
Alright, let's talk tail light covers. Whether you're dealing with a cracked lens, aiming for a custom look, or just diving into some DIY auto work, understanding the cost of a tail light cover is essential. This isn't just about aesthetics; it's about safety, legality, and keeping your ride looking its best.
Purpose
Why are we even discussing tail light cover prices? Well, several reasons. First, a cracked or broken tail light cover is a safety hazard. It reduces visibility, especially at night and in bad weather. Second, it's often illegal. Most jurisdictions have laws requiring functioning and intact tail lights. A missing or damaged cover can lead to a ticket. Third, replacing a tail light cover is a relatively simple and inexpensive repair, often within reach of the experienced DIYer. Fourth, replacing just the cover, instead of the entire tail light assembly, is an environmentally conscious and wallet-friendly move. Finally, some enthusiasts use aftermarket covers to customize the appearance of their vehicles.
Key Specs and Main Parts
Before we get to prices, let's break down the anatomy of a tail light cover and the factors influencing its cost.
- Material: Tail light covers are typically made from polycarbonate plastic, often referred to as polycarbonate. This material is chosen for its impact resistance, clarity, and ability to be molded into complex shapes. Acrylic (PMMA) is another less common alternative that offers even greater clarity but may be more brittle. The type of plastic significantly impacts the cover's durability and cost. Higher-grade polycarbonate, with UV inhibitors to prevent yellowing, will cost more.
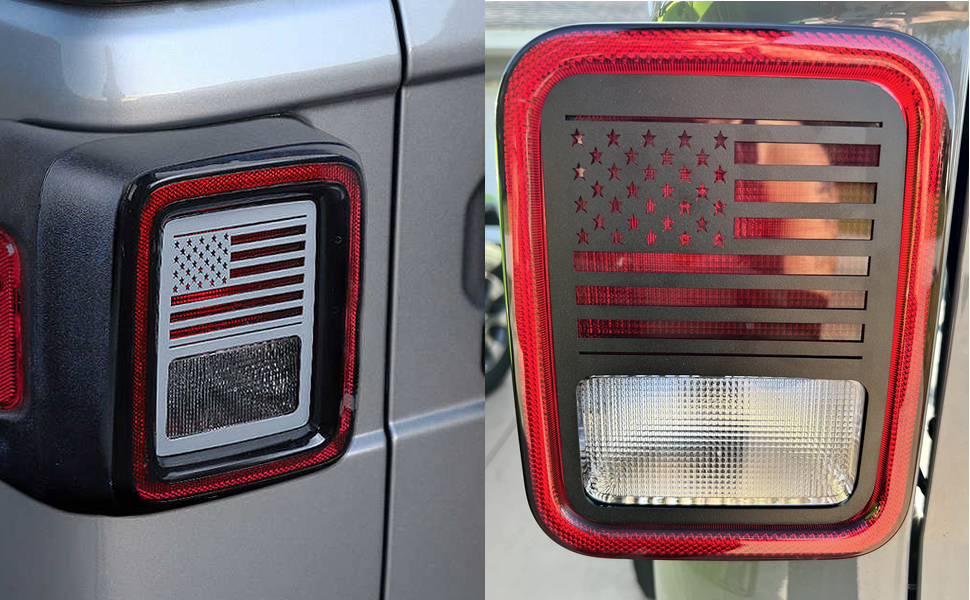
- Color/Tint: Clear, red, amber (for turn signals), and smoked are common colors. Special tints or coatings will increase the price. Aftermarket smoked covers often need brighter bulbs to maintain legality and visibility.
- Vehicle Make and Model: This is a huge factor. A cover for a popular sedan will likely be cheaper than one for a rare sports car. Complexity of the cover's shape also plays a role.
- OEM vs. Aftermarket: OEM (Original Equipment Manufacturer) covers, purchased from the dealership or a parts supplier selling genuine parts, are generally more expensive but are guaranteed to fit perfectly and meet factory specifications. Aftermarket covers can be cheaper but may require some modification to fit correctly, and the quality can vary widely.
- New vs. Used: Used covers are an option, but be very careful. Inspect them thoroughly for cracks, scratches, and discoloration. A used cover in poor condition won't save you any money in the long run.
- Sealing and Gaskets: Often, the cover comes with (or requires separately purchased) sealing materials like gaskets or sealant to prevent water ingress into the tail light housing. Factor this into the overall cost.
Symbols – Explanation of Markings
While tail light covers themselves don't usually have complex diagrams, the entire tail light assembly often does. Here's a breakdown of common symbols you might encounter on a tail light assembly schematic:
- Wiring Diagrams: You'll see lines representing wires, with different colors indicating different functions (e.g., red for power, black for ground, specific colors for turn signal, brake light, and running light circuits).
- Connector Symbols: Small squares or circles with numbers indicate electrical connectors. The numbers refer to the pin assignments within the connector.
- Bulb Symbols: A circle with an "X" through it typically represents a light bulb. The bulb type (e.g., 1157, 3157) is often indicated nearby.
- Ground Symbol: Three horizontal lines decreasing in size indicate a ground connection to the vehicle's chassis.
- Voltage Markings: Numbers followed by "V" (e.g., 12V) indicate the voltage of the circuit.
Understanding these symbols is crucial when troubleshooting electrical issues within the tail light assembly.
How It Works
The tail light cover's primary function is to protect the bulb and reflector within the tail light assembly. It also serves to diffuse the light, making it visible from a wider angle. The red color filters the light emitted by the bulb, ensuring it meets legal requirements for brake lights and running lights. Amber covers similarly filter light for turn signals. The clear portion is usually for the reverse light. When you press the brake pedal or activate the turn signal, the corresponding bulb illuminates, and the light passes through the colored cover, signaling your intentions to other drivers.
Real-World Use – Basic Troubleshooting Tips
Here are some common problems and troubleshooting steps related to tail light covers:
- Cracked or Broken Cover: Replace it immediately. Don't try to "fix" it with tape; it's a temporary and unreliable solution.
- Water Inside the Tail Light: This indicates a leak, usually around the cover's seal. Remove the cover, inspect the gasket or sealant, and replace or reapply as needed. Ensure the cover is properly seated when reinstalling.
- Dim or Flickering Light: This could be a bulb issue, a wiring problem, or a corroded connection. Check the bulb first. If the bulb is good, inspect the wiring and connectors for damage or corrosion. Clean or replace as necessary. Consider using dielectric grease on the connectors to prevent future corrosion.
- Aftermarket Cover Fitment Issues: If your aftermarket cover doesn't fit perfectly, you may need to trim or modify it slightly. Use a heat gun to carefully reshape the plastic if needed. Be patient and avoid forcing it into place.
A common mistake is overtightening the screws holding the tail light cover in place. This can crack the cover, especially if it's made of brittle plastic. Tighten the screws snugly, but don't overtighten them.
Safety – Highlight Risky Components
While replacing a tail light cover is generally a safe procedure, there are a few potential risks:
- Electrical Shock: Disconnect the battery before working on any electrical components, including the tail lights. Even though the voltage is low (12V), it's still possible to get a shock, especially if you're working in wet conditions.
- Broken Glass: If the existing cover is shattered, handle the pieces carefully to avoid cuts. Wear gloves and eye protection.
- Sharp Edges: Be careful when handling the tail light assembly and the new cover. Some edges may be sharp.
- Hot Bulbs: Allow the bulbs to cool down before handling them. They can get very hot, especially after being on for a long time.
- Improper Wiring: Incorrectly wiring the tail lights can cause shorts, blown fuses, and even fires. Double-check your wiring before reconnecting the battery. Use a wiring diagram if you're unsure.
Remember: when in doubt, consult a professional mechanic. Electrical problems can be tricky to diagnose and repair, and it's better to be safe than sorry.
Cost Factors and Average Prices
Okay, let's get down to the numbers. The cost of a tail light cover can vary significantly, depending on the factors mentioned above. Here's a general idea of what you can expect to pay:
- Economy Cars (e.g., Honda Civic, Toyota Corolla): Aftermarket covers can range from $20 to $50. OEM covers can be $50 to $100 or more.
- Mid-Size Sedans (e.g., Ford Fusion, Chevy Malibu): Aftermarket: $30 to $60. OEM: $60 to $120.
- Trucks and SUVs (e.g., Ford F-150, Chevy Tahoe): Aftermarket: $40 to $80. OEM: $80 to $150+.
- Luxury Vehicles (e.g., BMW, Mercedes-Benz): Aftermarket: $60+. OEM: $150+.
These are just estimates, and prices can vary based on the specific make, model, and year of your vehicle. It's always best to check with multiple suppliers (online retailers, auto parts stores, dealerships) to get the best price. Don't forget to factor in shipping costs if you're ordering online. Remember to always compare the part number with the original part to ensure compatibility.
By understanding these factors, you can make an informed decision when purchasing a tail light cover and ensure that you get a quality product at a fair price. And remember, a properly functioning tail light is essential for safety and legality.