How Much Is Car Ac Repair
Let's talk about car AC repair costs. As an experienced DIYer, you know the sting of unexpected automotive expenses. Diagnosing and fixing your car's air conditioning system can seem daunting, but with the right knowledge, you can save a significant amount of money. This article will break down the factors influencing AC repair costs, empowering you to make informed decisions and potentially tackle some repairs yourself. While specific prices fluctuate based on location, vehicle model, and part availability, this guide will give you a solid understanding of the process.
Understanding the Car AC System and Repair Costs
Several factors contribute to the final bill when your car's AC gives out. These include the cost of parts, labor (if you're not doing it yourself), refrigerant, and diagnostic fees. A seemingly simple problem can sometimes require replacing multiple components, impacting the overall expense.
Purpose of Understanding AC Repair
Knowing the ins and outs of your car's AC system isn't just about saving money; it's about proactive maintenance and better understanding your vehicle's overall health. Understanding the system allows you to:
- Diagnose problems early, potentially preventing larger and more expensive issues.
- Communicate effectively with mechanics, ensuring you're not being overcharged or sold unnecessary services.
- Perform basic repairs yourself, saving on labor costs.
- Maintain the system properly, extending its lifespan.
Key Specs and Main Parts
The car AC system is a closed-loop system that relies on refrigerant to transfer heat. Key components include:
- Compressor: The heart of the system, driven by the engine via a belt. It compresses the refrigerant, increasing its temperature and pressure. A failing compressor is often a major cost driver in AC repairs.
- Condenser: Located at the front of the car, the condenser dissipates heat from the high-pressure refrigerant, turning it into a high-pressure liquid.
- Evaporator: Located inside the dashboard, the evaporator absorbs heat from the cabin air, cooling it down. The refrigerant evaporates, becoming a low-pressure gas.
- Expansion Valve (or Orifice Tube): Meters the flow of refrigerant into the evaporator, controlling the cooling process.
- Receiver Drier (or Accumulator): Filters contaminants and removes moisture from the refrigerant. It also acts as a reservoir for the refrigerant.
- Refrigerant: The working fluid that carries heat throughout the system. Common refrigerants include R-134a and the newer R-1234yf.
- Hoses and Lines: Connect all the components, carrying the refrigerant.
- Pressure Switches: Monitor refrigerant pressure and protect the system from over-pressurization or low-pressure conditions.
How It Works
The refrigeration cycle works as follows:
- The compressor compresses the refrigerant, raising its pressure and temperature.
- The hot, high-pressure refrigerant flows to the condenser, where it cools down and condenses into a liquid.
- The high-pressure liquid refrigerant passes through the receiver drier (or accumulator) to remove moisture and contaminants.
- The refrigerant then flows to the expansion valve (or orifice tube), where its pressure drops significantly. This allows the liquid refrigerant to expand into a cold, low-pressure mist as it enters the evaporator.
- In the evaporator, the refrigerant absorbs heat from the air blowing across it, cooling the cabin air.
- The refrigerant, now a low-pressure gas, returns to the compressor to begin the cycle again.
Real-World Use – Basic Troubleshooting Tips
Before heading to the shop, try these basic troubleshooting steps:
- Check the AC Compressor Clutch: With the engine running and the AC turned on, observe the compressor clutch. It should be engaging (spinning) and disengaging (stopping) periodically. If it's not engaging at all, it could indicate a problem with the compressor, electrical system, or refrigerant pressure.
- Inspect for Leaks: Look for signs of refrigerant leaks around the compressor, condenser, hoses, and fittings. You might see oily residue or a distinct refrigerant smell. Use a UV dye and a UV light for easier leak detection.
- Check the Cabin Air Filter: A clogged cabin air filter can restrict airflow, reducing cooling efficiency. Replace it if it's dirty.
- Measure Vent Temperature: Use a thermometer to measure the air temperature coming from the vents. Compare it to the ambient temperature. A significant difference (e.g., 20 degrees Fahrenheit cooler) indicates the system is functioning reasonably well.
- Listen for Unusual Noises: Hissing, grinding, or rattling noises from the AC system can indicate problems with the compressor, expansion valve, or other components.
If you suspect a refrigerant leak, it's crucial to address it promptly. Not only is refrigerant harmful to the environment, but low refrigerant levels can also damage the compressor.
Safety – Highlight Risky Components
The car AC system contains high-pressure refrigerant that can be dangerous if handled improperly. Here are some key safety precautions:
- Never disconnect AC lines while the system is pressurized. Refrigerant can cause frostbite and eye damage.
- Wear safety glasses and gloves when working with AC components.
- Do not expose refrigerant to open flames or high temperatures. It can produce toxic fumes.
- If you suspect a leak, ventilate the area to avoid inhaling refrigerant vapors.
- Properly dispose of used refrigerant according to local regulations.
- The compressor drive belt and pulley can be dangerous. Ensure the engine is off and the ignition key is removed before working near these components.
- Cap off disconnected lines to prevent contamination.
High-pressure side components like the compressor and condenser are especially risky to work on without proper training and equipment. If you're not comfortable working with these components, it's best to leave the repair to a qualified technician.
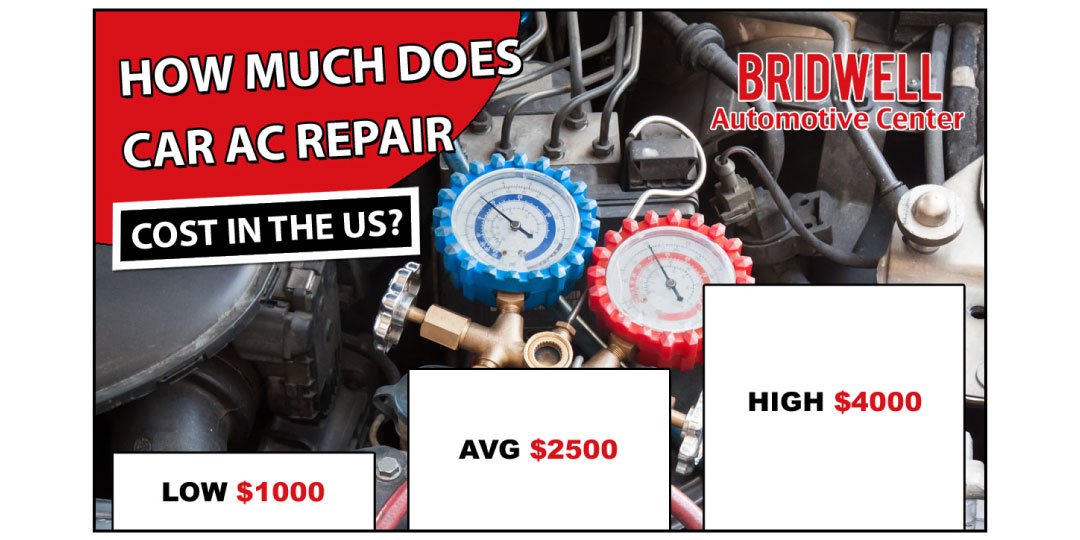
Factors Affecting Repair Costs
Here's a breakdown of typical costs associated with common AC repairs:
- Refrigerant Recharge: The cost varies depending on the type of refrigerant and the amount needed. R-134a recharges are typically less expensive than R-1234yf. Expect to pay between $100 and $300 for a recharge.
- Compressor Replacement: This is usually the most expensive repair, ranging from $500 to $1200 or more, depending on the vehicle and compressor type. The labor cost can be significant due to the complexity of the job.
- Condenser Replacement: Expect to pay between $300 and $800 for a condenser replacement, including parts and labor.
- Evaporator Replacement: This is another labor-intensive job, as it requires removing the dashboard. Expect to pay between $600 and $1500.
- Expansion Valve/Orifice Tube Replacement: This is a relatively inexpensive repair, usually costing between $100 and $300.
- Receiver Drier/Accumulator Replacement: Similar to the expansion valve, this repair typically costs between $100 and $300.
- Leak Repair: The cost depends on the location and severity of the leak. Simple hose repairs might cost $50 to $200, while more complex leaks could require replacing entire components.
- Diagnostic Fee: Most shops charge a diagnostic fee to identify the problem. This can range from $50 to $150.
Final Thoughts
Understanding your car's AC system empowers you to make informed decisions about repairs. While some repairs are best left to professionals, basic troubleshooting and maintenance can save you money and extend the life of your AC system. Remember to prioritize safety when working with AC components and consult a qualified technician if you're unsure about any aspect of the repair process.