How Much Is It To Fix A Car Ac
Let's talk about your car's AC system. More specifically, let's break down what it costs to fix it when things go wrong. Whether you're a seasoned DIYer or just starting to get your hands dirty under the hood, understanding the components and potential problems of your AC system can save you a significant amount of money. This isn't just about saving a few bucks; it's about understanding how a critical system in your vehicle works, allowing you to diagnose problems accurately and potentially handle repairs yourself.
The Importance of Understanding Your AC System
Purpose: A good understanding of your car's AC system is essential for targeted repairs, troubleshooting issues, and even customizing or upgrading the system. Knowing how each component interacts helps you pinpoint problems faster and avoid unnecessary expenses. Plus, it's just plain interesting!
Think of this knowledge as an investment. A small amount of time spent learning the basics can prevent major headaches (and wallet-emptying repair bills) down the road. And, if you're thinking about modifications, understanding the underlying system is crucial to prevent unintended consequences.
Key Specs and Main Parts of the AC System
The air conditioning system in your car operates on the principle of refrigeration. It moves heat from inside the car to outside, creating a cooler environment. The system is closed and uses refrigerant (usually R-134a or, in newer vehicles, R-1234yf) to accomplish this.
Main Components:
- Compressor: The heart of the system. Driven by the engine (via a belt), the compressor increases the pressure and temperature of the refrigerant. This compressed, hot, high-pressure refrigerant is sent to the condenser.
- Condenser: Located at the front of the car (usually near the radiator), the condenser dissipates heat from the hot, high-pressure refrigerant, turning it into a high-pressure liquid. Think of it as a small radiator for the AC system.
- Receiver/Drier (or Accumulator): This component acts as a filter and reservoir. It removes moisture and contaminants from the refrigerant. The drier contains a desiccant material that absorbs moisture. Some systems use an accumulator instead of a receiver/drier. The accumulator is typically located on the low-pressure side of the system.
- Expansion Valve (or Orifice Tube): This critical component regulates the flow of high-pressure liquid refrigerant into the evaporator. It creates a pressure drop, which causes the refrigerant to rapidly expand and cool. The expansion valve is a more complex component that automatically adjusts the refrigerant flow based on temperature and pressure. An orifice tube is a simpler, fixed-size restrictor.
- Evaporator: Located inside the car, usually behind the dashboard, the evaporator is where the cold magic happens. The low-pressure liquid refrigerant absorbs heat from the cabin air passing over it, causing the air to cool. The refrigerant then returns to the compressor as a low-pressure gas.
- Refrigerant Lines: These hoses and pipes connect all the components, carrying the refrigerant throughout the system. They need to be leak-proof to maintain system pressure.
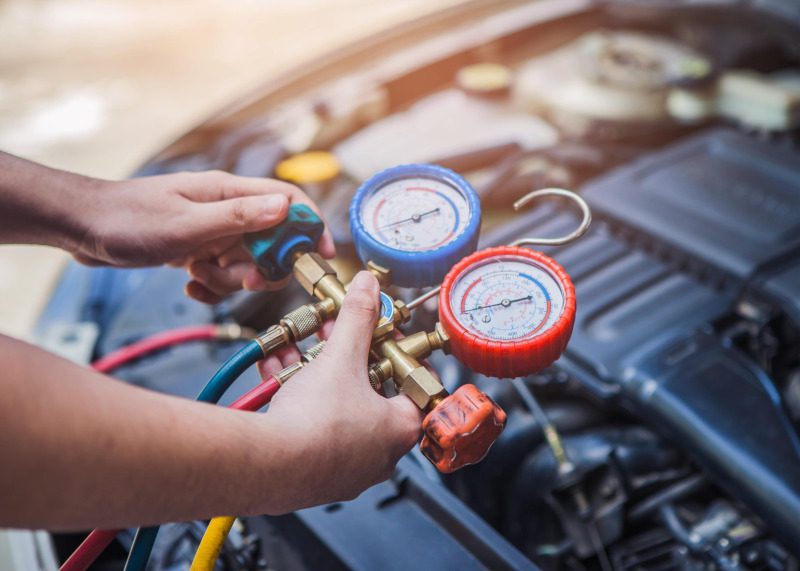
- Service Ports: These are access points for connecting AC gauges and charging equipment. There are typically two: a high-pressure port and a low-pressure port.
Typical System Specifications:
While specific values vary greatly depending on the make and model of your vehicle, here are some general ranges:
- Refrigerant Type: R-134a (older vehicles), R-1234yf (newer vehicles)
- Refrigerant Charge: Varies widely, consult your vehicle's service manual. Typically, passenger vehicles can range from 14oz to 32oz of R-134a.
- High-Side Pressure: 150-250 PSI (at idle, depending on ambient temperature)
- Low-Side Pressure: 25-45 PSI (at idle, depending on ambient temperature)
How the AC System Works
The AC system operates in a cycle:
- The compressor pumps refrigerant around the system.
- Hot, high-pressure refrigerant flows to the condenser, where it releases heat.
- The refrigerant, now a high-pressure liquid, flows to the receiver/drier (or accumulator) for filtration.
- The expansion valve (or orifice tube) regulates the refrigerant flow, creating a pressure drop and cooling the refrigerant.
- Cold, low-pressure refrigerant enters the evaporator, absorbing heat from the cabin air.
- The refrigerant, now a low-pressure gas, returns to the compressor to repeat the cycle.
This continuous cycle removes heat from the inside of the car, creating a cool and comfortable environment.
Real-World Use: Basic Troubleshooting Tips
Before diving into repairs, try these basic troubleshooting steps:
- Check the basics: Is the AC button turned on? Is the blower fan working? Is the engine overheating?
- Listen for the compressor clutch: When you turn on the AC, you should hear a distinct click as the compressor clutch engages. If you don't hear it, the compressor might not be getting power, or the clutch itself might be faulty.
- Feel the lines: Carefully (with gloves!) feel the refrigerant lines. The high-pressure line should be warm, and the low-pressure line should be cool. If both lines are the same temperature, the compressor might not be working properly.
- Look for leaks: Inspect the AC components for any signs of refrigerant leaks (oily residue). A UV dye kit can help locate leaks that are hard to spot.
- Check the cabin air filter: A clogged cabin air filter can restrict airflow to the evaporator, reducing AC performance.
If you suspect a refrigerant leak, it's best to have the system professionally inspected and recharged. Remember, releasing refrigerant into the atmosphere is illegal and harmful to the environment.
Safety First!
Working on your car's AC system can be dangerous if you're not careful.
Safety: Refrigerant is under high pressure and can cause frostbite if it comes into contact with your skin. Always wear safety glasses and gloves when working with refrigerant. Never disconnect lines or components while the system is pressurized. Refrigerant should only be handled in a well-ventilated area.
The compressor is driven by the engine belt, so be sure to disconnect the negative battery cable before working on it. Also, be aware that some refrigerant lines can become extremely hot. Take all necessary precautions to avoid burns.
The most risky components are the compressor and the high-pressure lines. A failure in these areas can result in a rapid release of refrigerant.
Typical Repair Costs
Repair costs can vary wildly depending on the problem, the vehicle, and whether you do the work yourself. Here's a rough estimate of what you might expect to pay:
- Recharge: $100-$300 (includes leak test and refrigerant)
- Compressor replacement: $400-$1200 (including labor)
- Condenser replacement: $300-$800 (including labor)
- Receiver/drier replacement: $150-$400 (including labor)
- Expansion valve/orifice tube replacement: $150-$400 (including labor)
- Leak repair: $100-$500 (depending on the location and severity of the leak)
Doing some of the work yourself can significantly reduce these costs. For example, you might be able to replace the receiver/drier or expansion valve yourself. However, you'll still need a professional to evacuate and recharge the system.
Downloading the Diagram
For a detailed diagram of a typical automotive AC system, including labeled components and refrigerant flow paths, we have a downloadable file available. This diagram is invaluable for understanding the layout of the system and identifying specific parts. Just replace this placeholder with a valid download link, "Download the AC System Diagram [here]".
Remember, this information is for educational purposes only. Always consult your vehicle's service manual and follow all safety precautions when working on your car's AC system. Good luck!