How Much To Replace U Joints
So, you're tackling U-joint replacement? Excellent! It's a job that, while requiring a bit of patience and some specialized tools, is definitely within reach for the intermediate DIYer. Understanding the costs involved, both in terms of parts and labor (if you decide to outsource), is crucial for budgeting and making informed decisions. This article will break down the factors influencing U-joint replacement costs, focusing on the components, labor, and potential hidden expenses.
Why Understanding U-Joint Replacement Costs Matters
Knowing the breakdown of U-joint replacement expenses isn't just about saving money, although that's certainly a perk. It's about:
*Informed Repair Decisions: You can assess whether a mechanic's quote is reasonable and understand where your money is going.
*DIY vs. Professional Assessment: You can weigh the cost of tools and your time against the labor costs of a shop.
*Preventing Rip-Offs: Unfortunately, some shops may overcharge or suggest unnecessary repairs. Knowledge is your shield.
*Learning and Expanding Skills: Understanding the components and process allows you to confidently tackle future repairs on your vehicles.
Key Specs and Main Parts
Let's dive into the components that affect the cost of a U-joint replacement:
*U-Joint Itself: This is the heart of the operation. Prices vary wildly depending on quality, brand, and vehicle application. Expect to pay anywhere from $20 to $100+ per U-joint. Key specs to consider include:
*Series: (e.g., 1310, 1350, 1410) Refers to the size and strength of the U-joint. Higher series numbers generally indicate a stronger joint for more demanding applications.
*Greaseable vs. Non-Greaseable (Sealed): Greaseable U-joints have a zerk fitting (grease fitting) and allow for periodic lubrication, potentially extending their lifespan. Non-greaseable joints are sealed and require no maintenance but may wear out faster in harsh conditions. Greaseable joints are generally preferred for heavy-duty applications.
*Material: Most U-joints are made from steel, but higher-performance options may use stronger alloys or even chromoly for increased durability.
*Straps or U-Bolts: These secure the U-joint to the pinion yoke on the differential or the transmission yoke. They can often be reused, but it's wise to inspect them for wear or damage and replace them if necessary. Expect to pay around $5-$20 for a set.
*Yoke (Potential Replacement): In some cases, the yoke itself might be damaged due to a failing U-joint. A damaged yoke will almost always need to be replaced. Yokes can range from $50 to several hundred dollars, depending on the vehicle and type of yoke (e.g., pinion yoke, slip yoke).
*Grease: If you're using a greaseable U-joint, you'll need high-quality grease designed for U-joints. A small tube costs around $5-$15.
*Penetrating Oil: Indispensable for loosening rusted or seized U-joints. A can of penetrating oil (like PB Blaster or Liquid Wrench) is about $10-$20.
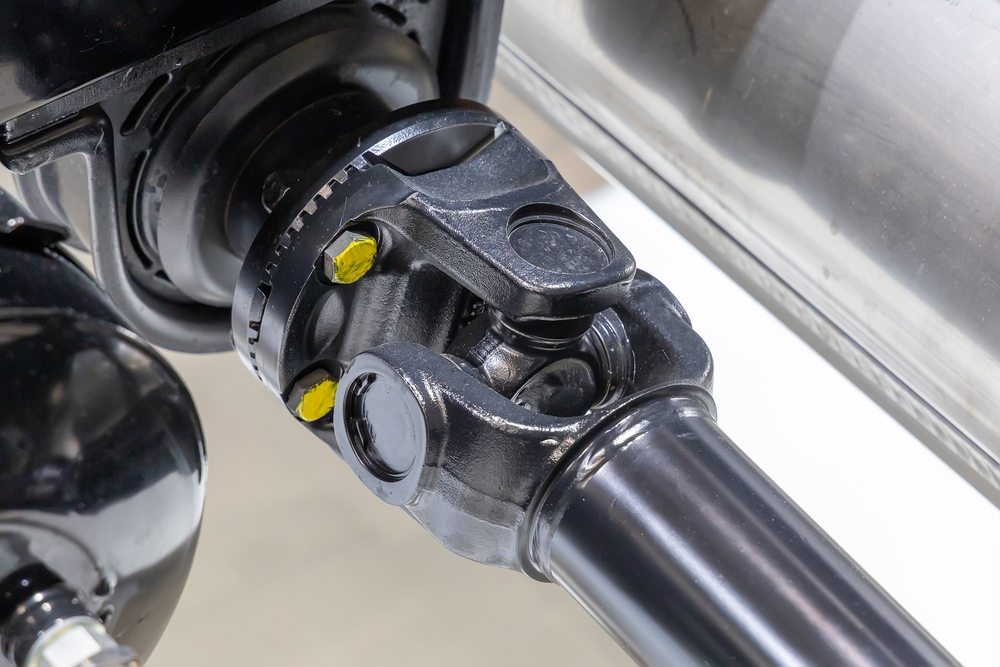
How It Works: A Brief Overview
The U-joint (universal joint) is a mechanical joint that transmits rotational power between two shafts that are not in line. It allows the driveline to articulate as the suspension moves, maintaining a constant power transfer. Replacing a U-joint typically involves these steps:
1.Disconnecting the Driveshaft: This involves removing the straps or U-bolts that hold the U-joint to the pinion yoke or transmission yoke. The driveshaft is then carefully lowered.
2.Removing the Old U-Joint: This usually requires a U-joint press or a hammer and sockets to drive the old U-joint out of the driveshaft yoke.
3.Installing the New U-Joint: The new U-joint is carefully positioned in the yoke, and the caps are pressed or hammered into place. It's crucial to ensure the needle bearings inside the caps don't fall out of place.
4.Reinstalling the Driveshaft: The driveshaft is reattached to the pinion yoke or transmission yoke using new or reused straps or U-bolts.
5.Greasing the U-Joint (if applicable): If the U-joint is greaseable, it should be greased until grease purges from all four seals.
Real-World Use & Basic Troubleshooting
Here's some practical advice and troubleshooting tips:
*Symptoms of a Bad U-Joint: Common signs include vibrations, clunking noises when shifting gears, squeaking noises, and excessive play in the driveshaft. Often the vibrations will change with vehicle speed.
*Rust is Your Enemy: Living in a rust-prone area can significantly increase the difficulty of U-joint replacement. Liberal use of penetrating oil is essential.
*Stuck U-Joint Caps: If the U-joint caps are seized in the yoke, try heating the yoke with a torch (carefully!) to expand the metal and loosen the cap.
*Damaged Yoke: Check the yoke for wear or damage, especially around the U-joint ears. If the yoke is damaged, it must be replaced. Look for elongated holes or cracks in the metal.
*DIY vs. Professional: If you're uncomfortable working with driveline components or lack the necessary tools, it's best to have a professional handle the job. Improper U-joint installation can lead to serious driveline issues.
*Labor Costs: Expect to pay between $100 and $300 in labor per U-joint, depending on the shop's hourly rate and the complexity of the job. Some vehicles have driveshafts that are more difficult to remove than others. Four wheel drive vehicles often require more labor.
Safety – Highlight Risky Components
Working on driveline components can be dangerous if not done correctly. Here are some key safety considerations:
*Secure the Vehicle: Always use jack stands to support the vehicle before working underneath it. Never rely solely on a jack.
*Eye Protection: Wear safety glasses to protect your eyes from flying debris.
*Gloves: Protect your hands from sharp edges and harsh chemicals.
*Driveshaft Weight: Driveshafts can be heavy and awkward to handle. Be sure to have a firm grip and use proper lifting techniques.
*Potential for Dropping Driveshaft: Always be aware of the driveshaft weight, and make sure to keep clear in case the driveshaft drops. Be sure to support the driveshaft while removing the U-joints.
*Torque Specs: Always torque the straps or U-bolts to the manufacturer's specifications. Overtightening can damage the components, while undertightening can lead to premature failure.
*Working on the Exhaust: Be aware that exhaust parts can be extremely hot. If working near the exhaust system, allow it to cool down completely before starting work.
*Working on Four Wheel Drive Vehicles: Be aware that four wheel drive vehicles are more complex. There are often more U-joints on a four wheel drive vehicle than a two wheel drive.
By carefully considering the factors outlined above, you can make an informed decision about tackling U-joint replacement yourself or entrusting the job to a professional. Remember to prioritize safety and double-check your work to ensure a reliable and long-lasting repair.