How Mych Is An Oil Change
Let's talk about something fundamental to car ownership and maintenance: the oil change. You might think it's a simple process, and it largely is, but understanding the nuances can save you money, prevent future headaches, and even give you a deeper appreciation for how your engine works. This article isn't just about the cost; it's about the entire oil change process, from understanding what's involved to the various factors that influence the final price.
Purpose of Understanding the Oil Change Process
Why should you, an experienced DIYer, even bother reading about something as seemingly basic as an oil change? The benefits are multifaceted:
- Repair & Preventative Maintenance: Knowing the process allows you to identify potential problems early. Is your oil looking unusually dirty? Are you noticing metal shavings? These are red flags that warrant further investigation.
- Cost Savings: Performing your own oil changes saves you a significant amount of money compared to taking your car to a shop. You control the quality of the oil and filter you use.
- Learning & Understanding: Delving into the details of the oil change process improves your overall understanding of engine lubrication and maintenance principles. This knowledge is invaluable when tackling more complex automotive repairs.
- Peace of Mind: Knowing your car is properly maintained provides peace of mind. You're less likely to experience unexpected breakdowns due to lubrication issues.
Key Specs and Main Parts
The essential components of an oil change are relatively straightforward, but understanding their specifications is crucial:
- Engine Oil: This is the lifeblood of your engine. Its primary functions are to lubricate moving parts, reduce friction, dissipate heat, and remove contaminants. Viscosity is a key specification, indicated by grades like 5W-30 or 10W-40. The first number (with the "W" for winter) indicates the oil's viscosity at cold temperatures, while the second number indicates its viscosity at operating temperature. Synthetic, semi-synthetic, and conventional oils are available, each with different properties and benefits.
- Oil Filter: This filter removes contaminants from the oil, preventing them from circulating through the engine. Micron rating indicates the size of particles the filter can capture. Different filter types exist, including spin-on, cartridge, and bypass filters. Choosing a quality filter is paramount.
- Oil Drain Plug: Located at the bottom of the oil pan, this plug is removed to drain the old oil. It typically has a copper or aluminum crush washer to ensure a tight seal. The thread size and pitch are critical for replacement.
- Crush Washer: This small, often overlooked part is crucial for proper sealing of the oil drain plug. It deforms slightly when tightened, creating a leak-proof seal. Always replace it!
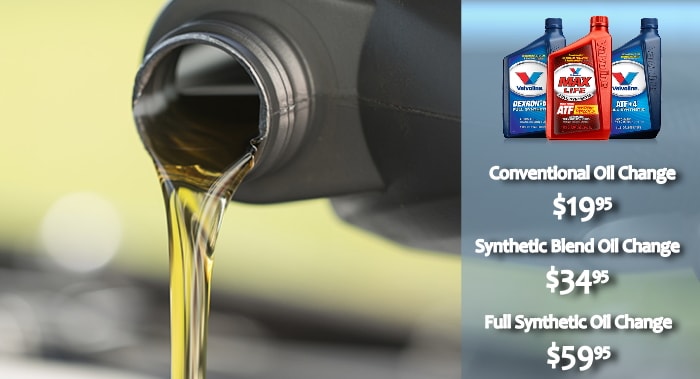
Factors Influencing the Cost of an Oil Change
The price of an oil change varies widely depending on several factors:
- Type of Oil: Synthetic oil is significantly more expensive than conventional oil, but it offers better protection and longer intervals between changes. Full synthetic oil can cost two to three times as much as conventional oil.
- Oil Filter Brand and Quality: High-quality oil filters from reputable brands typically cost more than generic filters, but they offer superior filtration and longevity.
- Vehicle Make and Model: Some vehicles require specialized oils or filters, which can increase the cost. Also, the engine's oil capacity affects the amount of oil needed, thus impacting the total cost.
- Labor Costs (If Not DIY): If you're not doing it yourself, labor costs can vary greatly depending on the location and type of shop. Dealerships typically charge more than independent shops.
- Location: Prices for oil changes can vary significantly based on geographical location. Areas with higher costs of living tend to have higher prices.
- Shop Type (If Not DIY): Quick lube shops often offer lower prices, but they may not provide the same level of service or attention to detail as a reputable repair shop.
How it Works: The Oil Change Process
The oil change process involves several key steps:
- Preparation: Gather your tools (wrench for drain plug, oil filter wrench, oil drain pan, funnel), new oil, new oil filter, and new crush washer.
- Warm-Up (Optional): Warming up the engine slightly (a few minutes) helps the oil flow more easily, but be careful not to burn yourself.
- Draining the Old Oil: Position the drain pan under the oil drain plug. Carefully remove the plug, allowing the old oil to drain completely. Be cautious – the oil can be hot!
- Replacing the Oil Filter: Locate the oil filter and use the oil filter wrench to remove it. Lightly lubricate the rubber gasket of the new filter with fresh oil and install it, tightening it by hand (usually about ¾ of a turn after the gasket makes contact).
- Replacing the Drain Plug: Install the new crush washer onto the oil drain plug. Reinstall the plug and tighten it to the manufacturer's specified torque (check your vehicle's repair manual for the correct torque specification). Overtightening can damage the oil pan.
- Adding New Oil: Locate the oil fill cap and remove it. Use a funnel to pour the correct amount of new oil into the engine. Consult your owner's manual for the recommended oil capacity.
- Checking the Oil Level: Use the dipstick to check the oil level. Add more oil as needed to reach the "full" mark.
- Running the Engine: Start the engine and let it run for a few minutes. Check for leaks around the oil drain plug and oil filter.
- Final Check: Turn off the engine and let it sit for a few minutes. Recheck the oil level and add more oil if necessary.
- Proper Disposal: Properly dispose of the used oil and filter at a designated recycling center.
Real-World Use: Basic Troubleshooting Tips
Even a seemingly simple task like an oil change can present challenges. Here are some troubleshooting tips:
- Drain Plug Stuck: If the drain plug is stuck, don't force it. Use penetrating oil and let it sit for a while. A specialized drain plug removal tool can also be helpful.
- Oil Filter Stuck: If the oil filter is stuck, try using a strap-style oil filter wrench for better grip. As a last resort, you can puncture the filter with a screwdriver and use it as a lever, but be extremely careful not to damage the engine.
- Leaking Drain Plug: If the drain plug is leaking, double-check that you installed a new crush washer and that the plug is tightened to the correct torque. If the threads in the oil pan are damaged, you may need to repair them with a thread repair kit (e.g., Heli-Coil).
- Low Oil Pressure After Change: If you notice low oil pressure after an oil change, immediately shut off the engine and check the oil level. A clogged oil filter or incorrect oil viscosity could also be the cause.
- Oil Light Stays On: If the oil light stays on after an oil change, it indicates a serious problem. Do not drive the vehicle. Check the oil level immediately, and consider having the oil pump checked.
Safety Considerations
Working with automotive fluids and components involves inherent risks. Prioritize safety at all times:
- Hot Oil: Used engine oil can be extremely hot. Allow the engine to cool down sufficiently before draining the oil. Wear gloves and eye protection.
- Jack Stands: Never work under a vehicle supported only by a jack. Always use jack stands to provide secure support.
- Eye Protection: Wear safety glasses or goggles to protect your eyes from splashes of oil and other fluids.
- Gloves: Wear gloves to protect your skin from oil and other chemicals.
- Proper Ventilation: Work in a well-ventilated area to avoid inhaling fumes.
- Clean Up Spills: Immediately clean up any oil spills to prevent slips and falls.
- Flammability: Remember that oil is flammable. Keep it away from open flames and sources of ignition.
By understanding these details, you'll be well-equipped to perform your own oil changes, troubleshoot common issues, and ultimately save money while ensuring the longevity of your engine.
This guide has provided a detailed overview of the oil change process. We have a more in-depth diagram detailing each step, including torque specifications and component breakdowns. You can download it by contacting us.