How To Adjust Brake Pedal Height
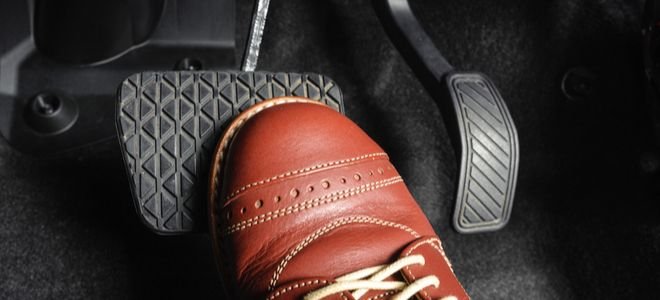
Adjusting your brake pedal height can significantly impact your driving comfort and safety. A brake pedal that's too high or too low can lead to awkward foot positioning, delayed reaction times, and increased fatigue, especially on longer drives. Fortunately, in many vehicles, adjusting the brake pedal height is a straightforward process that can be accomplished with basic tools and a little patience.
Why Adjusting Brake Pedal Height Matters
The ergonomics of your driving position are paramount for both comfort and safety. Imagine driving for hours with your foot constantly strained to reach a high-set brake pedal. This can cause leg cramps, back pain, and a general feeling of discomfort that distracts you from the road. Conversely, a brake pedal that's too low might lead to you lifting your foot excessively to engage the brakes, again creating strain and delaying your reaction time in an emergency.
Safety is the primary concern. A poorly positioned brake pedal can hinder your ability to apply the brakes quickly and effectively. In a sudden braking situation, every fraction of a second counts. If you're struggling to find the pedal or apply adequate pressure due to an uncomfortable position, your stopping distance will increase, raising the risk of an accident.
Proper brake pedal adjustment also contributes to reduced wear and tear on your braking system. A misaligned pedal might lead to unintentional light pressure being applied, causing the brake pads to rub against the rotors even when you're not actively braking. This constant friction can accelerate wear, shortening the lifespan of your brake components and increasing maintenance costs in the long run.
Benefits of Correct Brake Pedal Height:
- Improved Comfort: Reduces strain and fatigue during driving.
- Enhanced Safety: Enables quicker and more effective braking.
- Reduced Wear: Prevents unintentional pressure and premature wear on brake components.
- Better Control: Provides a more natural and responsive braking feel.
How to Adjust Brake Pedal Height: A Step-by-Step Guide
The process of adjusting your brake pedal height varies slightly depending on the make and model of your vehicle. However, the general principles remain the same. Always consult your vehicle's owner's manual for specific instructions and safety precautions. If you're not comfortable performing this task yourself, it's best to seek the assistance of a qualified mechanic.
Tools you'll likely need:
- Wrench set (typically metric)
- Socket set (typically metric)
- Screwdriver (Phillips and flathead)
- Penetrating oil (if components are rusted)
- Work light
- Gloves
Steps:
- Preparation: Park your vehicle on a level surface, engage the parking brake, and turn off the engine. Disconnect the negative terminal of your battery to prevent accidental electrical shorts. Locate the brake pedal assembly under the dashboard. Use a work light to illuminate the area.
- Identify the Adjustment Mechanism: The most common adjustment mechanism involves an adjustable pushrod that connects the brake pedal to the master cylinder. This rod usually has a threaded section and a lock nut. Some vehicles may have a different system, such as an adjustable stop switch or a series of shims. Refer to your owner's manual for the specific location and type of adjustment mechanism in your vehicle.
- Loosen the Lock Nut: Using the appropriate wrench, loosen the lock nut on the pushrod. This nut secures the pushrod in place and prevents it from rotating. Apply penetrating oil to the threads if the nut is rusted or difficult to turn.
- Adjust the Pushrod: Once the lock nut is loose, you can adjust the length of the pushrod by rotating it. Turning the rod clockwise will typically raise the brake pedal, while turning it counter-clockwise will lower it. Make small adjustments and test the pedal feel after each adjustment.
- Check for Proper Pedal Travel: As you adjust the pushrod, ensure that the brake pedal has adequate travel. It should move freely without binding or hitting other components. There should also be a small amount of free play before the brakes engage. This free play ensures that the master cylinder is not constantly under pressure. Consult your owner's manual for the recommended pedal travel specification.
- Tighten the Lock Nut: Once you've achieved the desired brake pedal height and pedal travel, tighten the lock nut securely. This will prevent the pushrod from rotating and ensure that the adjustment remains in place.
- Test the Brakes: Reconnect the negative terminal of your battery. Start the engine and test the brakes thoroughly. Ensure that the pedal feels firm and responsive, and that the vehicle stops smoothly and evenly. Check for any unusual noises or vibrations.
- Fine-Tune if Necessary: If the brake pedal still doesn't feel quite right, repeat the adjustment process until you achieve the desired pedal height and feel. It may take a few iterations to get it perfect.
Choosing the Right Brake Pedal Adjustment Method
As mentioned earlier, the specific method for adjusting brake pedal height can vary. Here's a breakdown of common methods and when they might be applicable:
- Adjustable Pushrod: This is the most common method, particularly in older vehicles. The threaded pushrod allows for precise adjustments to pedal height. It's suitable for minor adjustments and correcting for pedal height changes due to brake pad wear.
- Adjustable Stop Switch: Some vehicles use an adjustable stop switch to control the brake lights and sometimes influence pedal feel. Adjusting this switch can affect pedal height, but it primarily affects the point at which the brake lights activate. This is often a simpler adjustment than the pushrod.
- Shims: Less common, shims are used in some vehicles to adjust the overall position of the brake pedal assembly. This is typically used for larger adjustments or when the entire pedal assembly needs to be repositioned.
Important Considerations:
- ABS (Anti-lock Braking System): If your vehicle has ABS, be extra cautious when adjusting the brake pedal. Incorrect adjustments can interfere with the ABS system's operation. If you're unsure, consult a qualified mechanic.
- Brake Light Switch: Always check the brake light switch after adjusting the brake pedal. Ensure that the brake lights illuminate when the pedal is depressed and turn off when the pedal is released.
- Professional Help: If you're not comfortable performing this task yourself, or if you encounter any difficulties, it's always best to seek the assistance of a qualified mechanic. They have the expertise and tools to ensure that the adjustment is done correctly and safely.
Real-World Owner Experiences
Many drivers have reported significant improvements in their driving experience after adjusting their brake pedal height. Here are a few anecdotal examples:
- Sarah, a commuter: "I was experiencing leg cramps on my daily commute. After adjusting my brake pedal, the cramps disappeared, and I feel much more comfortable during my drive."
- John, a truck driver: "The brake pedal on my truck was too high, making it difficult to apply the brakes quickly. Adjusting it made a huge difference in my reaction time."
- Emily, a senior driver: "I was having trouble reaching the brake pedal due to my age. Adjusting it made it easier to apply the brakes and gave me more confidence behind the wheel."
These stories highlight the practical benefits of adjusting brake pedal height, emphasizing improved comfort, safety, and overall driving experience.
Frequently Asked Questions (FAQs)
Q: How often should I adjust my brake pedal height?
A: There's no fixed schedule. Adjust it whenever you notice discomfort or difficulty applying the brakes. It's also a good idea to check it periodically, especially after brake repairs or maintenance.
Q: Can adjusting the brake pedal affect my brake lights?
A: Yes, it can. Always check the brake light switch after adjusting the brake pedal to ensure proper operation.
Q: What if I can't find the adjustment mechanism?
A: Consult your vehicle's owner's manual. If you still can't find it, seek the assistance of a qualified mechanic.
Q: Is it safe to drive with an improperly adjusted brake pedal?
A: It's not recommended. An improperly adjusted brake pedal can compromise your safety and increase the risk of an accident.
Q: Can adjusting the brake pedal height fix squeaky brakes?
A: No, squeaky brakes are usually caused by worn brake pads or rotors. Adjusting the brake pedal height will not resolve this issue.
Q: What if the adjustment screw is stuck or rusty?
A: Apply penetrating oil and let it soak for a while. Use a wrench or socket with a good grip to avoid stripping the head. If it's severely stuck, consider seeking professional help.
Adjusting your brake pedal height is a relatively simple task that can provide significant benefits. By following these steps and taking the necessary precautions, you can improve your driving comfort, enhance your safety, and ensure that your braking system is functioning optimally. Remember to always consult your vehicle's owner's manual and seek professional assistance if needed. A properly adjusted brake pedal contributes to a safer and more enjoyable driving experience.