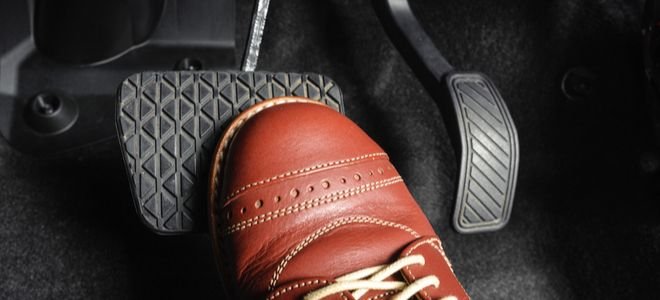
How To Adjust The Brake Pedal
Having trouble with your brake pedal? A brake pedal that feels too low, too high, spongy, or otherwise out of sorts can be unsettling and, more importantly, unsafe. Adjusting your brake pedal can often resolve these issues, restoring confidence and proper function to your braking system. Getting it right is crucial for your safety and the longevity of your brake components. This article will walk you through the process, helping you understand the problem, identify the symptoms, and implement the right solution.
Identifying the Problem: Symptoms of a Misadjusted Brake Pedal
A misadjusted brake pedal can manifest in several ways. Here's a detailed list of symptoms to help you pinpoint the issue:
- Low Brake Pedal: The pedal travels too far towards the floor before the brakes engage. You might feel like you're having to really stomp on the brakes to get the car to stop.
- High Brake Pedal: The pedal is positioned higher than normal, requiring you to lift your foot excessively to apply the brakes. This can be tiring and awkward, especially in stop-and-go traffic.
- Spongy Brake Pedal: The pedal feels soft and mushy, offering little resistance. This often indicates air in the brake lines, but a misadjusted pedal can contribute to the feeling.
- Hard Brake Pedal: The pedal requires excessive force to depress. This can be caused by a vacuum leak in the brake booster system, but a misadjusted pedal can exacerbate the problem.
- Brakes Not Fully Releasing: You might hear a slight scraping or grinding noise, or feel a drag, even when the brake pedal is released. This can lead to premature brake wear and reduced fuel economy.
- Uneven Brake Wear: A misadjusted pedal can cause some brakes to work harder than others, leading to uneven wear of the brake pads and rotors.
- ABS Light On: In some cases, a significant brake pedal misadjustment can trigger the ABS (Anti-lock Braking System) light on your dashboard.
- Difficulty Heel-Toe Downshifting: For manual transmission vehicles, a poorly positioned brake pedal can make heel-toe downshifting (a performance driving technique) difficult or impossible.
Understanding the Root Cause: Why Your Brake Pedal Might Be Misadjusted
Several factors can lead to brake pedal misadjustment:
- Wear and Tear: Over time, the various components in the brake pedal linkage, such as bushings, pivots, and springs, can wear down. This wear can introduce slack and alter the pedal's position.
- Stretched Cables (if applicable): Some older vehicles use mechanical cables to actuate the brakes. These cables can stretch over time, leading to a low brake pedal. (Less common in modern vehicles).
- Improper Brake Bleeding: While not directly a pedal adjustment issue, air in the brake lines creates a spongy pedal feel. Often, people try to compensate by adjusting the pedal, masking the underlying problem.
- Faulty Brake Booster: A failing brake booster can make the pedal feel hard or require excessive force. Again, misadjustment might be attempted to compensate.
- Accident or Impact: Even a minor fender-bender can subtly bend or damage the brake pedal assembly, altering its position and function.
- Previous Repair Work: If you've recently had brake work done, it's possible the pedal wasn't adjusted correctly during reassembly. This is especially common after master cylinder replacements.
- Aftermarket Pedal Installation: Installing aftermarket pedals for aesthetic purposes might require adjusting the brake pedal height and freeplay.
Consequences of Ignoring a Misadjusted Brake Pedal
Ignoring a misadjusted brake pedal can have serious consequences:
- Reduced Braking Performance: This is the most obvious and dangerous consequence. A misadjusted pedal can significantly increase stopping distances, putting you and others at risk.
- Increased Risk of Accidents: The reduced braking performance directly translates to a higher risk of collisions, especially in emergency situations.
- Premature Brake Wear: As mentioned earlier, uneven brake wear can occur, leading to costly repairs.
- Damage to Other Brake Components: Continuously operating with a misadjusted pedal can put undue stress on other components, such as the master cylinder and brake calipers.
- Decreased Fuel Economy: Brakes that are not fully releasing can cause drag, which reduces fuel efficiency.
- Failed Inspection: Many jurisdictions require proper brake pedal function for vehicle inspection. A misadjusted pedal could cause your vehicle to fail inspection.
Recommended Fixes: Adjusting Your Brake Pedal
The specific adjustment procedure varies depending on the vehicle make, model, and year. However, here's a general overview of the steps involved:
- Consult Your Vehicle's Repair Manual: This is crucial. Your vehicle's repair manual will provide detailed instructions and specifications for adjusting the brake pedal. It will tell you where the adjustment points are located and the correct procedure. You can usually find these manuals online, at auto parts stores, or through a subscription service like Alldata or Mitchell OnDemand.
- Locate the Adjustment Points: Typically, the brake pedal adjustment involves one or more of the following:
- Brake Light Switch Adjustment: This switch is activated when the brake pedal is depressed and controls the brake lights. Its position often affects pedal freeplay. It is very important to ensure the brake lights are NOT engaged when the pedal is released.
- Pushrod Adjustment: This rod connects the brake pedal to the master cylinder. Adjusting its length can alter the pedal's height and freeplay.
- Stop Lamp Switch: This is a separate component that senses pedal position and activates the brake lights. This must be properly adjusted or else cruise control may not work.
- Loosen the Locknuts: Once you've located the adjustment points, you'll usually need to loosen a locknut or locking mechanism.
- Adjust the Pedal Height and Freeplay: Use the appropriate tools (usually a wrench or pliers) to adjust the pedal height and freeplay according to the specifications in your repair manual. Freeplay refers to the amount of pedal travel before the brakes begin to engage. Too much freeplay means excessive pedal travel, while too little freeplay can cause the brakes to drag.
- Tighten the Locknuts: After making the adjustments, tighten the locknuts securely to prevent the settings from changing.
- Test the Brakes: After adjusting the pedal, test the brakes carefully in a safe location. Make sure the pedal feels firm, the brakes engage smoothly, and the vehicle stops properly. Check the brake lights to make sure they activate when the pedal is depressed and turn off when it's released. Check your cruise control, if applicable.
Important Safety Precautions:
- Disconnect the Battery: To prevent accidental activation of electrical components, disconnect the negative battery cable before working on the brake system.
- Use Wheel Chocks: Place wheel chocks behind the rear wheels to prevent the vehicle from rolling.
- Work in a Well-Ventilated Area: Brake fluid is toxic and can cause skin irritation. Work in a well-ventilated area and wear gloves.
- Dispose of Brake Fluid Properly: Brake fluid is hazardous waste and must be disposed of properly. Contact your local recycling center for information on proper disposal methods.
Cost Estimates and Shop Advice
If you're not comfortable adjusting the brake pedal yourself, it's best to take your vehicle to a qualified mechanic. The cost of adjusting a brake pedal can vary depending on the complexity of the adjustment and the labor rates in your area. Generally, you can expect to pay between $50 and $150 for this service. However, if there are underlying problems, such as a faulty brake booster or air in the brake lines, the cost could be higher.
When choosing a mechanic, look for one who:
- Is ASE-certified: ASE certification indicates that the mechanic has met certain standards of training and experience.
- Has experience working on your vehicle make and model: Mechanics who are familiar with your vehicle's specific braking system are more likely to diagnose and repair the problem correctly.
- Offers a warranty on their work: A reputable mechanic will stand behind their work and offer a warranty on parts and labor.
Credibility and Technical Service Bulletins (TSBs)
While a general misadjustment isn't often explicitly addressed in a TSB (Technical Service Bulletin), related issues are. For example, if you are experiencing a hard pedal or extended stopping distances along with brake pedal issues, check for TSBs related to your specific vehicle's brake booster or ABS system. A search of online automotive forums can also be helpful. Many owners share their experiences and solutions to common problems. Keep in mind that online advice should be taken with a grain of salt and always verified with a qualified mechanic.
Keep in mind that older vehicles with high mileage (over 100,000 miles) are more prone to brake pedal issues due to wear and tear on the linkage components. Routine brake inspections and maintenance can help prevent these problems and ensure your braking system is functioning properly.
By understanding the symptoms, causes, and solutions for a misadjusted brake pedal, you can take steps to improve your vehicle's safety and performance. Whether you choose to tackle the adjustment yourself or seek professional help, addressing this issue promptly is essential for your peace of mind and the safety of everyone on the road.