How To Back Probe A Connector
Back probing a connector involves carefully accessing the wiring and terminals of an electrical connector without disconnecting it. This allows you to test the circuit while it's still connected and under load, providing crucial information for troubleshooting electrical problems in vehicles, appliances, and other devices.
Why Back Probing Matters: Unveiling Electrical Secrets
Imagine trying to diagnose a flickering headlight. You could disconnect the headlight connector and test for voltage, but that only tells you if voltage is *reaching* the connector. It doesn't tell you if the circuit is performing properly *under load* when the headlight is drawing current. This is where back probing shines.
Here's a breakdown of why back probing is such a valuable technique:
- Real-time Diagnostics: Back probing allows you to measure voltage, current, or resistance while the circuit is actively operating. This provides a more accurate picture of the circuit's performance under real-world conditions.
- Pinpointing Intermittent Issues: Intermittent problems, like a loose connection that only manifests under vibration, can be notoriously difficult to diagnose. Back probing lets you monitor the circuit while simulating those conditions, helping you catch the problem in the act.
- Avoiding Circuit Disruption: Disconnecting a connector can sometimes introduce new problems, such as resetting computer systems or triggering fault codes. Back probing avoids this, keeping the system in its natural state for more accurate testing.
- Minimizing Damage: Improperly disconnecting connectors can damage delicate terminals or wiring. Back probing provides a non-invasive way to test the circuit without risking damage.
- Efficiency: Back probing can significantly speed up the troubleshooting process by providing immediate feedback on circuit performance. You can quickly identify the source of the problem without a lot of guesswork.
In essence, back probing provides a window into the electrical system's inner workings, giving you the information you need to diagnose problems quickly and effectively.
Choosing the Right Back Probing Tools: A Guide to Success
Using the correct tools is essential for safe and accurate back probing. Here's what you need to consider:
1. Multimeter: The Cornerstone of Electrical Testing
A reliable digital multimeter (DMM) is the foundation of any electrical testing setup. Look for a DMM with the following features:
- Accuracy: Choose a DMM with good accuracy, especially for voltage and resistance measurements.
- Input Impedance: A high input impedance (typically 10 MΩ or higher) minimizes the impact of the meter on the circuit being tested.
- Continuity Tester: A built-in continuity tester with an audible beep can be very helpful for quickly checking for broken connections.
- Auto-ranging: Auto-ranging simplifies the measurement process by automatically selecting the appropriate range.
- Safety Ratings: Ensure the DMM has appropriate safety ratings (CAT III or CAT IV) for the voltage levels you'll be working with.
2. Back Probes: Accessing the Circuit
Back probes are specifically designed to access the terminals of a connector without damaging them. There are several types of back probes available:
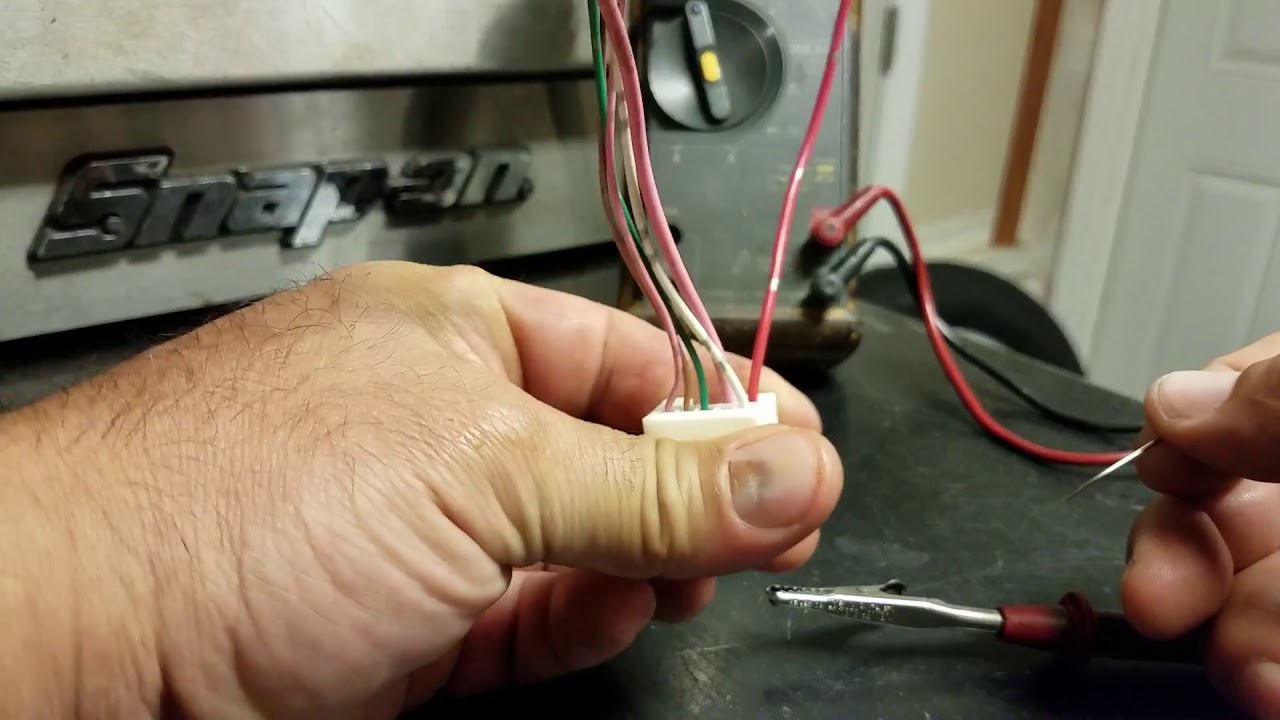
- Needle Probes: These probes have a very fine, sharp tip that can pierce the wire insulation or slide alongside the terminal inside the connector. They are ideal for tight spaces.
- T-Pin Probes: T-pin probes are larger and more robust than needle probes. They often have a banana plug connector for easy connection to the DMM.
- Alligator Clip Adapters: These adapters clip onto the wire and provide a connection point for the DMM. They are useful for making temporary connections.
- Connector Test Lead Kits: Many manufacturers offer kits with a variety of back probes, test leads, and adapters specifically designed for automotive or other applications. These kits can be a worthwhile investment if you do a lot of electrical troubleshooting.
When choosing back probes, consider the size and type of connectors you'll be working with. Opt for probes that are durable, well-insulated, and designed to provide a secure connection without damaging the terminals.
3. Jumper Wires: Bridging Connections
Jumper wires are short wires with connectors on each end that can be used to bypass a switch or sensor for testing purposes. They can also be used to provide a temporary ground connection.
4. Safety Gear: Protecting Yourself
Safety is paramount when working with electricity. Always wear:
- Safety Glasses: To protect your eyes from sparks or debris.
- Insulated Gloves: To protect your hands from electrical shock.
Before you start, ensure the circuit is de-energized whenever possible. If you must work on a live circuit, exercise extreme caution and use insulated tools.
Real-World Owner Experiences: Stories from the Field
Many technicians and DIYers have found back probing to be an invaluable troubleshooting technique. Here are a few examples:
Case Study 1: Intermittent Starting Problem
A car owner was experiencing an intermittent starting problem. The engine would sometimes crank but not start. A mechanic used back probing to test the fuel pump relay while cranking the engine. He discovered that the relay was not receiving a consistent signal from the engine control unit (ECU). By back probing the wiring harness between the ECU and the relay, he was able to identify a corroded connector as the source of the problem. Cleaning the connector resolved the issue.
Case Study 2: ABS Sensor Failure
An ABS warning light was illuminated on a vehicle's dashboard. A technician used back probing to test the voltage signal from each ABS sensor while rotating the wheel. He found that one sensor was not producing a consistent signal. By back probing the sensor's wiring harness, he was able to confirm that the sensor itself was faulty. Replacing the sensor cleared the ABS warning light.
Case Study 3: Diagnosing a Faulty Appliance
A homeowner's washing machine was not filling with water. Using a multimeter and back probing techniques, he checked the voltage at the water inlet valve while the machine was supposed to be filling. He discovered that the valve was not receiving any voltage. Further back probing revealed a faulty timer switch. Replacing the timer switch restored the washing machine's functionality.
These examples demonstrate the power of back probing in diagnosing a wide range of electrical problems. By using this technique, technicians and DIYers can quickly and accurately identify the source of the problem and implement the appropriate repair.
Frequently Asked Questions (FAQs) About Back Probing
Here are some common questions about back probing:
Q: Is back probing safe?
A: Back probing can be safe if done correctly. Always use insulated tools and wear appropriate safety gear. Avoid probing circuits with high voltage levels. If you are not comfortable working with electricity, consult a qualified technician.
Q: Can back probing damage the connector?
A: Improper back probing can damage the connector. Use the correct size and type of back probe and avoid forcing the probe into the connector. If you are unsure about the proper technique, consult a service manual or seek guidance from a qualified technician.
Q: What's the difference between back probing and piercing the wire?
A: Back probing is accessing the terminal *within* the connector, often alongside the wire. Piercing the wire involves *puncturing* the insulation to access the conductor. Piercing is generally discouraged as it can damage the wire and create a potential entry point for moisture and corrosion. Back probing is a non-destructive method.
Q: What if I can't access the back of the connector?
A: Some connectors are sealed or difficult to access. In these cases, you may need to carefully remove the connector from its housing to gain access to the terminals. Be sure to disconnect the power source before doing so.
Q: Where can I learn more about back probing?
A: Many online resources, including YouTube videos and automotive forums, provide detailed instructions on back probing techniques. You can also consult a service manual for your specific vehicle or appliance.
By understanding the principles and techniques of back probing, you can significantly improve your ability to diagnose and repair electrical problems. Remember to prioritize safety, use the correct tools, and always consult a qualified technician if you are unsure about any aspect of the process.