How To Change A Brake Light Bulb
The dreaded dashboard light. It’s often an orange harbinger of doom, silently screaming about impending doom or, more likely, a minor inconvenience. Let's face it, few things are more annoying than being pulled over for a faulty brake light, especially when you suspect it's just a blown bulb. While seemingly trivial, a malfunctioning brake light significantly compromises safety, reducing visibility for following drivers and increasing the risk of rear-end collisions. So, instead of shelling out potentially exorbitant fees at a mechanic for a task that's often surprisingly simple, let’s dive into the process of replacing a brake light bulb yourself. This guide aims to not only walk you through the steps but also illuminate the underlying mechanics, giving you a deeper understanding of your vehicle.
Why Bother Doing It Yourself? The Cost-Benefit Analysis
Imagine this: you're running late for an important meeting, stuck in rush hour traffic. You tap the brakes, and… nothing. Or, more accurately, only one of your brake lights illuminates. You can already envision the potential consequences: a fender bender, an unwanted interaction with law enforcement, and a delay that could cost you a promotion. A blown brake light isn't just a minor inconvenience; it's a significant safety hazard. While a mechanic will undoubtedly perform the task competently, the labor costs associated with such a simple fix are often disproportionate. We are going to walk through the simple steps, which can often be done with common tools.
Pros of DIY Replacement:
- Cost Savings: The primary advantage is the substantial cost savings. A replacement bulb typically costs a few dollars, while labor charges at a repair shop can easily exceed that by a factor of ten.
- Convenience: You can perform the replacement at your own convenience, without the need to schedule an appointment or leave your vehicle at a shop.
- Empowerment: Gaining a better understanding of your vehicle and its systems fosters a sense of empowerment and self-reliance.
- Learning Opportunity: Each DIY project is a valuable learning experience that enhances your mechanical aptitude.
Cons of DIY Replacement:
- Time Investment: While the task itself is relatively quick, it requires a dedicated block of time and may be inconvenient if you're pressed for time.
- Potential for Damage: If performed incorrectly, there's a risk of damaging the bulb socket, wiring, or surrounding components.
- Complexity (Rare Cases): Some vehicles have more complex brake light assemblies that require specialized tools or knowledge.
- Incorrect Bulb Selection: Using the wrong type of bulb can lead to dim lighting, rapid burnout, or even damage to the electrical system.
The Brake Light System: A Simplified Overview
The brake light system is a relatively simple circuit. When you depress the brake pedal, it activates a brake light switch, usually located near the pedal assembly. This switch closes the circuit, allowing electrical current to flow from the car's battery, through the fuse box (a crucial safety component that prevents overloads), and to the brake light bulbs. The bulbs then illuminate, signaling your intention to slow down or stop to following vehicles. This entire process occurs in a fraction of a second.
Think of it like a light switch in your home. The brake pedal is your trigger to engage the switch. When you flip the switch, the light bulb immediately illuminates, giving you a strong, noticeable indication.
Types of Brake Light Bulbs
Automotive brake lights typically use incandescent or LED (Light Emitting Diode) bulbs. Incandescent bulbs are the older, more traditional technology. They produce light by heating a filament until it glows. They are cheaper but less energy-efficient and have a shorter lifespan than LEDs.
LED brake lights are increasingly common in newer vehicles. LEDs are more energy-efficient, last much longer, and illuminate faster than incandescent bulbs, providing a quicker warning to following drivers. They are, however, more expensive to replace. Some vehicles also utilize CAN bus (Controller Area Network) systems that monitor bulb resistance. Using the wrong type of LED bulb can trigger error messages on the dashboard due to resistance mismatches. Some automotive manufacturers like BMW, Mercedes, and Audi have started using LED tail lights which often require the entire assembly to be replaced if there is a failure.
Manufacturer Examples:
- Toyota: Often uses standard incandescent bulbs in older models, transitioning to LED in newer vehicles. Simple access to the bulb housing for easy replacement.
- Ford: Similar to Toyota, with a mix of incandescent and LED bulbs depending on the model year. Some Ford trucks have complex tail light assemblies.
- Honda: Tends to favor reliable incandescent bulbs in many models, offering a good balance of cost and performance.
- BMW: Increasingly reliant on LED technology, often integrated into the vehicle's computer system. Bulb replacement may require specific tools or coding.
Step-by-Step Guide to Brake Light Bulb Replacement
Safety First! Before you begin, park your vehicle on a level surface, engage the parking brake, and turn off the ignition. Consult your owner's manual to identify the correct type of bulb for your vehicle.
- Gather Your Tools: You'll typically need a replacement bulb (correct type and voltage), a screwdriver (usually Phillips or flathead), and possibly a pair of pliers. Consider wearing gloves to protect your hands.
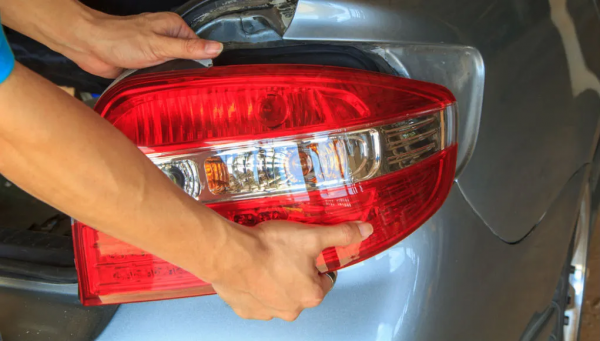
- Access the Bulb Housing: The location of the brake light bulb housing varies depending on the vehicle model. It's usually accessible from inside the trunk or through a removable panel on the rear of the vehicle. Refer to your owner's manual for specific instructions. Some housings may be secured with screws, while others use clips or tabs.
- Remove the Old Bulb: Once you've accessed the bulb housing, carefully remove the old bulb. In many cases, you'll need to twist the bulb socket counterclockwise to release it from the housing. Once the socket is free, gently pull the bulb straight out. Be careful not to break the bulb inside the socket.
- Install the New Bulb: Insert the new bulb into the socket, ensuring it's properly aligned. Avoid touching the glass of the bulb with your bare hands, as oils from your skin can shorten its lifespan. If you do touch the bulb, wipe it clean with a soft cloth.
- Reinstall the Socket: Reinsert the bulb socket into the housing, twisting it clockwise to lock it in place.
- Test the Brake Lights: Before reassembling the housing, test the brake lights to ensure the new bulb is working correctly. Have a friend depress the brake pedal while you observe the lights. If the bulb doesn't illuminate, double-check the bulb type, the socket connection, and the fuse.
- Reassemble the Housing: Once you've confirmed that the new bulb is working, reassemble the bulb housing, securing it with screws, clips, or tabs as needed.
- Final Check: Perform a final check to ensure all the brake lights are functioning correctly, including the center high-mounted stop lamp (CHMSL).
Dealing with Stubborn Bulbs and Sockets
Sometimes, bulbs can be difficult to remove due to corrosion or age. Here are a few tips for dealing with stubborn bulbs:
- Penetrating Oil: Apply a small amount of penetrating oil (like WD-40) to the base of the bulb socket and let it sit for a few minutes before attempting to remove the bulb.
- Pliers: Use a pair of pliers to gently grip the bulb and twist it loose. Be careful not to crush the bulb.
- Bulb Removal Tool: Specialized bulb removal tools are available that provide a better grip and reduce the risk of breaking the bulb.
If the socket is corroded, clean it with a wire brush or sandpaper to remove any rust or debris. You can also apply dielectric grease to the socket to prevent future corrosion.
Troubleshooting: What to Do When Things Go Wrong
Even with careful execution, problems can occasionally arise. Here are some common troubleshooting scenarios:
- New Bulb Doesn't Light Up: Check the fuse. A blown fuse is a common cause of brake light failure. Consult your owner's manual to identify the correct fuse for the brake lights and replace it with a new one of the same amperage. If the fuse blows again immediately, there may be a short circuit in the wiring.
- Dim or Flickering Light: A dim or flickering light can indicate a loose connection, corrosion, or a faulty ground. Check the bulb socket and wiring for any signs of damage or corrosion. Clean the contacts with a wire brush or sandpaper and apply dielectric grease.
- Dashboard Error Message: Some vehicles have sophisticated monitoring systems that detect bulb failures. If you replace the bulb and still get an error message, the system may need to be reset. Consult your owner's manual or a repair shop for instructions on resetting the system.
Real-World Insights and Recommendations
Based on real-world experience, here are a few additional recommendations:
- Keep Spare Bulbs: Always keep a spare set of brake light bulbs in your vehicle. This allows you to quickly replace a blown bulb without having to run to the store.
- Inspect Regularly: Regularly inspect your brake lights to ensure they are functioning correctly. This is especially important before long trips.
- Consider LED Upgrades: If you're looking for improved performance and longevity, consider upgrading to LED brake light bulbs. However, make sure to choose bulbs that are compatible with your vehicle's electrical system.
- Seek Professional Help: If you're uncomfortable working on your vehicle's electrical system or if you encounter a complex problem, don't hesitate to seek professional help from a qualified mechanic.
Replacing a brake light bulb is a simple task that can save you money and improve your vehicle's safety. By understanding the underlying mechanics and following these steps, you can confidently perform this repair yourself.